

Lighthouse Gallery Wall and Tips on How to Install One (or any gallery wall)
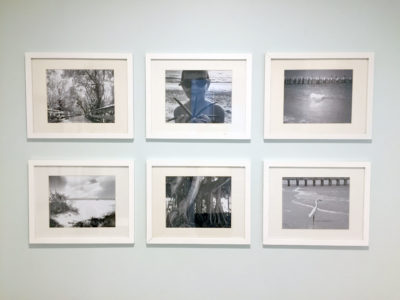
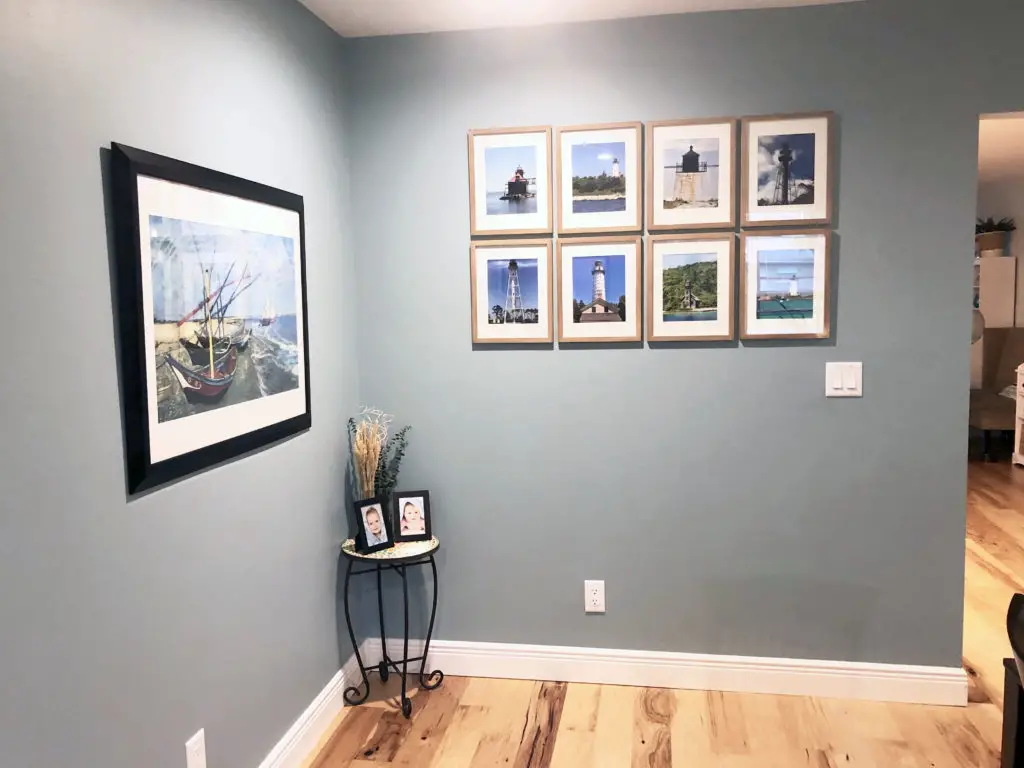
I love lighthouses and I realized recently that I have taken A LOT of pictures of them over the years. This summer alone, we saw a bunch of amazing lighthouses while in Pictured Rocks Lakeshore in Michigan, and Door County, Wisconsin. Heck, I even got married at a place that has a famous lighthouse on it’s property. Castle Hill Inn in Newport, RI, which houses Castle Hill Light. Lighthouses are full of history and I find them beautiful, so if there is one anywhere near where we are visiting, we will seek them out so I can photograph them. What better way to show off all the ones I have photographed than in a gallery wall?
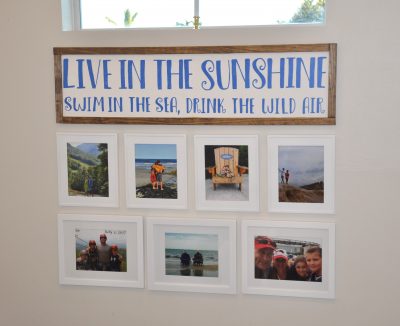
Obviously, if you want to install a gallery wall of your own, you can use any images you like. I have 3 other gallery walls in my home of various pictures.
Step 1, Find Your Images…..
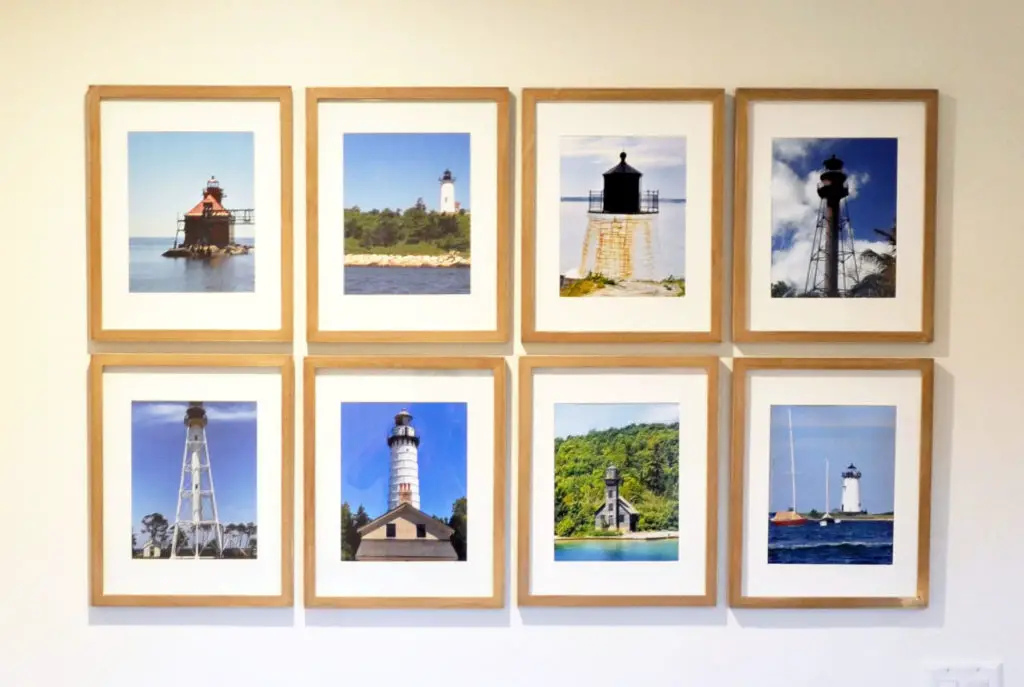
To begin, I started by going through the thousands of photos I have on my computer. It is kind of embarrassing how many photos I take (and have a hard time deleting!!!) so it took a while to find what I was looking for. Luckily, I was able to find 8 good ones.
Step 2, Print your Images…
Sam’s Club is my go to for image printing. It is close to my house, they do a good job and the prices are great. I ordered 8, 8×10 prints for under $19, and was able to pick them up the next day (but they also ship if you do not have a Sam’s near you and want to order from there too). The thought crossed my mind to print these in black and white, but I really love all the colors they display, so kept them as is.
Step 3, Finding the Perfect Frames…
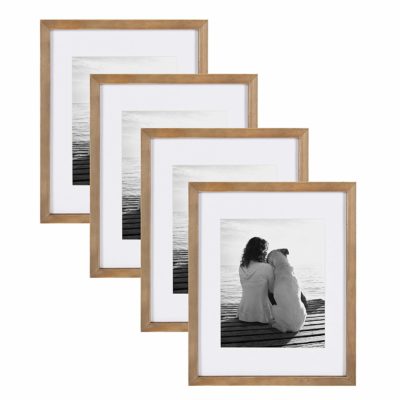
Next, I scoured Amazon to find frames that were perfect and not too expensive. I settled on these and they did not disappoint. For the price, they were better quality than I expected! They came in a box of 4, and since I ordered on Amazon they arrived just a few days later. The driftwood color is perfect for my beachy/coastal decor.
Step 4, How to Install the Gallery Wall…
Installing a gallery wall can be tricky! I found a good method that is (almost) foolproof. Here is how. By the way, Amazon sells picture hanging tools if you want to make things really easy.
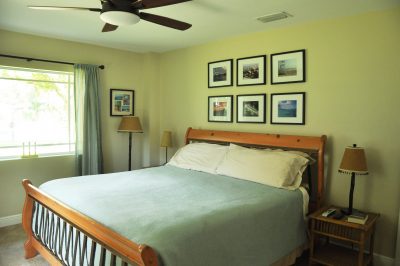
I didn’t have a picture hanging tool, so I here is what I did. First, I created 8 templates of the frames. Then I measured what would be the center of the wall and made a pencil mark. Next, I started arranging the templates on the wall until I was happy with the placement. I wanted them to be centered but the light switch was throwing me off. I had to place them a bit higher than I wanted or else the frames would have been on top of the switch. I suppose I could have moved them over and down, but then they wouldn’t have been centered and that might have driven me a bit crazy. Using the templates gave me a good visual of how they would look once the real frames were hung up.
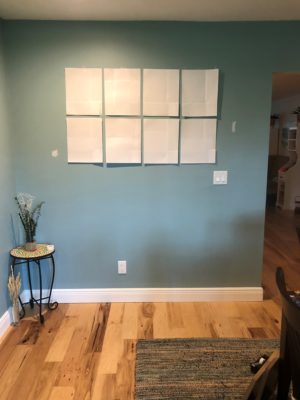
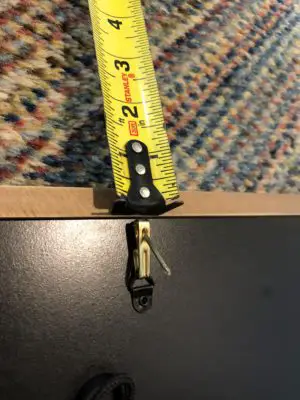
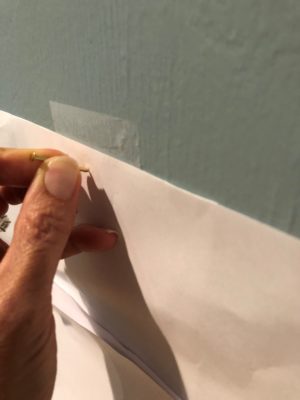
Once I had the templates on the wall perfectly, I put the nail AND hook into the back of the frame and then measured how far down I needed to hammer the nail. You can see from the picture below, it measured 1/2 inch. Then I measured 1/2 inch on the template on the wall, and stuck the nail lightly into the paper, making an indentation into the wall. Once I took the paper off I had a visible mark to use to hammer in the nail/hook. Easy peasy.
Rather than make all 8 nail holes and then hang them all at once, I hung each picture individually. After I hung each one, I took a level and made sure they were straight. Doing them one by one ensured that they were lining up with each other, and if they weren’t I could fix it right away.
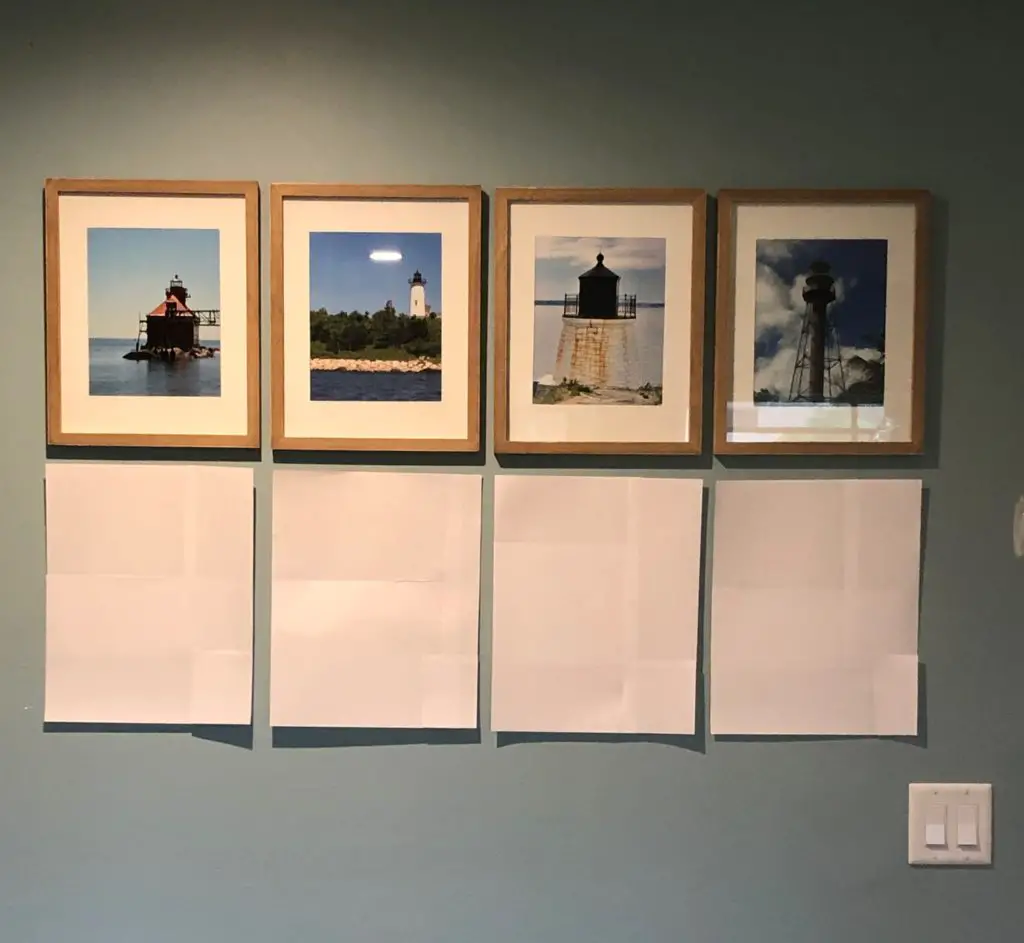
Here I as half way done.
I made sure to measure the back of each frame and where the nail hole would go, before I hammered them into the wall. Most of the frames measured the same but a few varied about 1/2 inch from the others, so I’m glad I took the time to measure each one. It took a bit longer but was worth it. You know what they say, measure twice, cut once. In my case it was measure twice, hammer once. I did still manage to make a 2 mistakes and was off but just a smidge, but was able to fix them pretty easily. Here they are in all their glory…
But Wait There’s more…
After I hung all these pictures I realized they would look so much better on white walls. I’ve been wanting to paint the walls white in this room for so long! I really do love this color blue, but this room always seemed so dark to me. So, guess what I did? Yup, I finally painted the damn walls.
Does that ever happen to you? You start one project and then it turns into another project? LOL!! Once I decided to paint it white, I then had to decide which shade of white. Did you know there are about one billion different shades of white to choose from and that you also need to consider which way the room faces? For example, this is a northern facing room, which means it gets pretty dark in there despite the fact that I have a huge bay window, and that certain whites may make a room appear even darker because of the way the shadows hit the paint? Sounds crazy and confusing, doesn’t it? After researching a bunch, I ended up using Antique White which has undertones of yellow (a warm color vs. tones of blue – a cool color) and is meant to make a northern facing room somewhat brighter (or so I read on the internet!). Plus, I’ve used this shade of white before in the One Room Makeover Challenge in our Guest Bathroom and already knew I liked it.
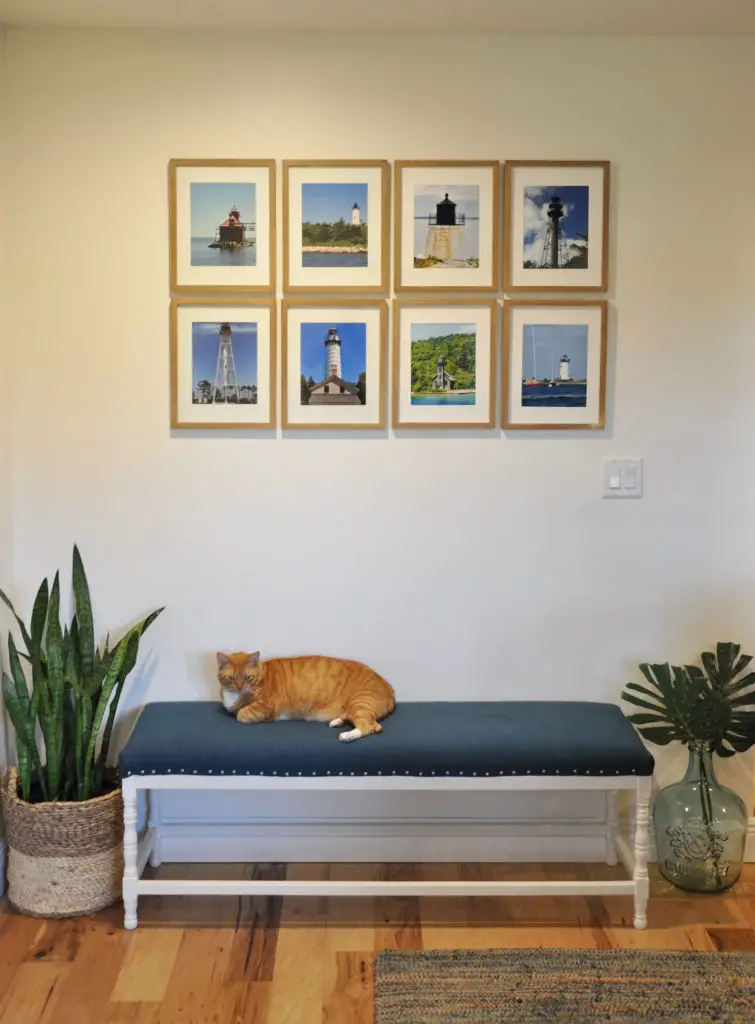
Anyway, here is how it looks after I painted the walls. Much brighter, don’t ya think? (I gave this bench a makeover a while back. It normally lives in the bay window, but I had to move it away from the bay window so I could paint the walls. I placed it here for now and the cat just made himself comfy. He loves this thing. It looks good here and was good for picture taking, but I plan to find a small console table instead.)
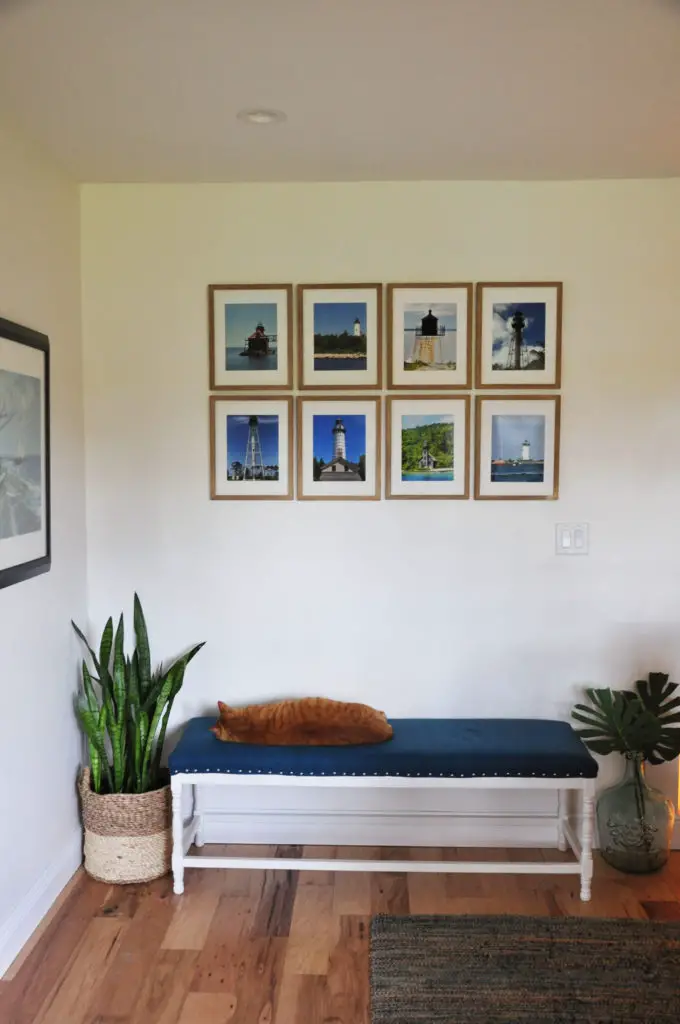
You can really see the yellow undertones in this picture below, when I had the lights turned on in the room.
So there ya have it! I hope you liked this project and found my tips helpful. Do you have a trick to hanging gallery walls?


No Comments