
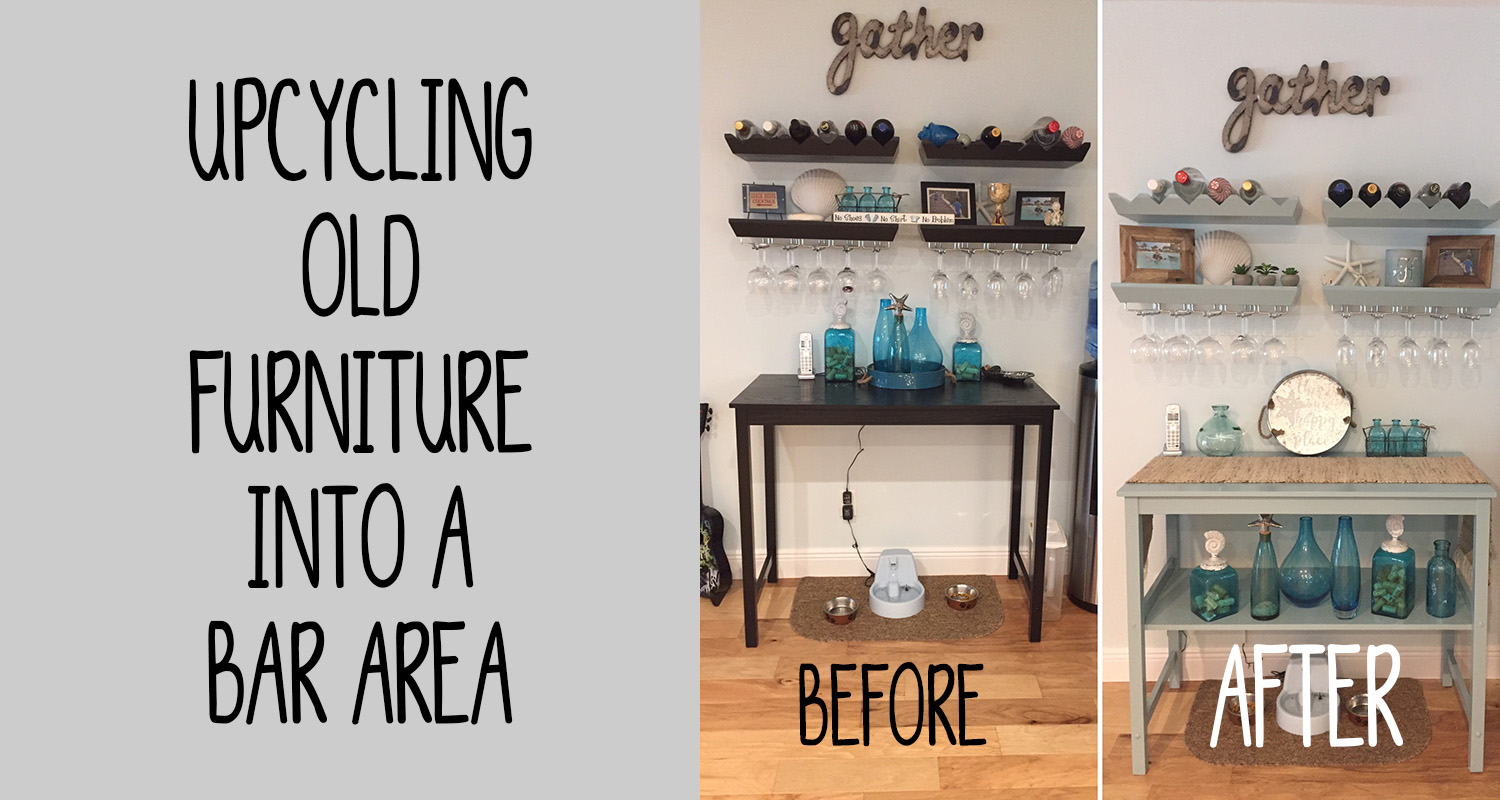
DIY/Upcycling – Old Furniture Turned Bar Area
Upcycling – Creating a Bar Area Using Old Furniture…
I love upcycling old pieces of furniture to match the decor of our new house. Today I’m going to tell you about how I used an old table and wine racks to make a ‘bar area’ in a nook in our kitchen. But, before I tell you how I upcycled this old furniture, let me give you some background information on why we have this nook in our kitchen in the first place.
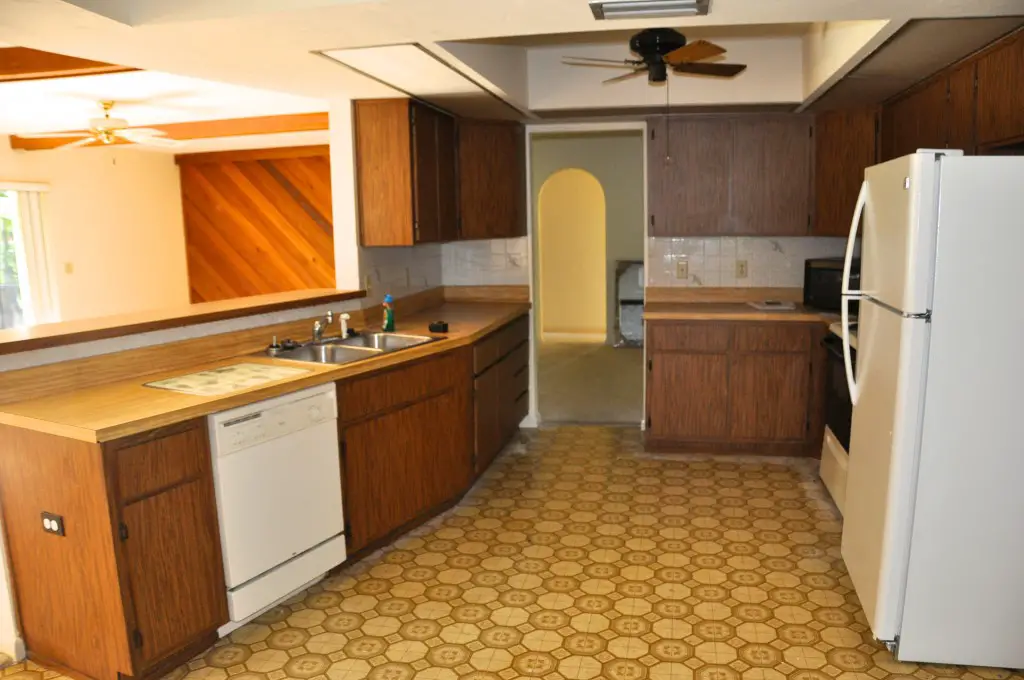
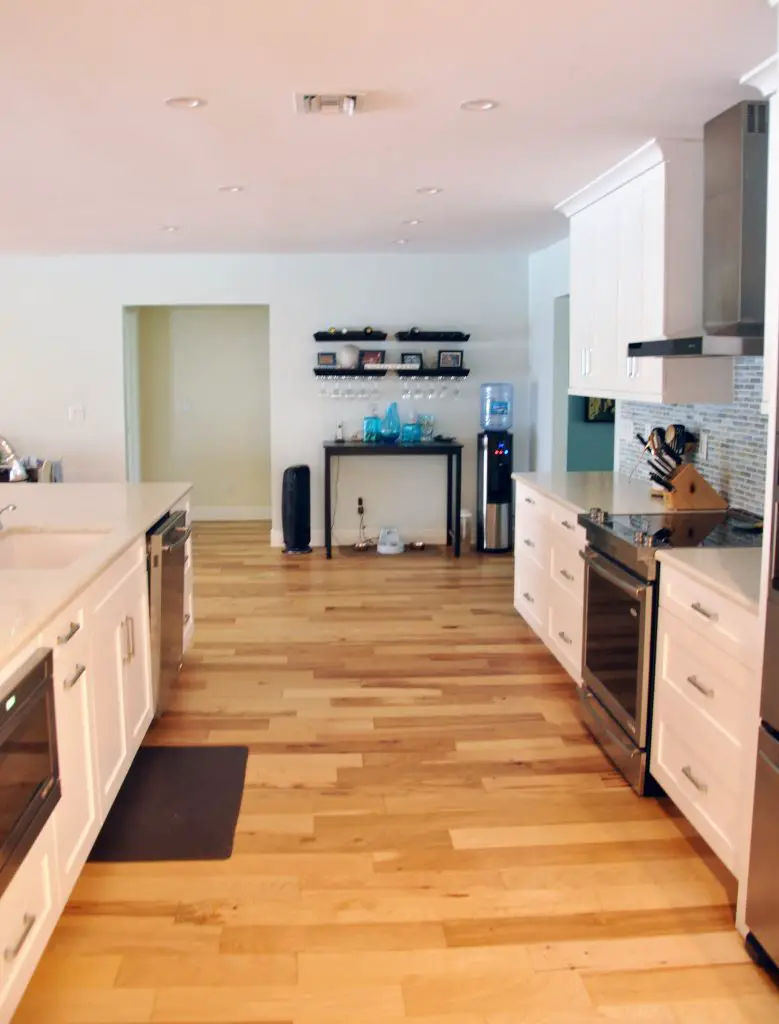
Before we remodeled this house, it was VERY outdated. Below is a picture of the old kitchen (here is a whole post on the kitchen before/after). It used to have a doorway going into the dining room. We gutted the whole kitchen to open it all up.
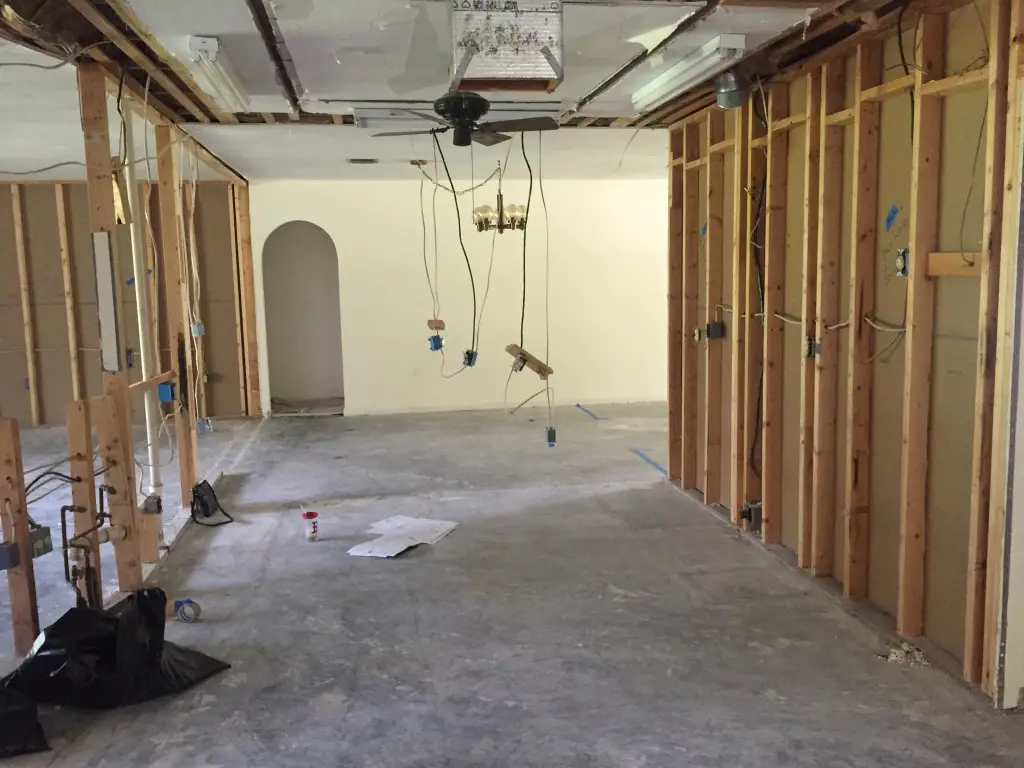
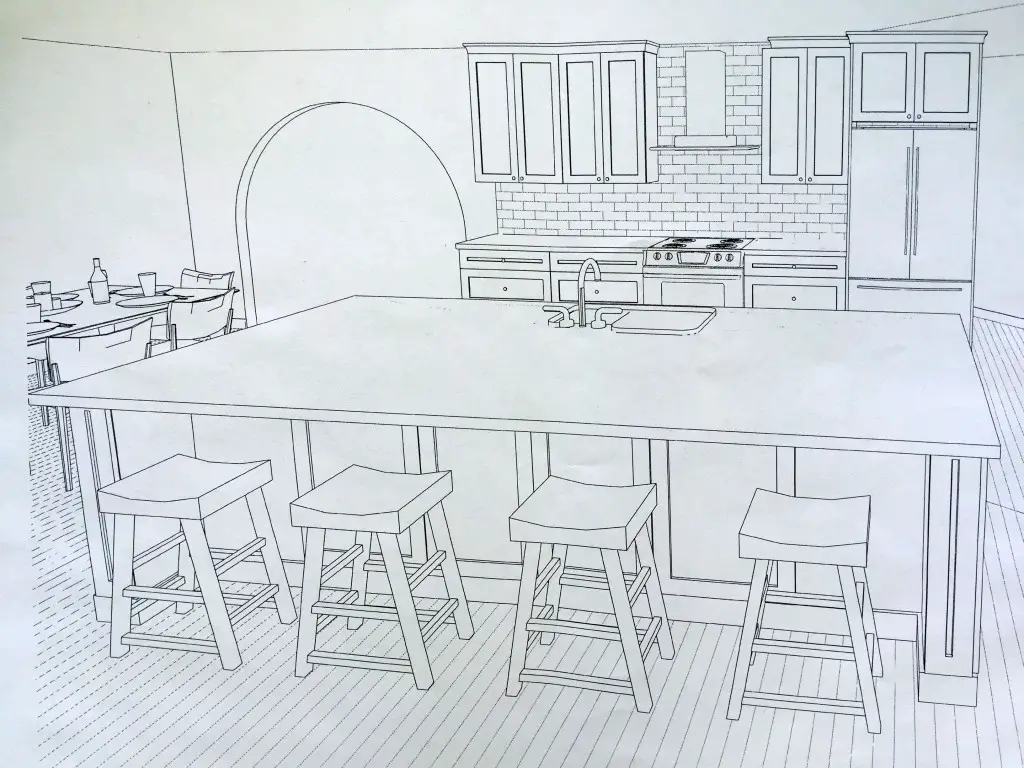
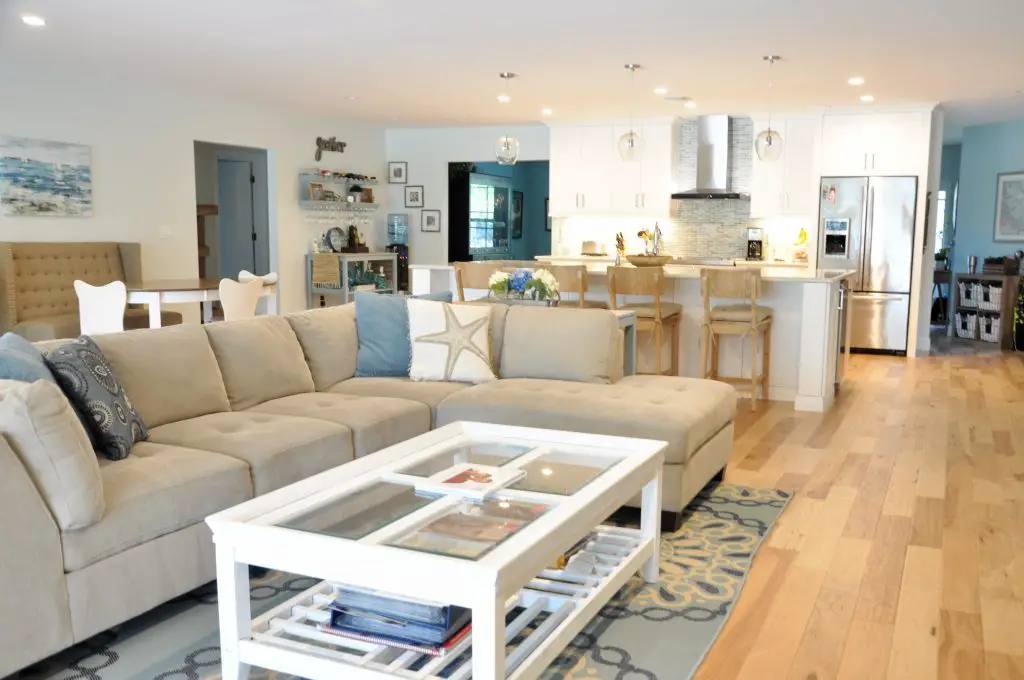
When the kitchen designer and I came up with plans for our new kitchen, that area where you see the small arched doorway above (which leads to bedrooms and a bathroom) is where a dining table was going to be. You can see the plan in this rendering below. But, after further review we decided it would be sort of cramped having a table there, and then right through the other, larger archway was the dining room (also shown below). So there would have been a table, then another table in the dining room almost right next to each other, which we thought would be weird. So, in hindsight we really should have added more kitchen cabinets to this little nook, and maybe we will some day. For now it serves as a wine glass, wine bottle bar area which is the area we are focusing on today.
Our Solution for this little nook…
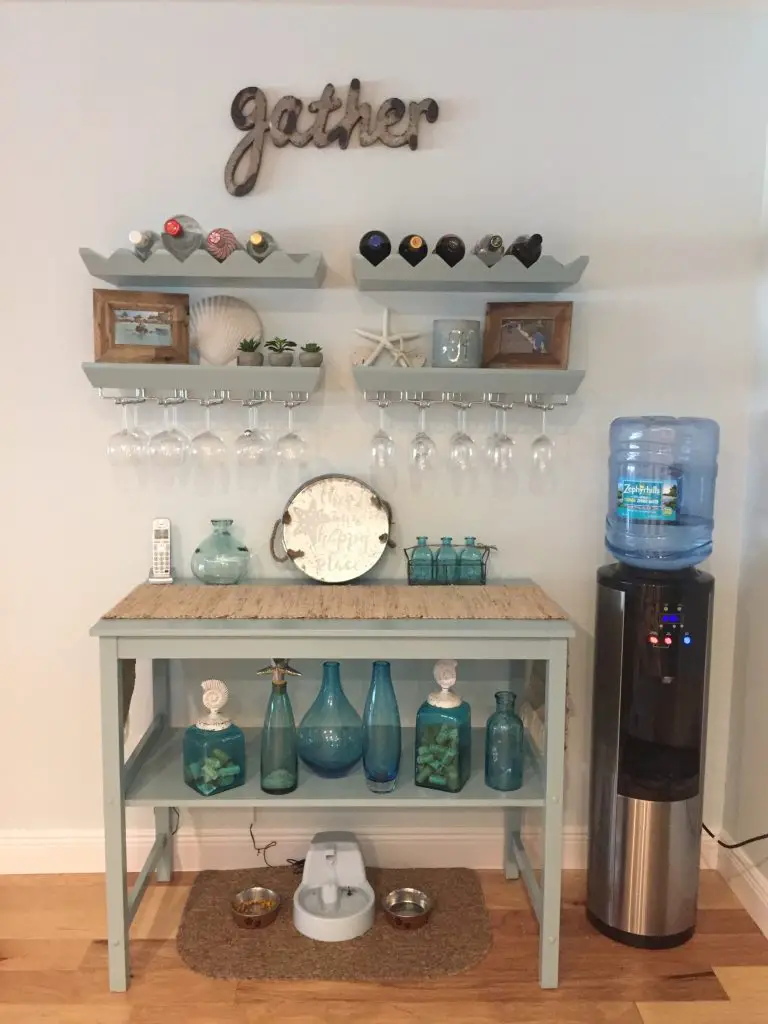
We’ve had these black wine and glass holders from Pottery Barn for YEARS (they don’t sell these exact ones anymore but here are some similar ones) and figured they’d look good in that spot. We also had this table from Target that fit in this spot perfectly. However, once we put them in place these black pieces stuck out like a sore thumb in our space (and yes I know the water cooler and cat food are not pleasant to look at either).
I painted the kitchen table, these bar stools, and our coffee table and end tables so I thought, why not paint these too?! So I did. And my husband added a shelf to the table too. Here is how we did it…
This post contains some affiliate links for your convenience (which means if you make a purchase after clicking a link I will earn a small commission which helps keep my blog up and running but it won’t cost you a penny more)!
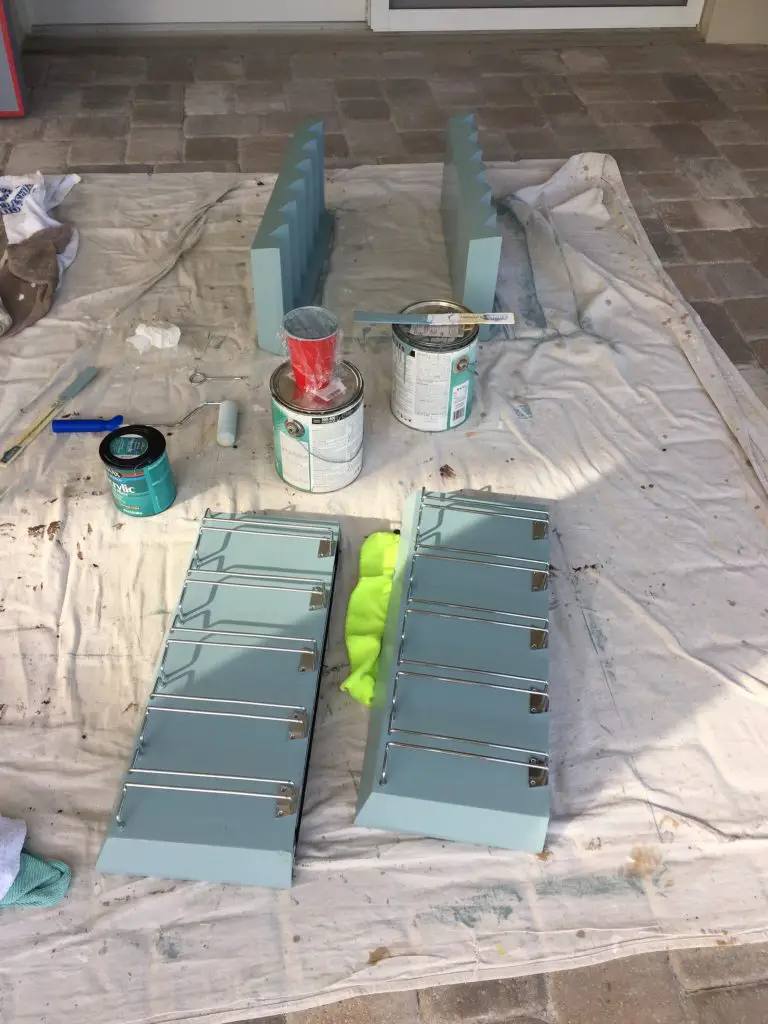
Materials Used for this projectWood for Shelf Old Wine Rack and Wine Glass Holder (similar one here) Left over paint from garage (Interesting Aqua by Sherwin Williams) which I used to make chalk paint or you can get chalk paint on amazon Plaster of Paris (for chalk paint recipe) MinWax Polycrylic |
Step 1 – Upcycling old furniture into a bar area…
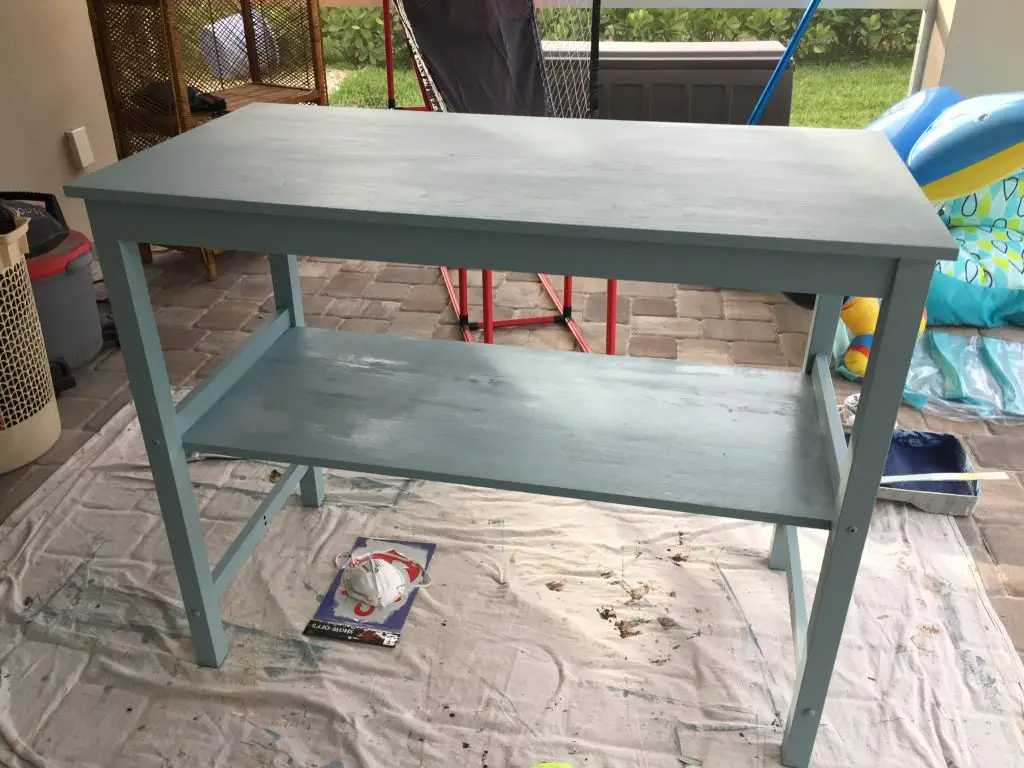
I put all the materials outside in my ‘workshop’ aka the covered pool area, found some left over paint in the garage (Interesting Aqua by Sherwin Williams) and mixed up some chalk paint. Interesting Aqua is the color we used on our dining room walls and that I used to re-do these barstools and this console table.
For those that aren’t familiar with chalk paint, it is awesome. Chalk paint allows you to paint something without having to sand or prep. They sell chalk paint at most hardware stores and on amazon but since I was using paint from my garage I just mixed my own using the recipe below.
chalk paint recipe
1/3 cup plaster of Paris
1/3 cup water
mix these 2 ingredients together first
then add 1 cup of paint
stir until smooth and mixed thoroughly
Step 2:
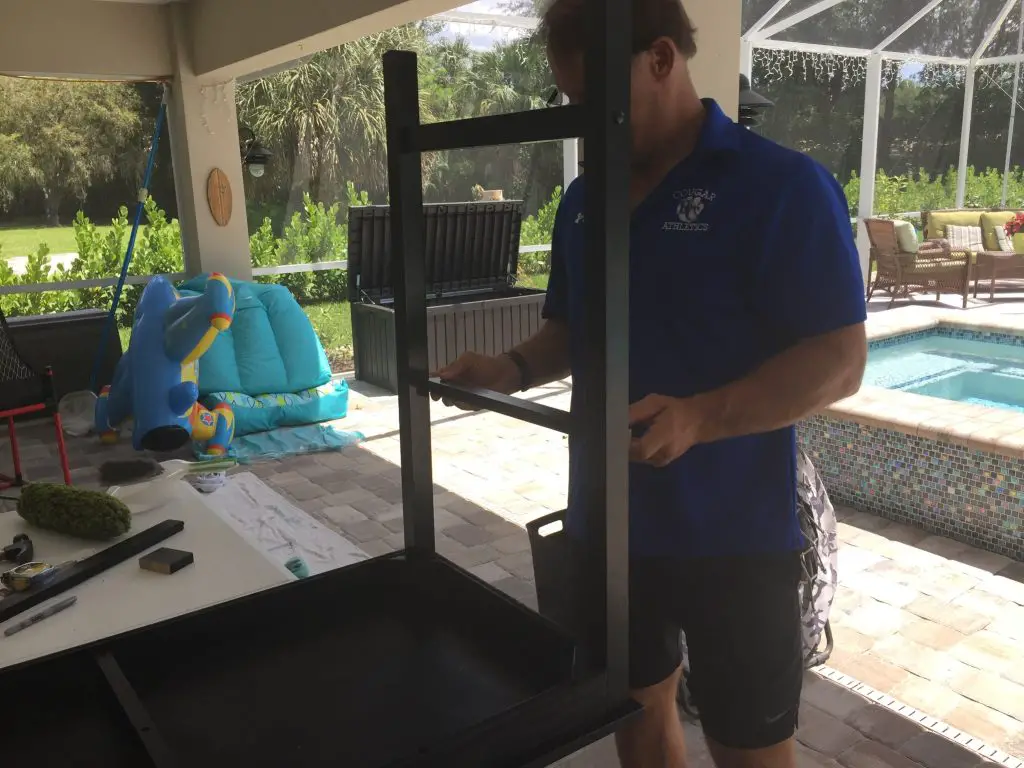
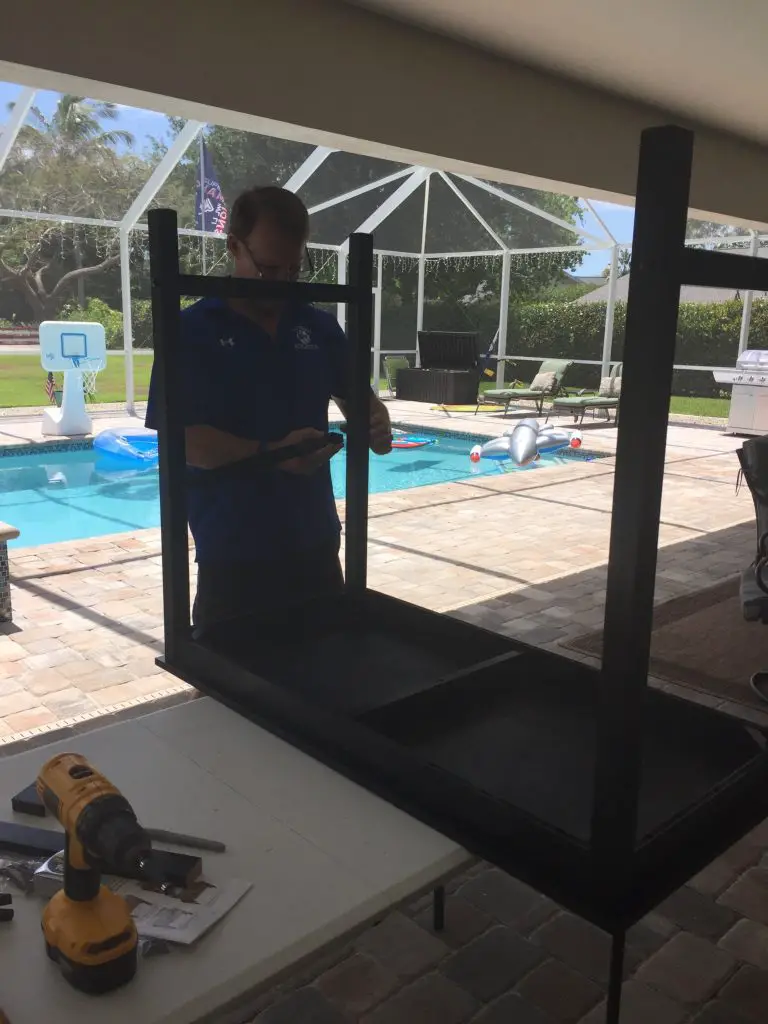
My husband got to work on the table adding a shelf. He does the construction stuff around here and I am the painter/decorator. We make a good team. 🙂 We thought it needed a shelf to break up the space, and so I could add my knick-knacks.
He used 2 pieces of wood from the garage that were perfect for shelf brackets (see him holding one below). I am not even sure where these came from, but he likes to save things like this for future projects. We bought a piece of wood from Home Depot and cut it down to size to use as the actual shelf. First he made holes in the brackets and the table so he could insert wooden dowels to make sure they were plenty strong (again the dowels had been saved from some piece of furniture we put together at one point in time). Once they were attached with the wooden dowels, he screwed in the brackets to the legs of the table using heavy duty screws. Then we attached the shelf to the bottom of the brackets (see 3rd pic below) using wood glue and small nails. That was pretty much it. Instant shelf!
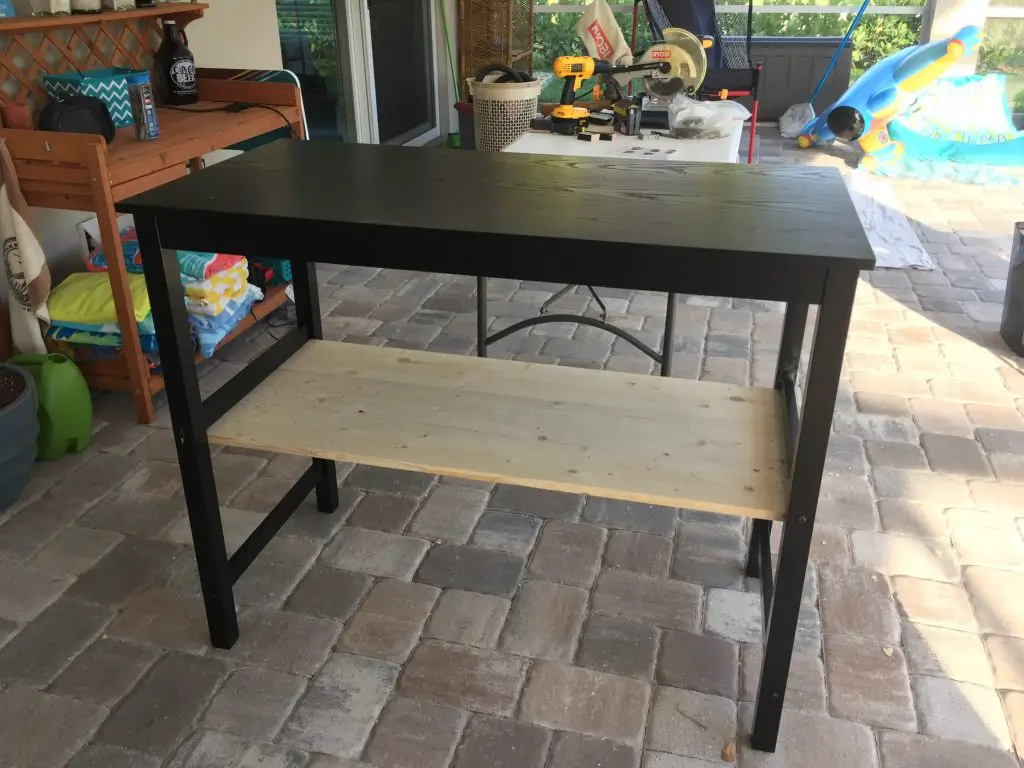
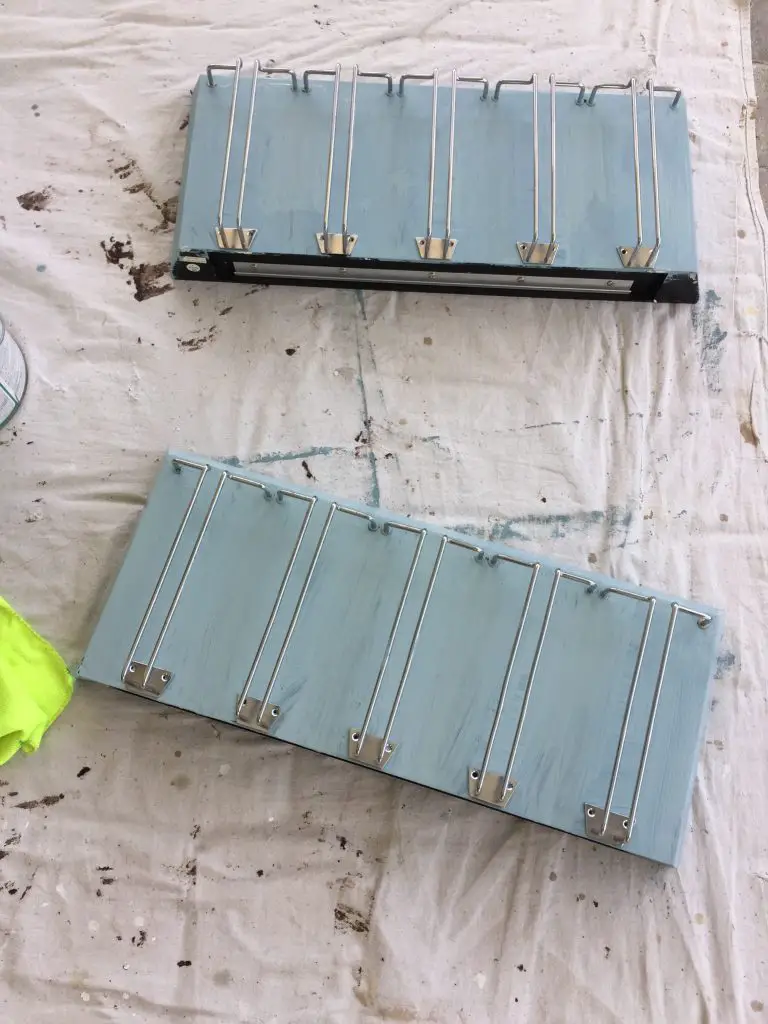
Then I got to work painting the entire thing. Below is how it looked in progress. Once the paint dried, I used several coats of MinWax Polycrylic to protect the piece from getting scratches or chips.
Step 3…
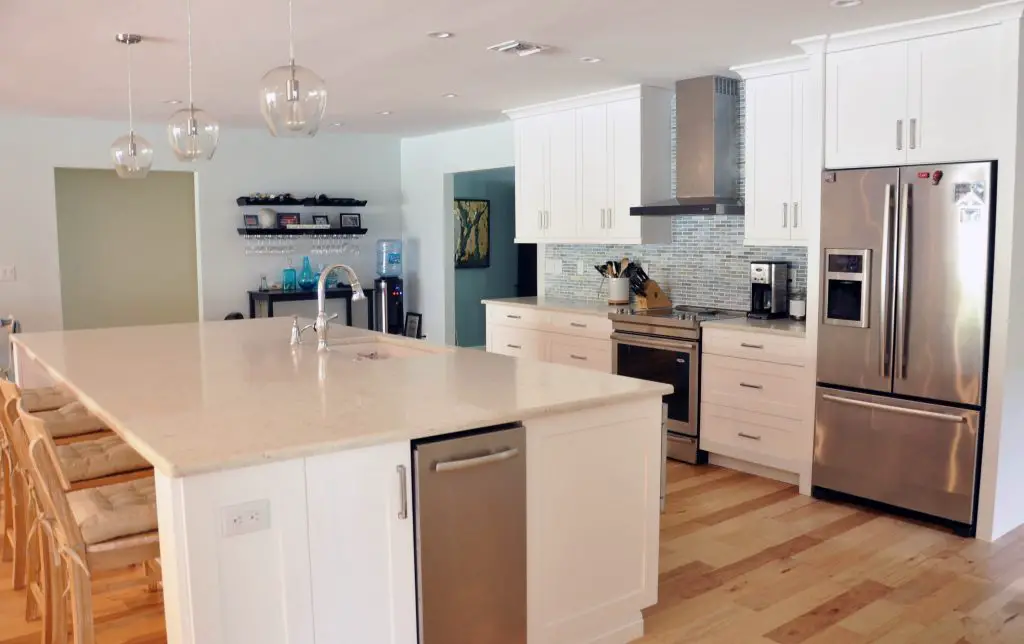
Once everything was dried we put them back in the same spot and I added my collection of blue bottles, a gather sign (here is a similar one, or this one would look awesome too), and some other coastal decor. I think it looks much better and blends in with the current colors. And yes I know the water dispenser and cat food are still there and look ugly but there really isn’t anywhere else to put them. (I know, I know!)
And one More Before and After photo…

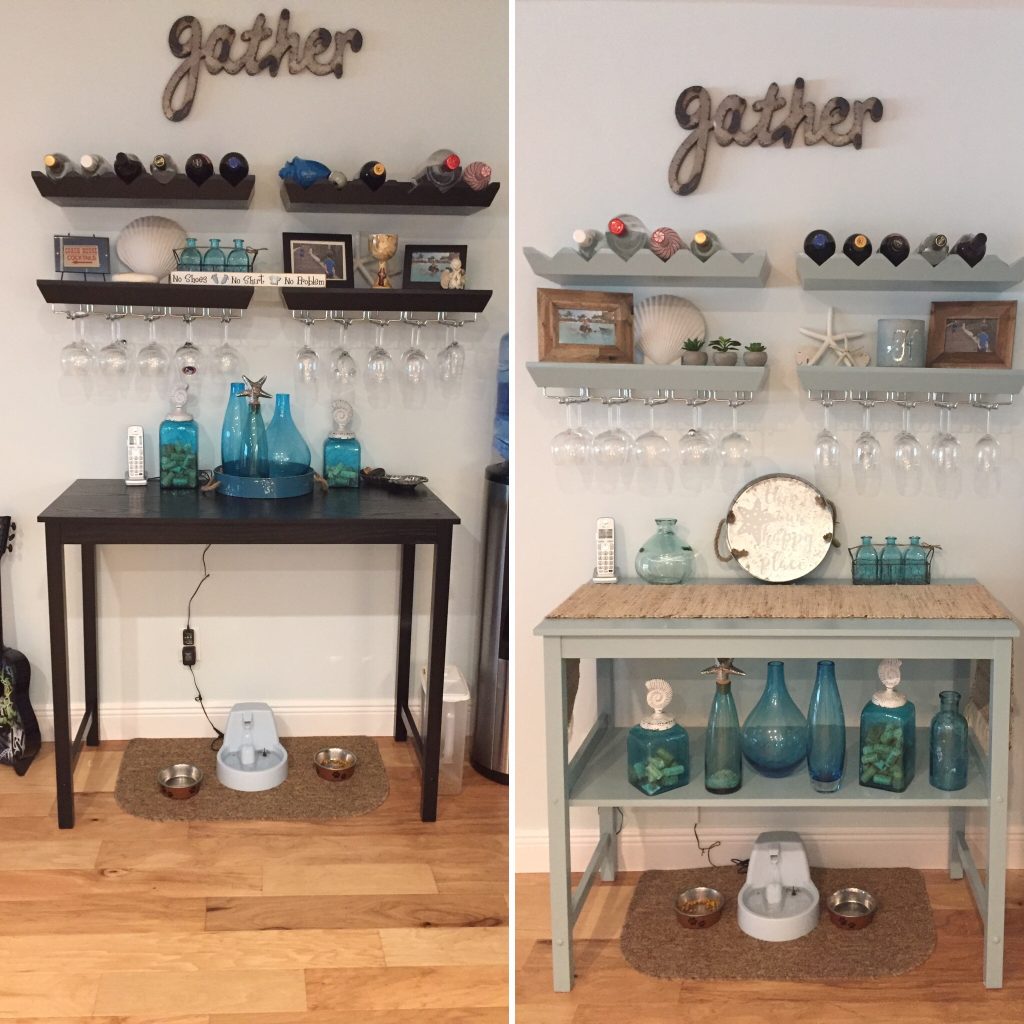
This just goes to show ya that you can paint and upcycle your old stuff to fit your needs, and all it takes is a little elbow grease. Once I get sick of this look I might paint it again. Who knows.
Hope you enjoyed this project. If you like my DIY projects and aren’t on my mailing list. Please sign up. I send out one email a week.
Thanks!
Jodi


No Comments