
DIY How to Add a Map to an Old Table
Changing up this old table with some paint and adding a map…
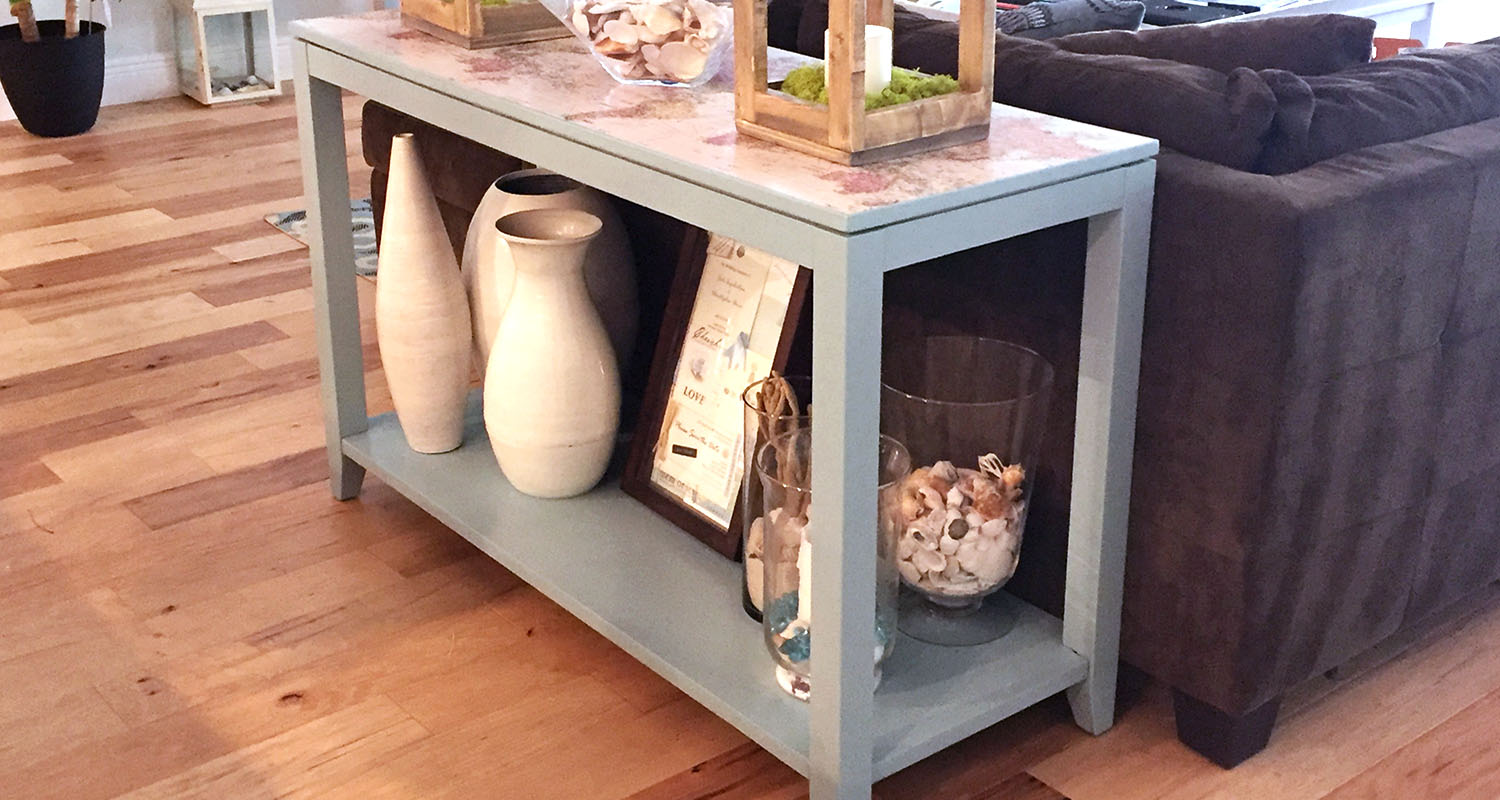
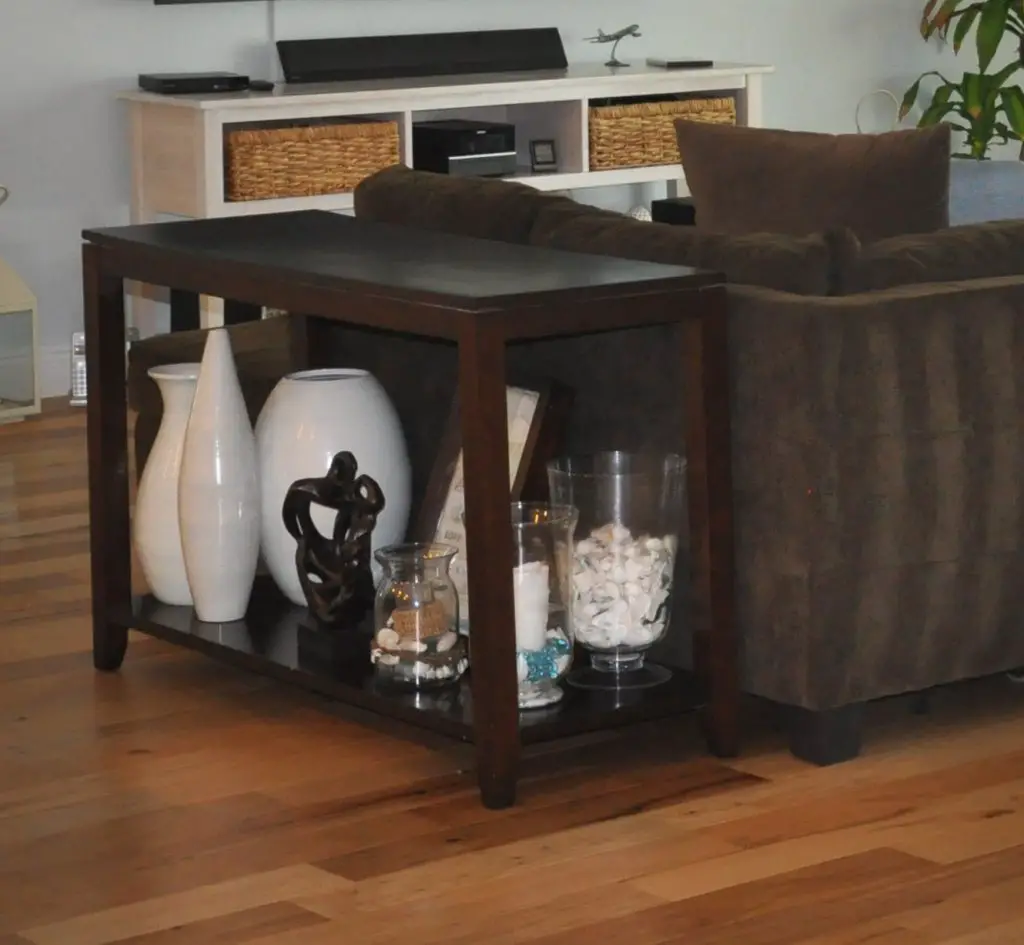
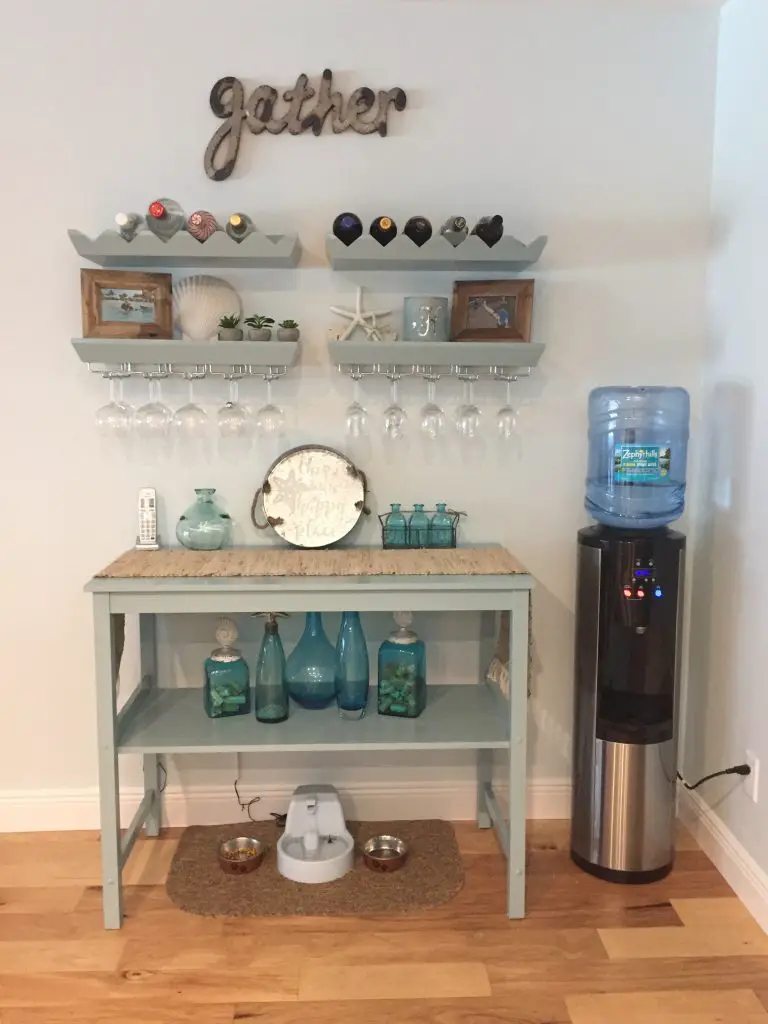
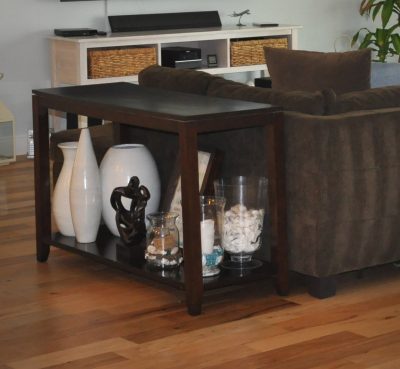
This console table is pretty old. It used to have a TV on top of it for years, until we moved into the House house and started using it as an actual console table. Except, it didn’t match anything once I painted all our other old dark wood furniture. So, guess what I did? Yup, I painted it. But I added a map to the top to make it a little different. Here is how I did my console table redo.
Materials Used for this Project…this Project Roll (for the map) |
Step 1, The Map…
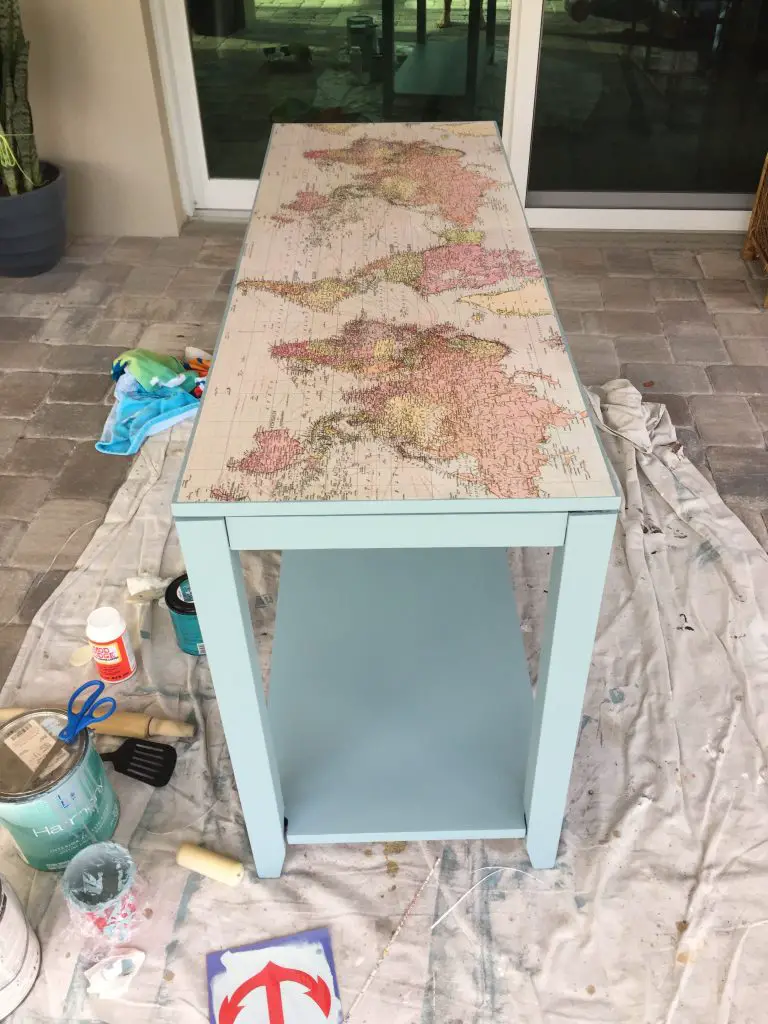
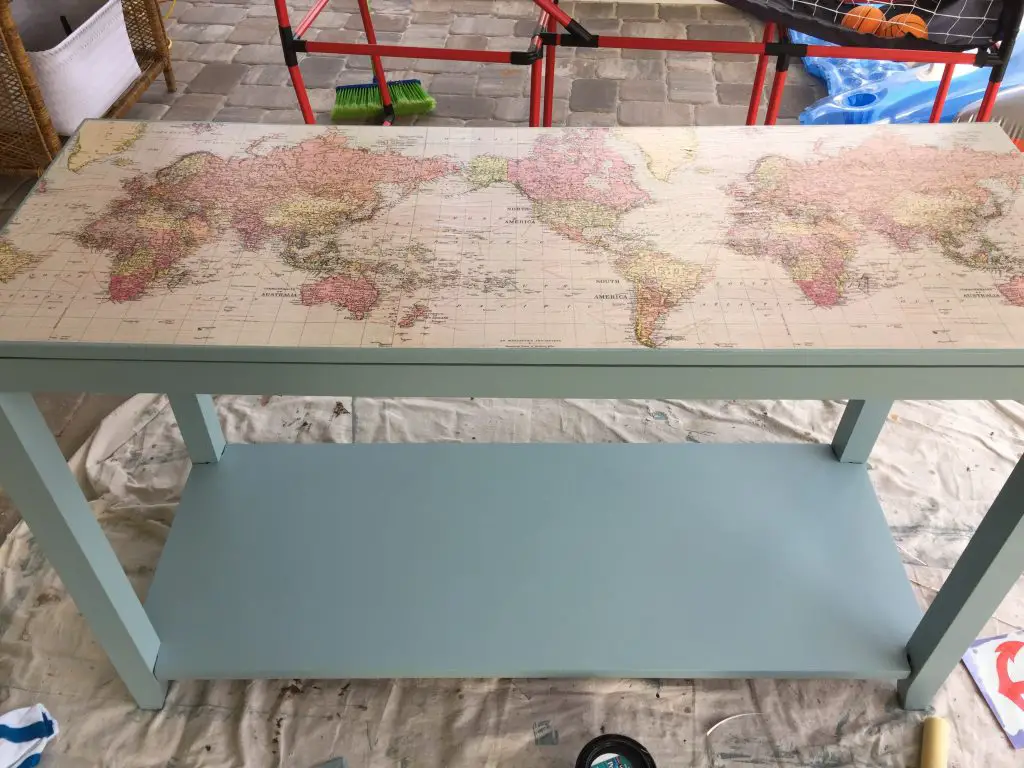
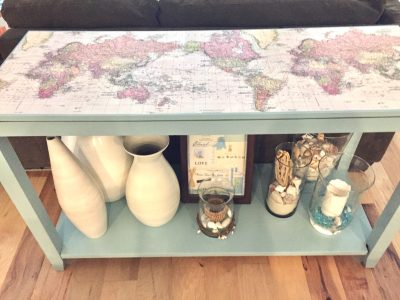
I’ve been wanting to add a map to a piece of furniture after seeing a few projects on Pinterest that I liked, and thought what better place than my old console table. I started searching for one and was having trouble finding a map that fit. This table is 42″ long and they don’t really make maps that big, at least none that I could find. I did however find this stuff called a ‘project roll’ at Joann’s (see pic below). It is almost like wrapping paper, except a little thicker. Bonus, it was on sale for $2.99! It still wasn’t long enough though so I had to cut it to size. I mean, it was plenty long, as you can see below, only the map kept repeating itself and everytime it repeated there was a border. After brainstorming a bit, I decided to cut off the top and bottom border and then the middle border too. I had to overlap where I cut off the border, by matching up the exact location on the map. Sounds complicated but it wasn’t.
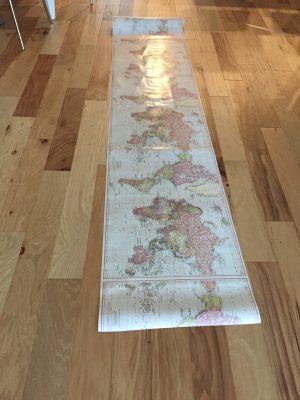
It looked like this, see below. You can see that the continents repeat but you can’t really see where I cut the border off and glued it back together. I wanted North America to be in the middle, but as you can see there are 2 Asia’s, Europe’s, Africa’s, etc., one on either side.
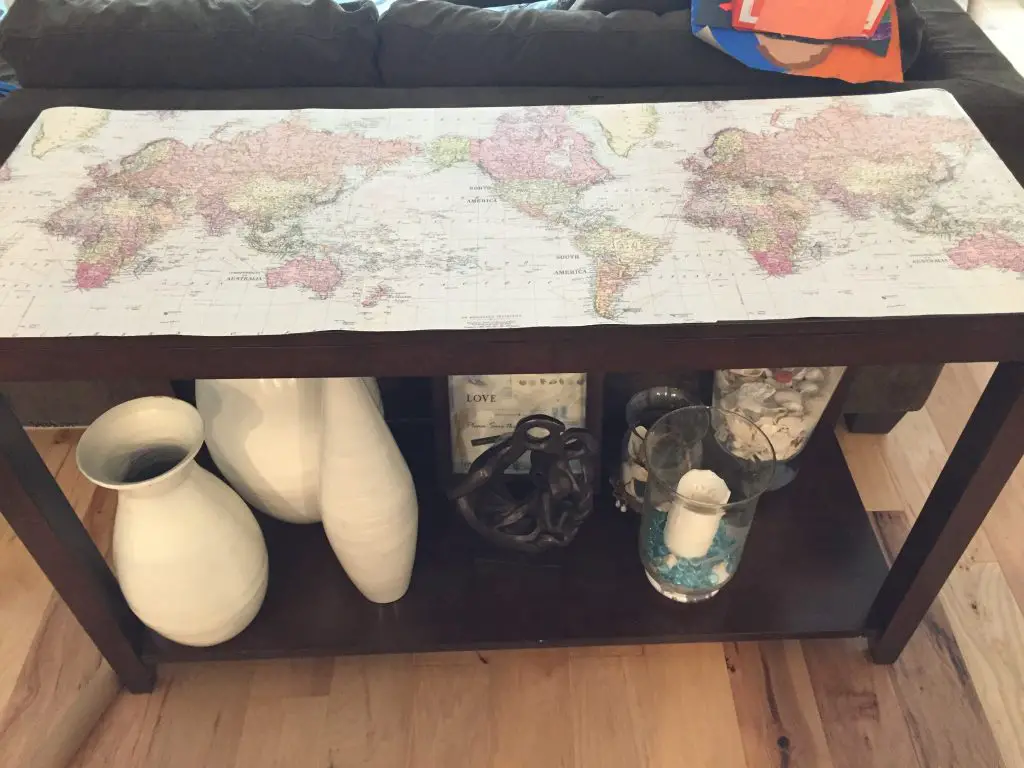
First I used an exacto knife to cut it down, then I used the actual console table as a template and some scissors to make sure it fit perfectly.
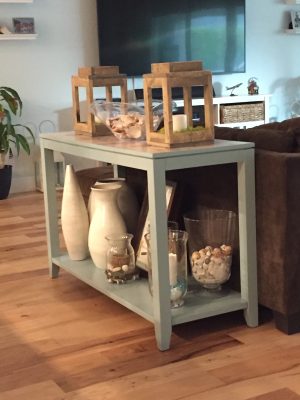
Step 2, Painting…
Since I still had some leftover, I used this same blue that I used to paint this bar area shown below, and these bar stools. It is also the same color as our dining room.

I brought the table outside to my “workshop”, aka the covered lanai, and started painting it. I gave the top one coat and the rest three. I wanted the top to be blue underneath the map since I cut the map so there is a slight border, maybe 1/8″ all the way around.
Step 3, Adding the Map…
To add the map to the table, I used Mod Podge to glue it in place. I started at one end and slowly kept appling glue to the table top and then slowly sticking the map to the table. Once it was all glued I tried to smooth out any bubbles.
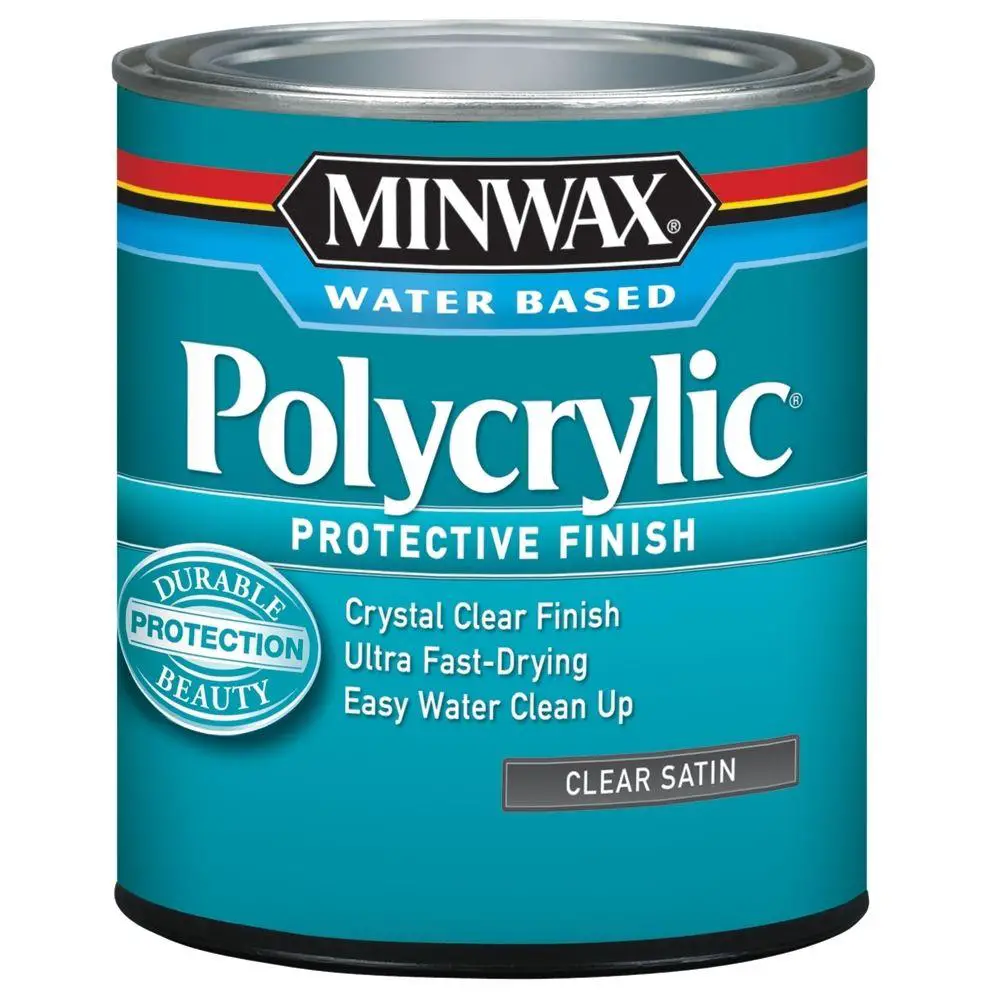
Once dry, I applied 2 more coats of Mod Podge on top of the map to seal it, then 3 coats of Sealer. I used Minwax, Water Based Polycrylic Clear Finish. I have to admit that all the bubbles on the top were freaking me out! I kept smoothing them down with a rolling pin and my fingers, and the edge of a spatula, but some of them were stubborn. I even popped a few with a pin. I kept thinking, OMG what did I do, this looks terrible. Anyway, after it sat and dried overnight all the bubbles magically disappeared! Whew!!!
And,that is pretty much it! Overall, I really like how it came out. Using left over paint and other materials in our garage, it only took me a couple of hours and a couple of dollars to do! The only thing I had to buy was the map, and that only cost $2.99!
Here are some more before/after shots. I styled it using the same stuff as before; a collection of shells, white vases and a shadow box that my bridesmaids made me the year I got married of all our wedding memorabilia.
What do you guys think? Do you have any projects to share with me?

2 Comments
Hello,
Thanks so much for this tutorial. Did you find that you could still read the map just as well? I have a big wall map that I really want to see well, but I also want a protective finish. I’m wondering if your technique would work for that and not distort the map too much.
Any thoughts are appreciated. Thanks!
Joe
Hi,
Yes the map is still readable on the table. They also sell protective spray finishes that might work well for your project. Check them out at Hobby Lobby or any craft store.