
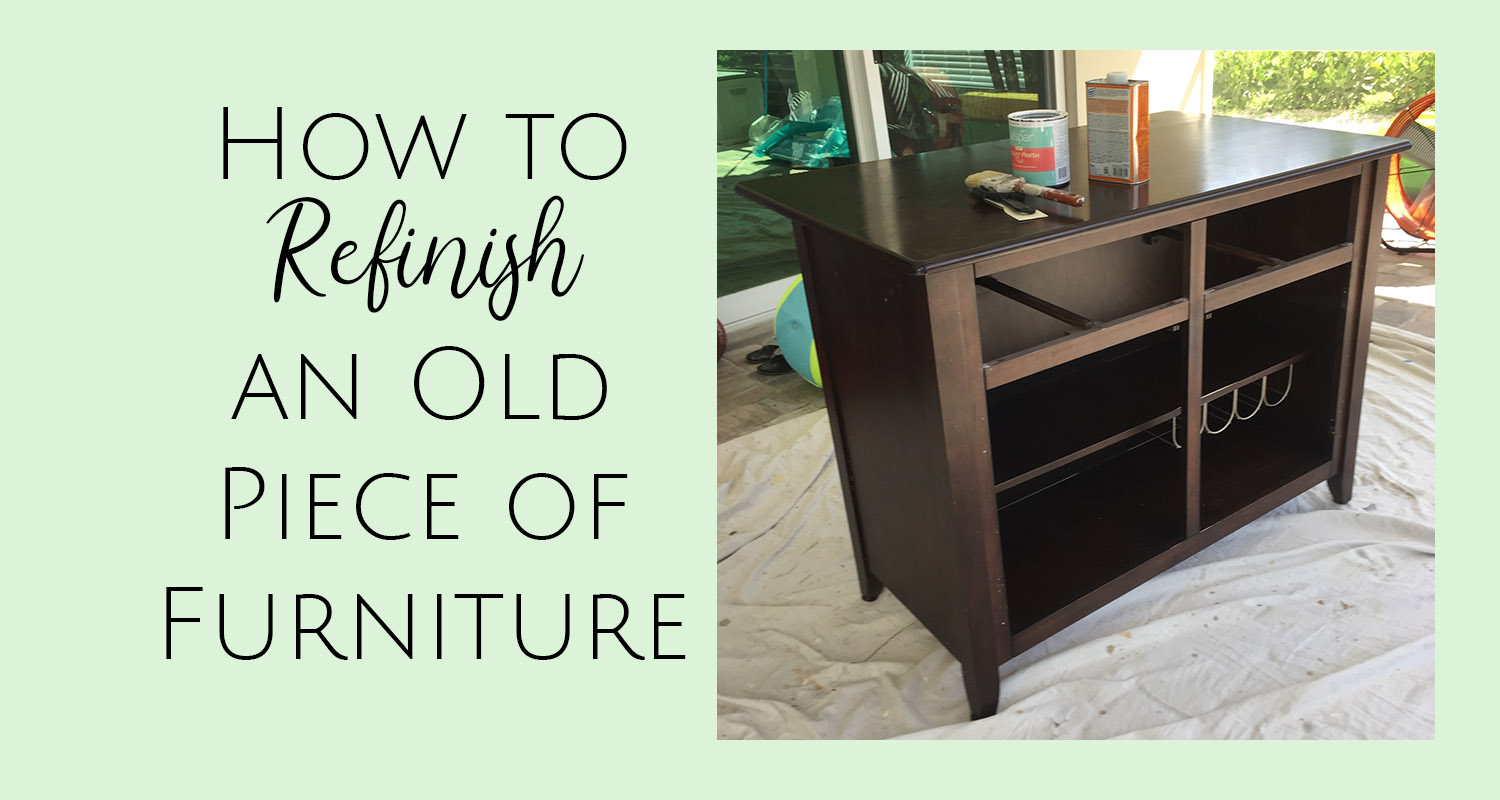
Refinishing An Old Bar
Follow my blog with Bloglovin
I was inspired to refinish our old bar/kitchen island after we moved into the House house and I realized how outdated all of our old furniture looked. The dark brown wood just wasn’t working for me anymore. I refinished our dining room table first and then this bar really stuck out like a sore thumb so I tackled that next. See the before picture below. The Bar in the back corner is the item I am talking about today. See also the console table and dining table that I refinished. This picture was taken not long after we moved in and before I refinished anything. We were having a little party, which is why there are chili pepper lights hung up and there was a buffet table set up with a bright yellow table cloth.
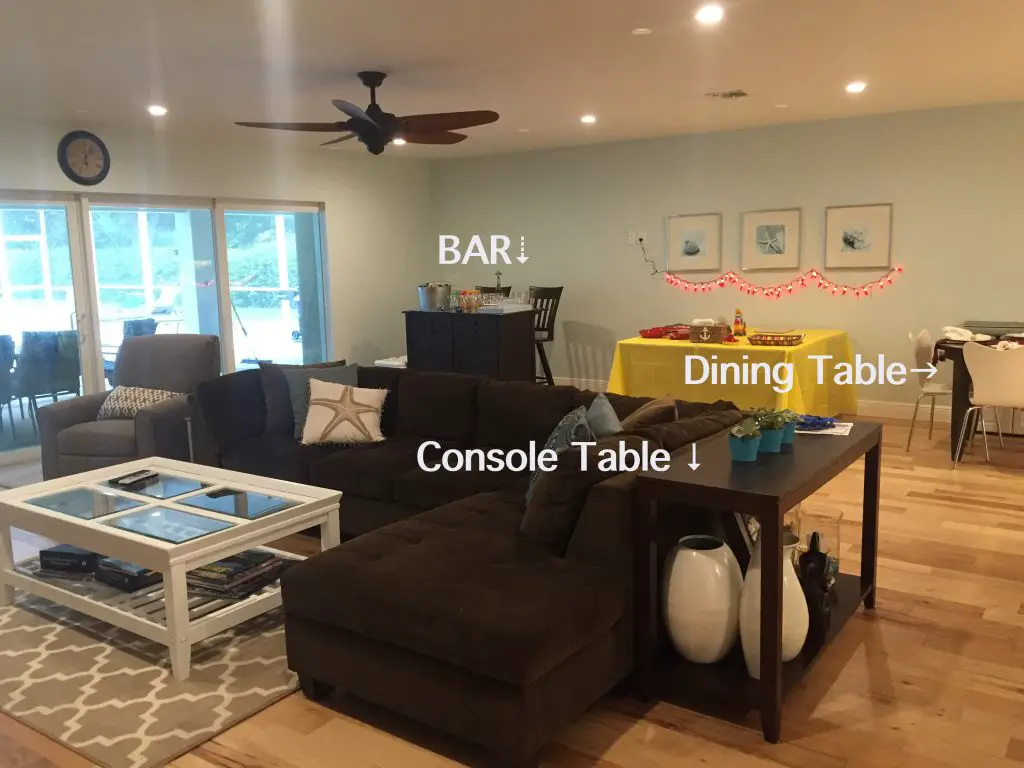
We’ve had this furniture set since way before we had kids and lived in a 2 bedroom condo in Boston. We use the bar as an actual bar but I think it was meant to be a kitchen island. The white coffee table above is a part of this set and also used to be chocolate brown until I painted it white. Anyway, 5 houses and 15 years later and we’ve still hung onto these pieces. My husband doesn’t like to get rid of anything when they are ‘perfectly fine’. Can anyone relate??? This is why I’ve been busy redoing and painting all these pieces. I guess he has a point. These pieces are perfectly fine and still in good shape, and I’ve been having so much fun getting creative and changing the way they all look, so maybe he’s right.
Anyway, here is my tutorial on refinishing an old bar (although this would work on any piece of furniture) and the techniques I used to achieve the look I wanted….
This post contains some affiliate links for your convenience (which means if you make a purchase after clicking a link I will earn a small commission which helps keep my blog up and running but it won’t cost you a penny more)!
Materials Used – Refinishing an Old Bar (or any piece of furniture)Weathered Oak Stain by Minwax paint brushes |
Step 1 in Refinishing an Old Bar (or any piece of furniture) – Stripping the Paint…
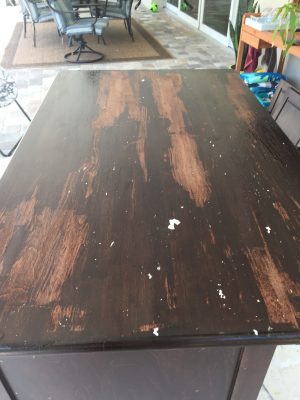
My husband helped me bring this bar outside to my ‘workshop’, aka the covered lanai area. Then I took the doors off and the drawers out. The first thing I wanted to do was remove the layer of paint from the top of the bar (I planned to paint the rest of it white). I used a paint stripper called Klean Strip. Klean Strip is very toxic smelling and you need to use safety gloves and protective eyewear if you attempt this. I also used a face mask so I wasn’t inhaling the toxic fumes. Several readers have recommended CitriStrip which is supposed to have less harsh fumes. I have not used it myself (yet) so cannot tell you how it works, but my readers tell me it is great, so I believe them!
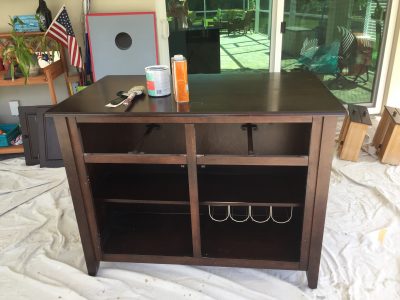
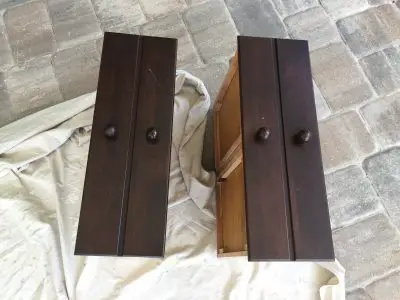
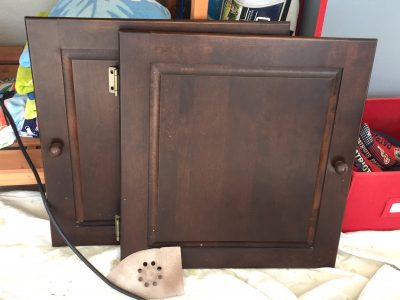
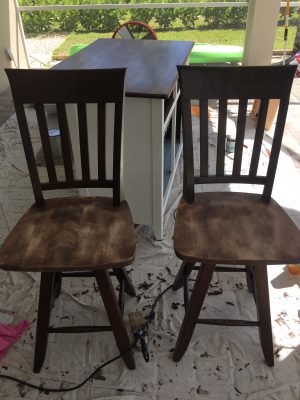
To use the paint stripper, you apply a thick layer using a paint brush, wait 10 – 15 minutes, then scrap off the paint with a good scraper tool. I did this 3 times. Discard the paint that comes off into a tin can. I only did the top of this piece as I planned to paint the rest of it white. I also stripped the seats of the chairs too. Here are some photos of the different stages of stripping off the paint.
Once you are done stripping the paint off, you then need to apply some Paint Stripper After Wash. I used Klean-Strip. This product essentially removes any paint residue left from the stripping process. To use, follow the instructions on the back of the can and make sure you wear gloves and safety googles.
Step 2, Sanding
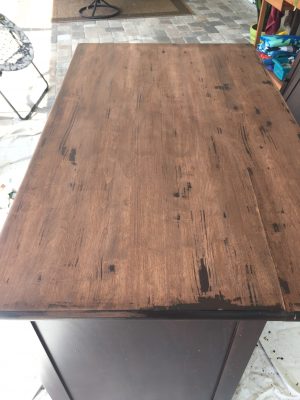
Once I was satisfied with how much paint I was able to scrape off, I moved on to sanding. I used my hand sander until I liked the way the wood looked. I was going for a farmhouse feel and liked that the color underneath was uneven and worn looking.
Step 3, Staining…
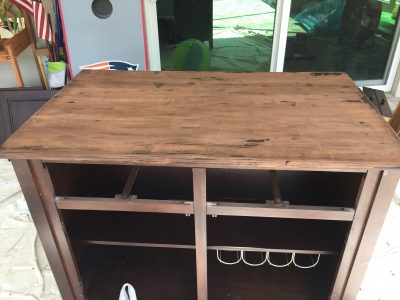
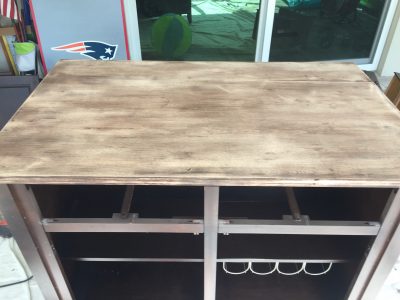
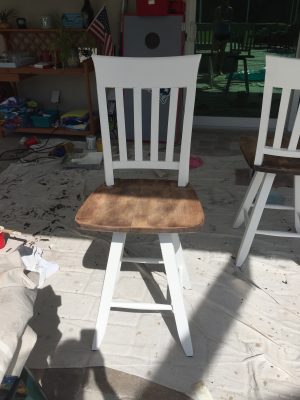
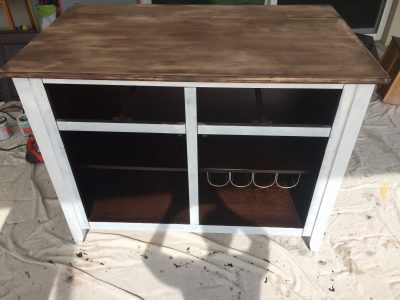
Before you begin staining, please make sure you clean up all the dust from your piece. Use a wet rag or tack cloth. I chose Weathered Oak stain by Minwax to achieve the same look as this table. In between staining I painted the rest of the piece white, using chalk paint that I mixed myself with this recipe below. I had to use 4 coats of white paint to cover this dark wood.
1/3 cup plaster of Paris
1/3 cup water
mix these 2 ingredients together first
then add 1 cup of paint
and stir until smooth and mixed thoroughly.
Step 4, Polyuerthane
I applied 4 coats of poluerthane to the top of the table. This part of the process takes the longest since you need to let it dry before you apply another coat and you are supposed to sand lightly between each coat. We have used this bar at many parties and lots of drinks have been prepared (and spilled) on it, and I am happy to report no water stains or chips have occurred.
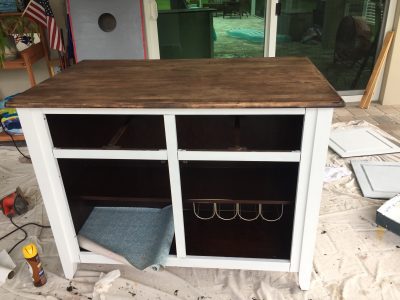
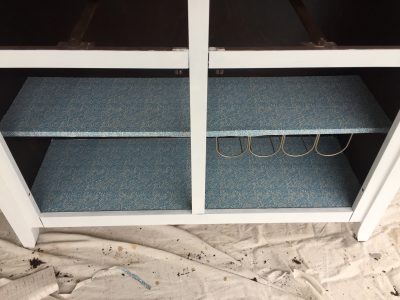
Step 5, Adding the contact paper to the inside (optional)…
Rather than paint the entire inside of this piece I decided to keep it dark brown and add some shelf liner paper. I used this fun stuff I found at Target. This can be tricky to install since it is so sticky, but I got the hang of it after a few tries. Or this fun beach wood paper would look so good.
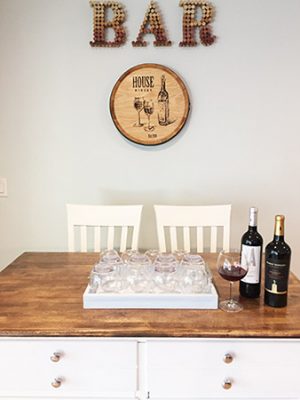
Step 6, Finishing Touches and Enjoy!
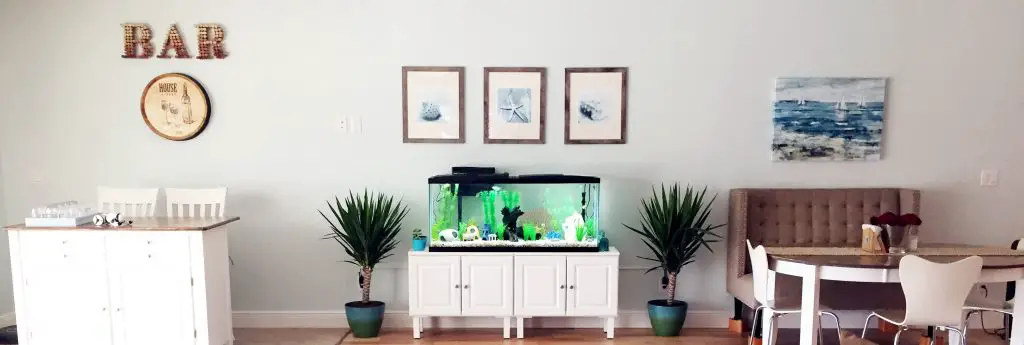
Once it was all painted and stained, I put the doors and drawers back on/in and put it back in my house. I also changed the knobs out. I ordered this fun Wine Barrel Sign from Amazon (the one I ordered is unavailable but here is a similar one and another one) and the BAR sign was a DIY project I made out of all my saved wine corks.
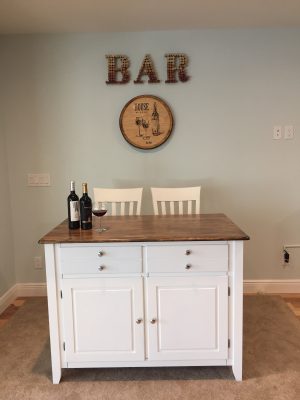
Before/After…
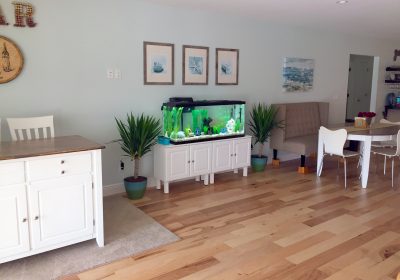
Here is the before after of this room with all my old furniture painted and updated, and a new rug and couch too.
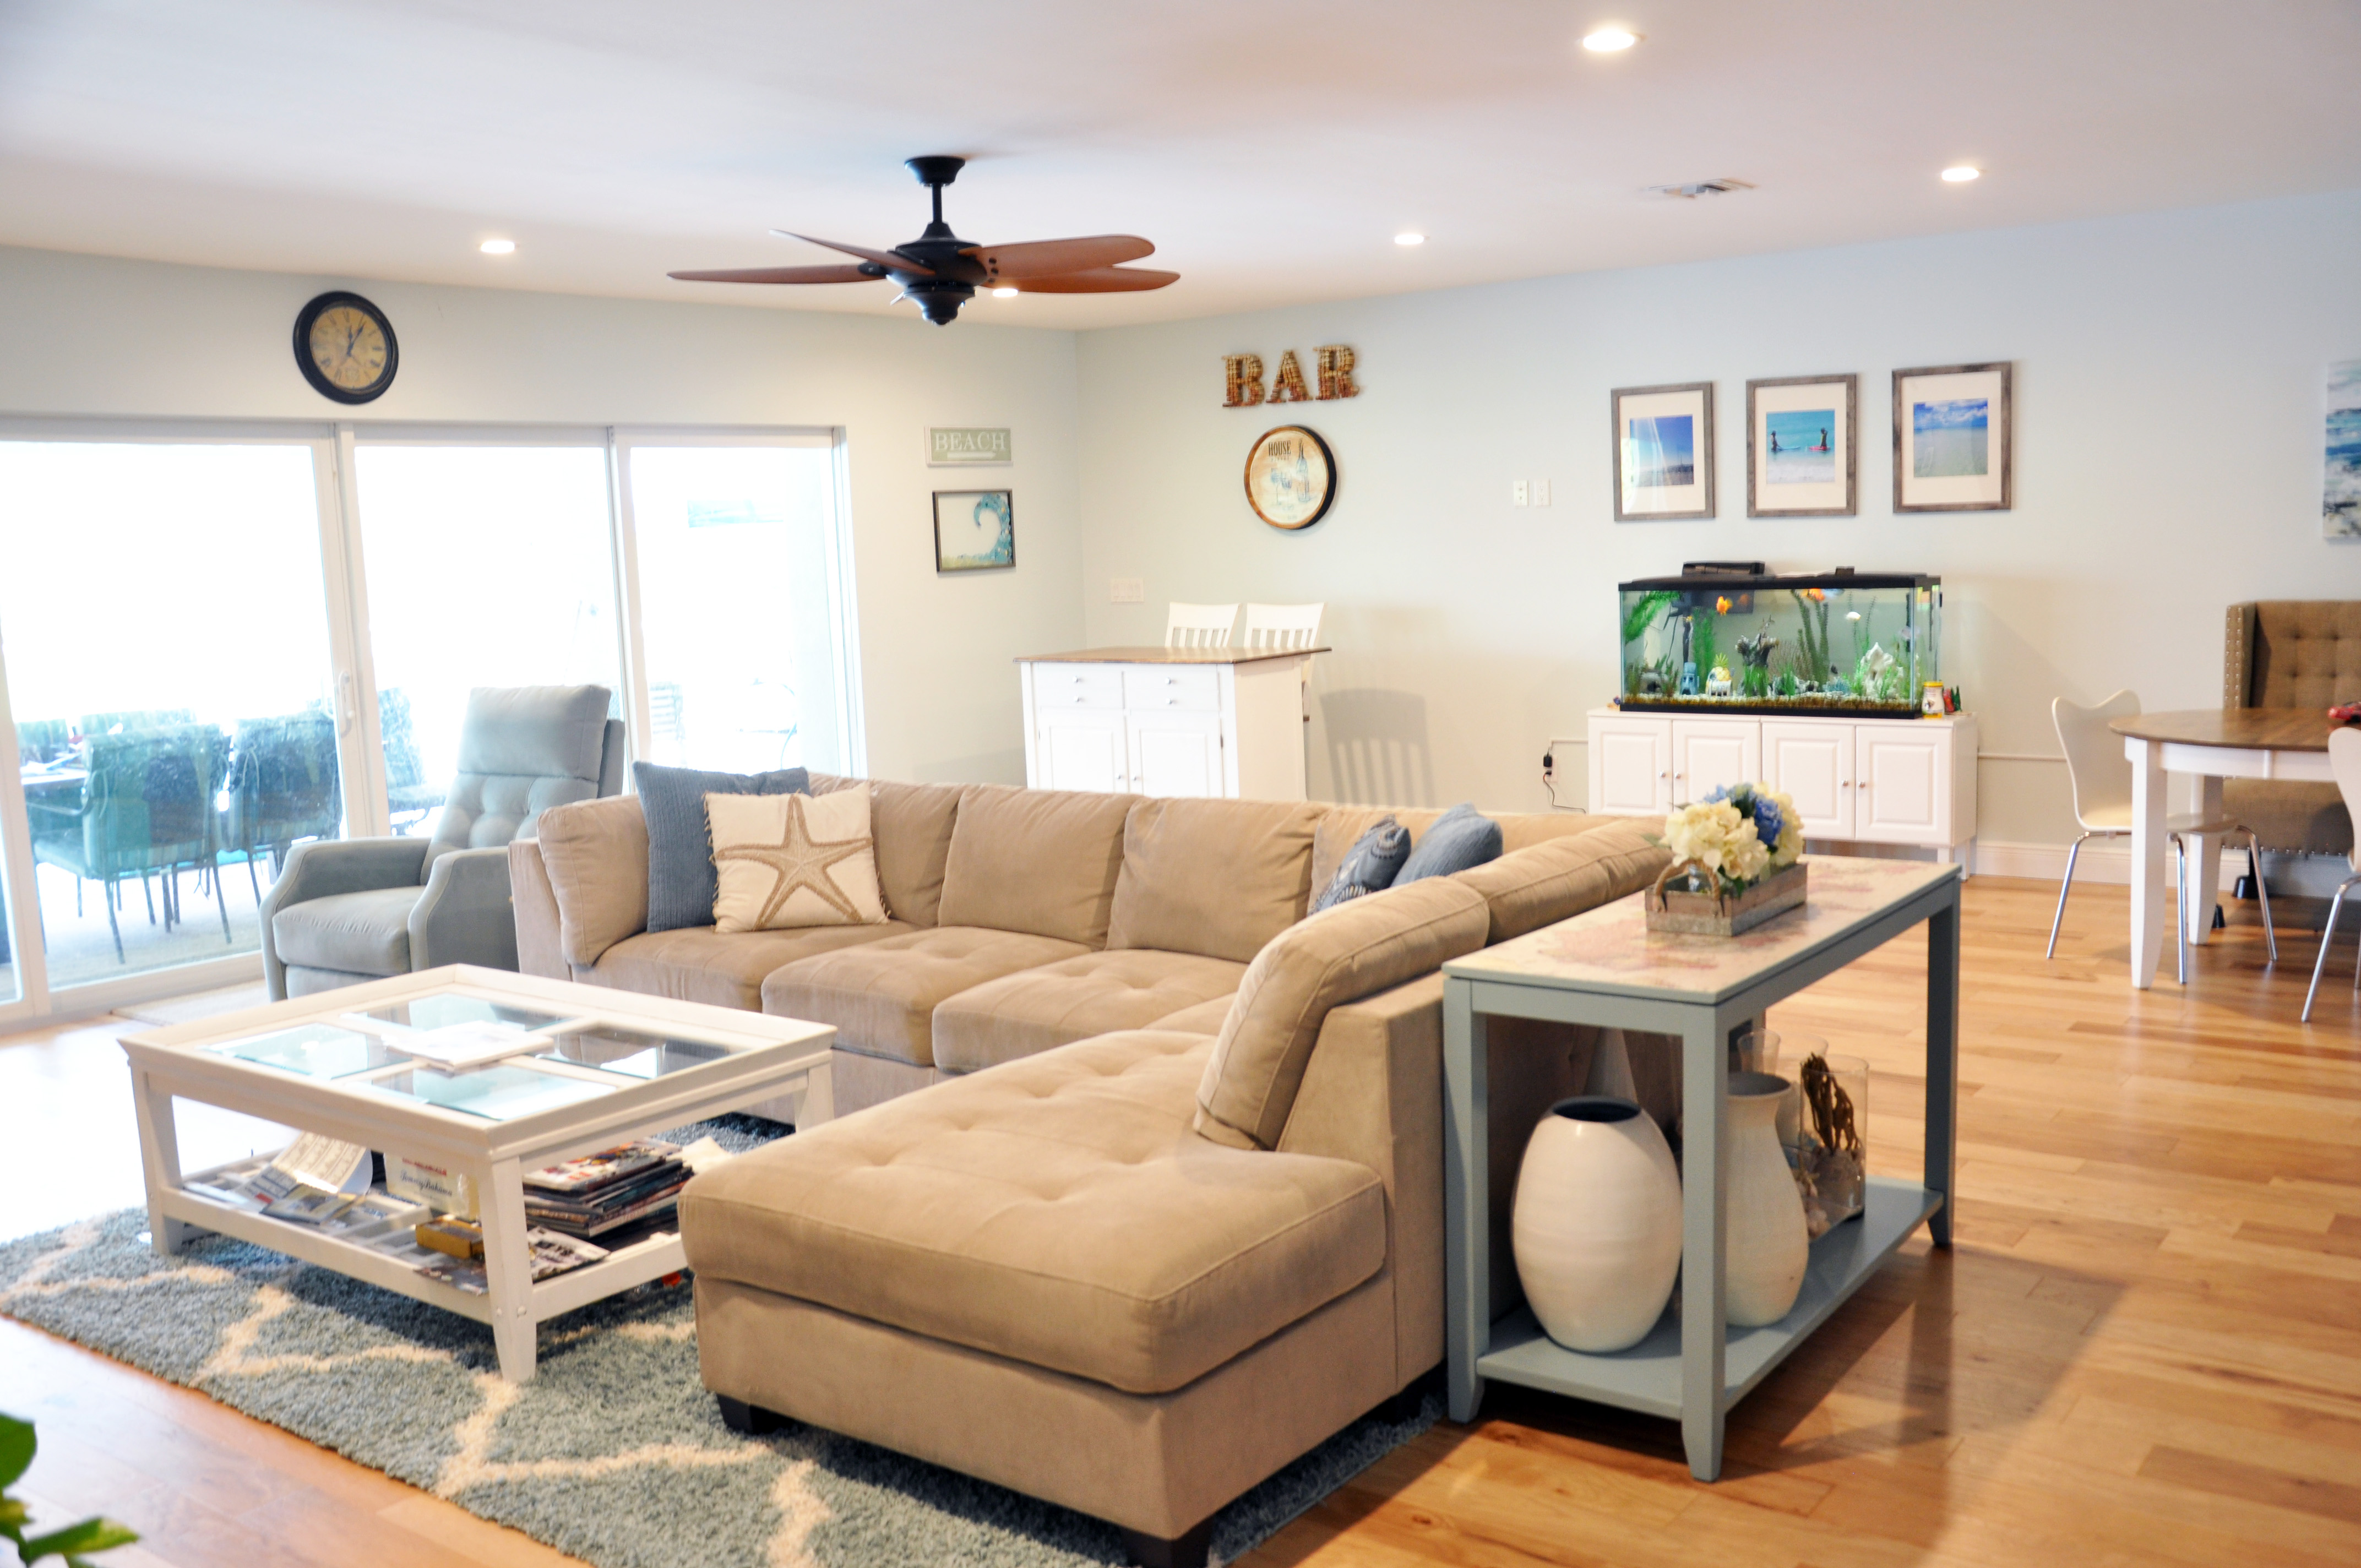
And here is a picture of this side of the room.
I hope you found this tutorial helpful. Hopefully you are inspired to refinish an old piece of your furniture. 🙂
Follow my blog with Bloglovin

2 Comments
Your old room, by comparison looked ok but ordinary. Your new look is so bright and airy and comfy chic. I love it. I have a new dining table that got scratched and I want to refinished it, but this looks like way way too much work and especially if it has to be done in doors.
Thanks for posting and thanks for the easy to follow instructions.
Thanks Linda. Yes, refinishing something is messy and can take awhile! But I find it is fun and it is worth it in the end if you’re trying to save some $$$. Glad you like my room!