

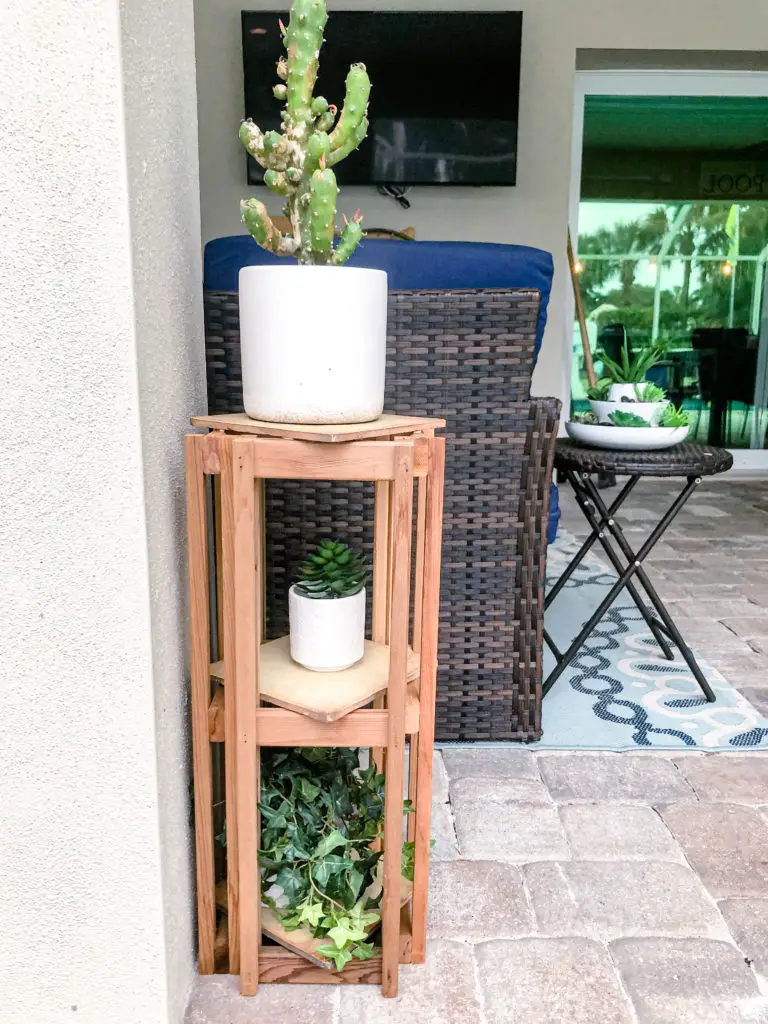
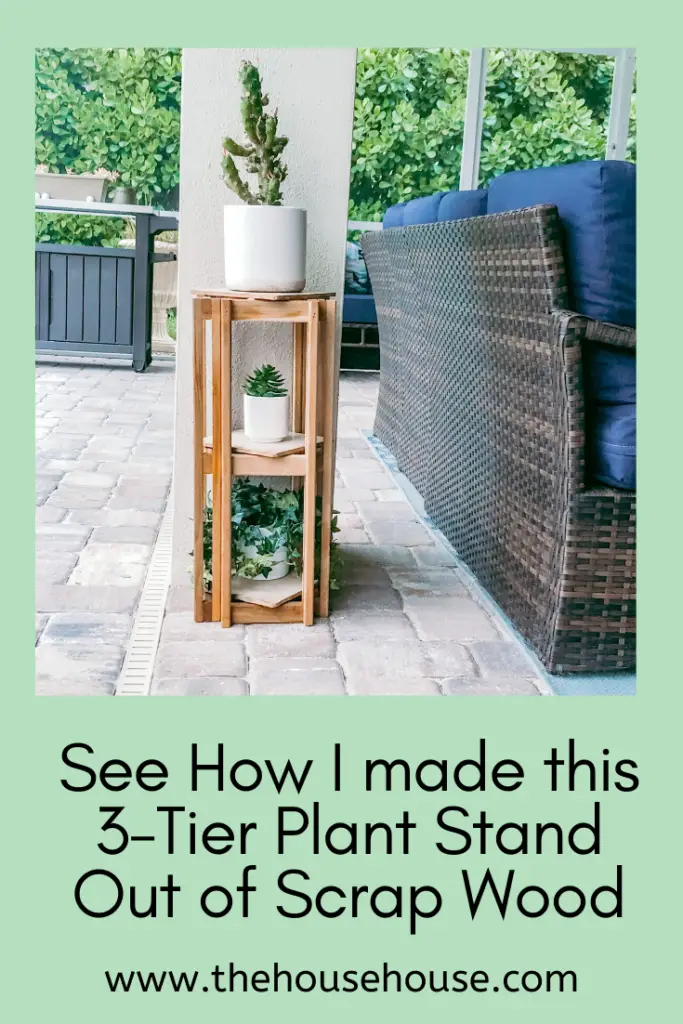
Quarantine Upcycle Challenge: 3-Tier Wooden Planter
I am joining a fun group of bloggers for a Quarantine Upcycle Challenge. In this challenge, since we are all mostly still self-quarantining, we will either MAKE, REVAMP or REFURBISH something we already have, using only materials we have on hand. I am excited to show you the DIY 3-Tier Wooden Planter that my husband and I came up with.
You will not believe what my creative blogger friends came up with in this quarantine upcycle challenge. The links to their blogs and all their amazing projects are at the bottom of this post. Please check them out. You don’t want to miss it!
Materials Used in making the 3-Tier Wooden Planter…4 Pieces of Scrap Wood |
My husband went out for a ride one morning and came home with this pile of pieces of wood. HA! He is too much, and not afraid or embarrassed to pick up someone else’s trash. Here are some of the other treasures he has brought home for me that I have revamped…..this table, this bench, these tables, and these chairs too!
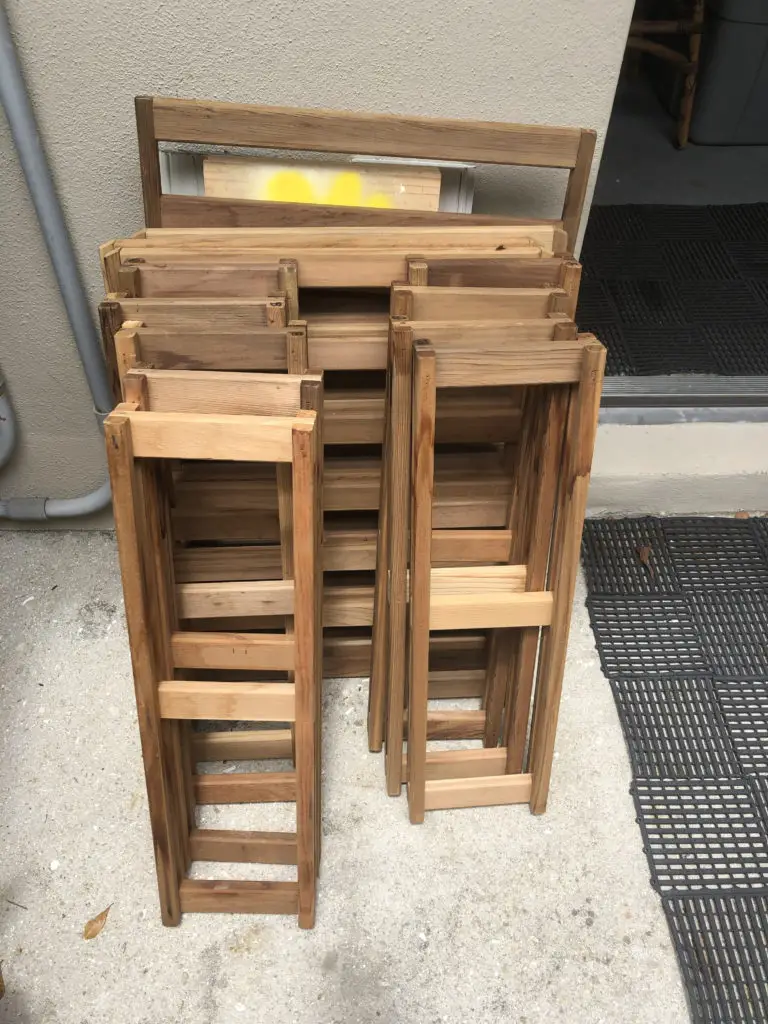
Anyway, I am not sure what these were originally used for and why they were in the trash. But, that didn’t matter. I knew we could use some of the pieces to make some sort of shelf for this challenge. My husband and I brainstormed a bit and came up with a design. Then he found 3 tiles in the garage that fit in between the wood to make a little 3-tier plant stand. Score! Here is what we did.
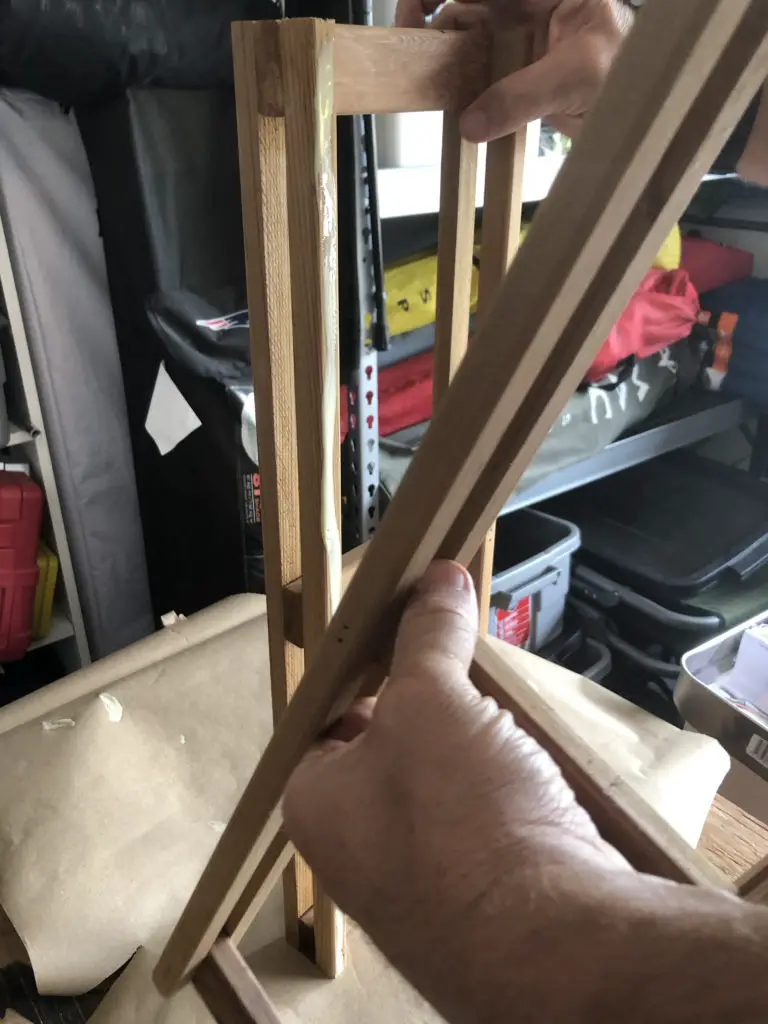
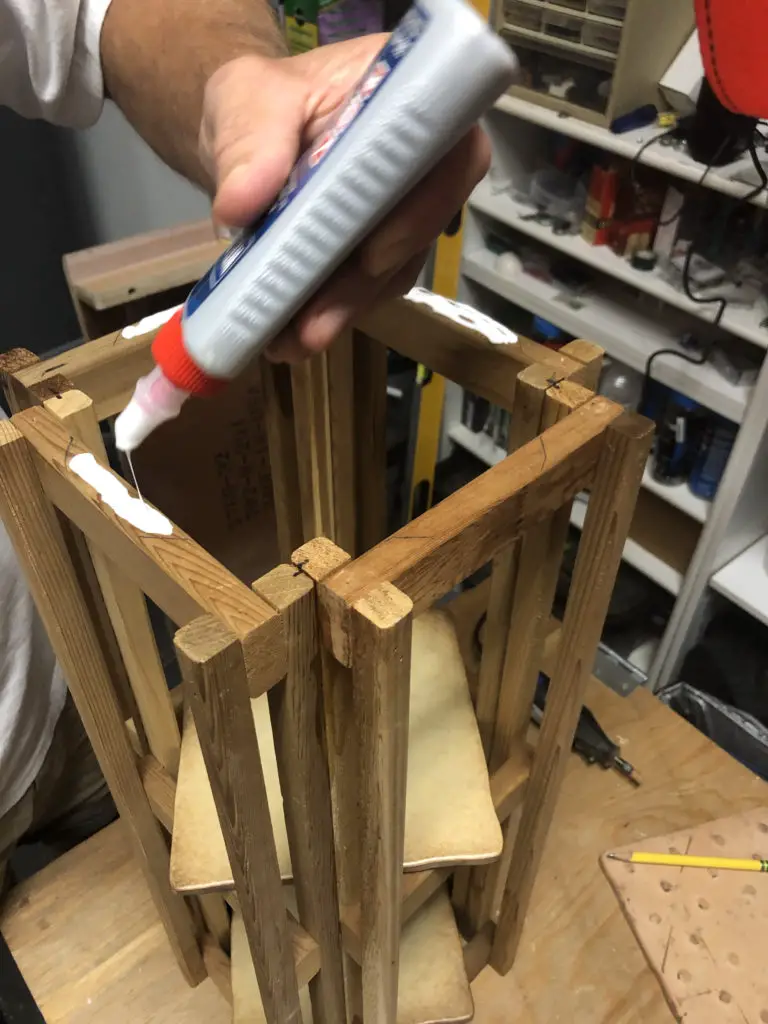
Step 1 in Making this 3-Tier Plant Stand, Glue Wood Pieces Together…
We took the 4 best pieces of wood from the stash, and glued them into a square (as shown below). Next, we used some zip ties to attach them tightly while the glue dried.
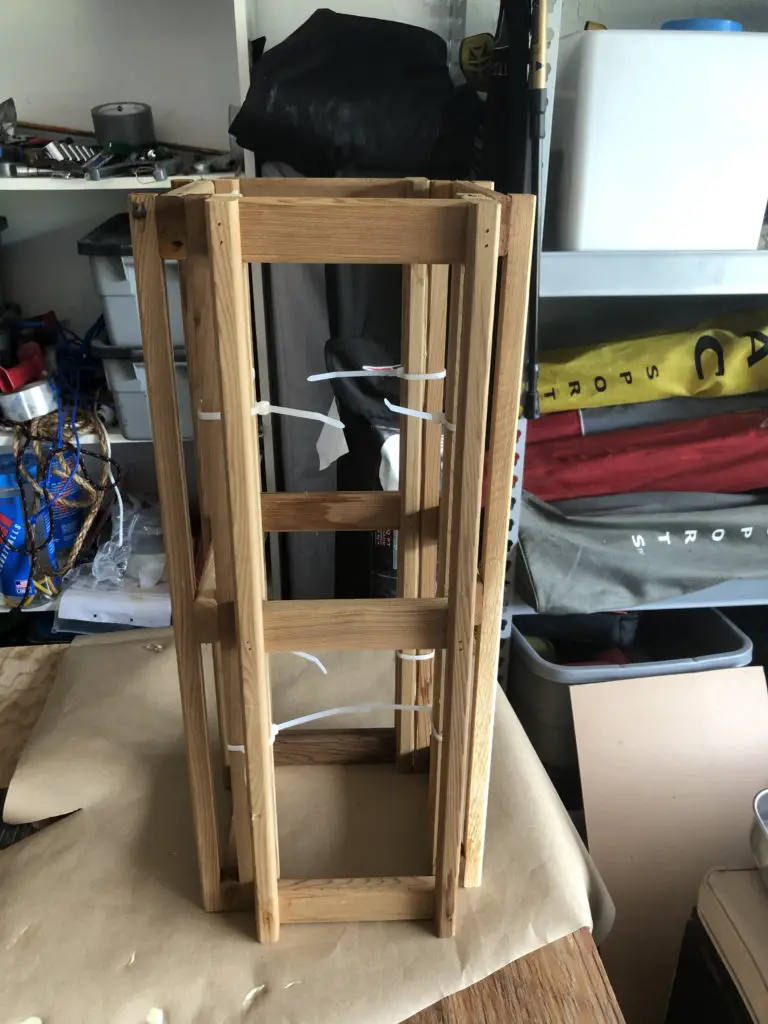
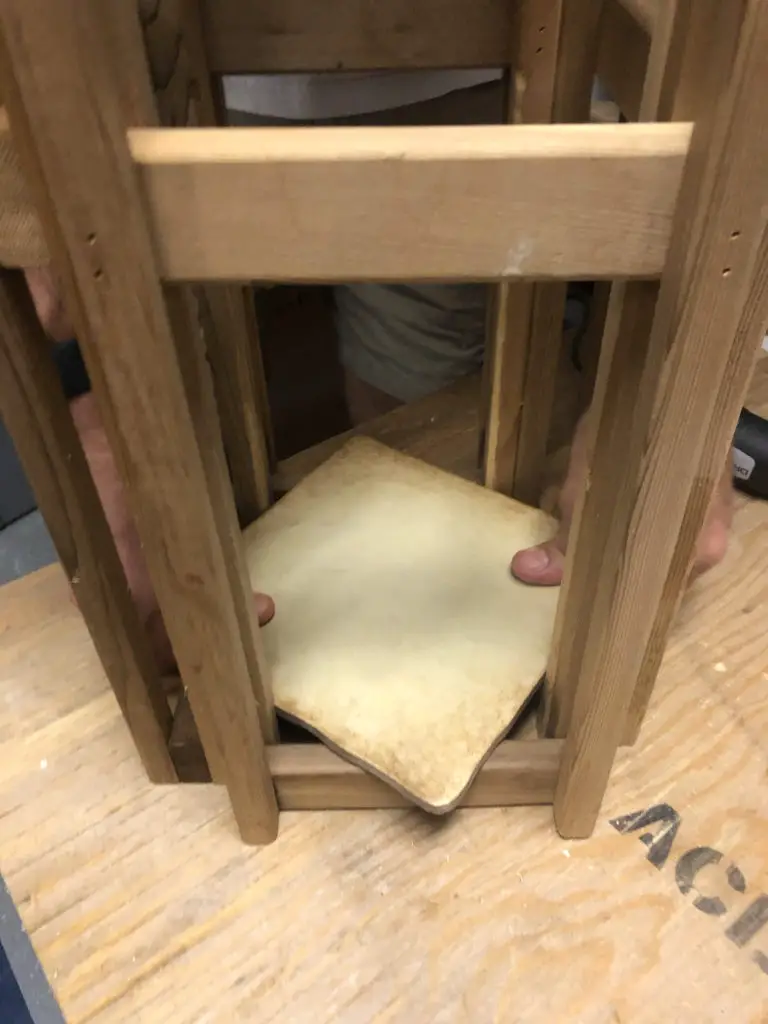
Step 2, Insert Tiles…
We waited for the glue to dry overnight, then took off the zip ties. When we tried to insert the tiles, we realized they wouldn’t fit. But, not to worry. My smart husband used the Dremel tool to shave the sides of the wood down slightly.

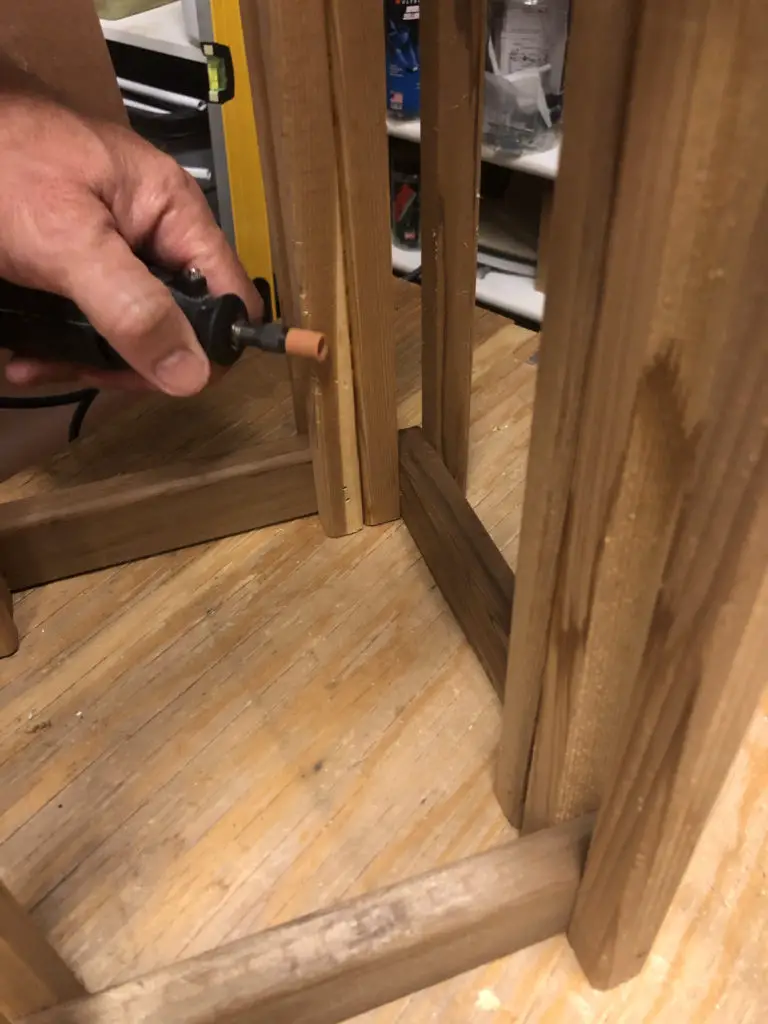
Once the wood was shaved enough we inserted the tiles and pushed them in so they were nice and tight.
We glued the last tile to the top.
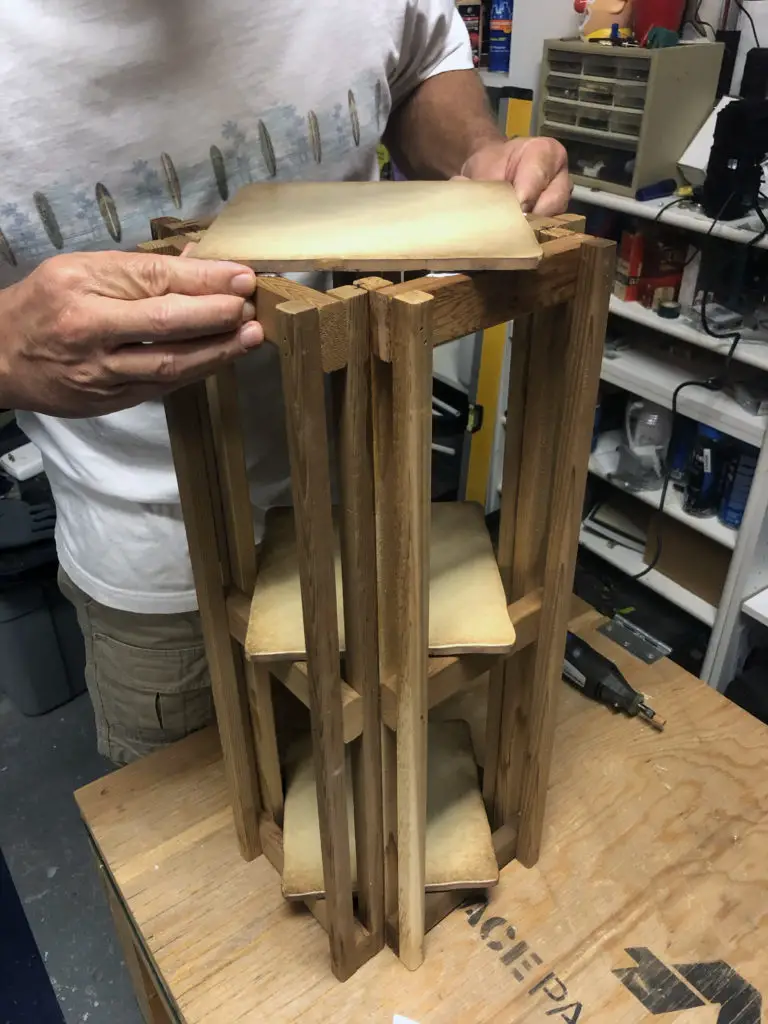
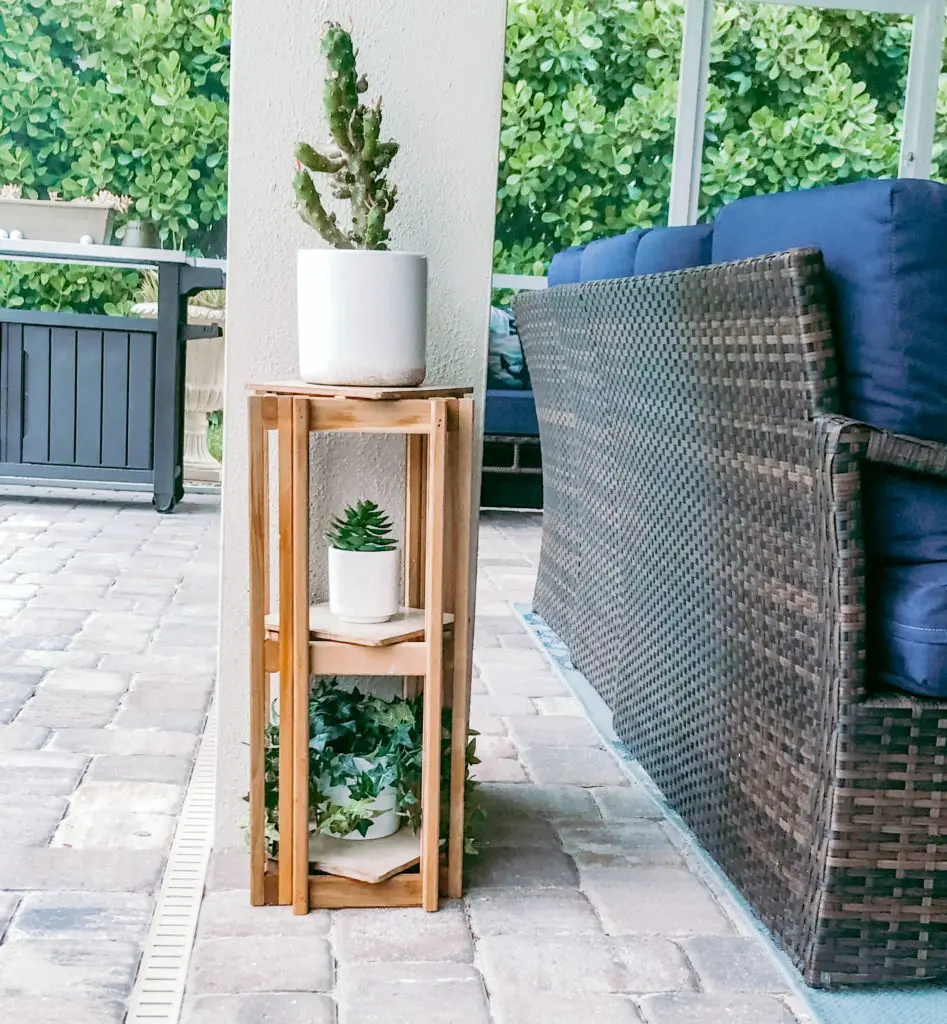
That was it! I thought about painting it, but am liking the natural wood look. Finally, I brought it outside by our pool and added some plants to it. Overall, I think it looks pretty good, and it didn’t cost us a penny. What do you think?

PIN FOR LATER…

14 Comments
Wow!!! This is such a great project! It turned out amazing!! I love it!
-Emily
Thanks so much! Not bad for free stuff.
This is a perfect way to use some of that free wood. I really like how you put the tiles on an angle like that rather than just putting plant bases of some sort perfectly squared off inside the stand. Super cute.
Thanks, Tara. Sometimes my husband comes up with good ideas. LOL!
Very lucky you scored those pieces. You made great use of them. Amazing creativity!
Cindy
Thanks, Cindy. I am glad you like it. It was fun working my husband to come up with this. I am lucky he is creative (and comes home with other peoples trash….LOL).
What a great project. Way to re-purpose some pieces to a small outdoor table. It would look great inside as well. Love it Jodi!
Thanks so much, Terrie! This was a fun little project to put together.
This turned out great! Y’all are so creative and it goes perfectly with your outdoor space.
Thanks, Danya! This was a fun challenge and a fun table to put together.
That’s just something I love so much!! Finding stuff on the street and then doing this!!
Great job and very creative. This is truly a trash to treasure project!
Love it!
Teresa!
Thanks, Teresa! I love doing this sort of stuff too. And I am lucky I have a husband who supports my habit. LOL!!!
This is so cute!! It’s a good thing your husband picked up all those wood pieces. You guys turned it into something amazing!
Thanks, Michelle! I am lucky to have married a trash picker! LOL