
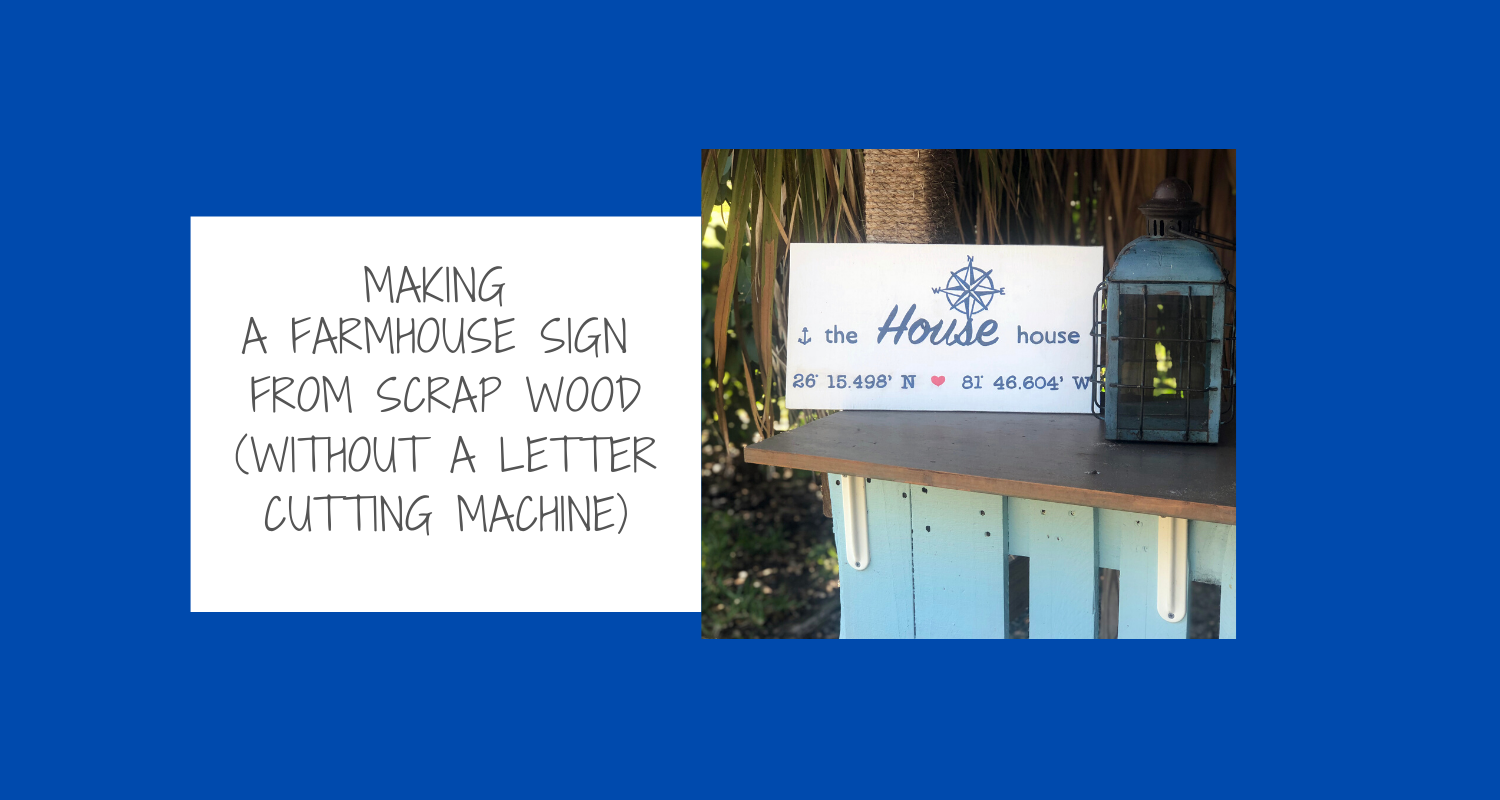
Making a Farmhouse Sign from Scrap Wood without a Cricut or Letter Cutting Machine
I am joining a group of bloggers for a blog hop called $10 on the 10th! This is a fun challenge where we share projects we have made for $10 or under. My project this month cost me $0!!! This month’s theme was upcycling or recycling something we already had on hand. Read below to see what I came up with. Then, be sure to check out what all the other creative and crafty bloggers came up with too, at the bottom of this post.

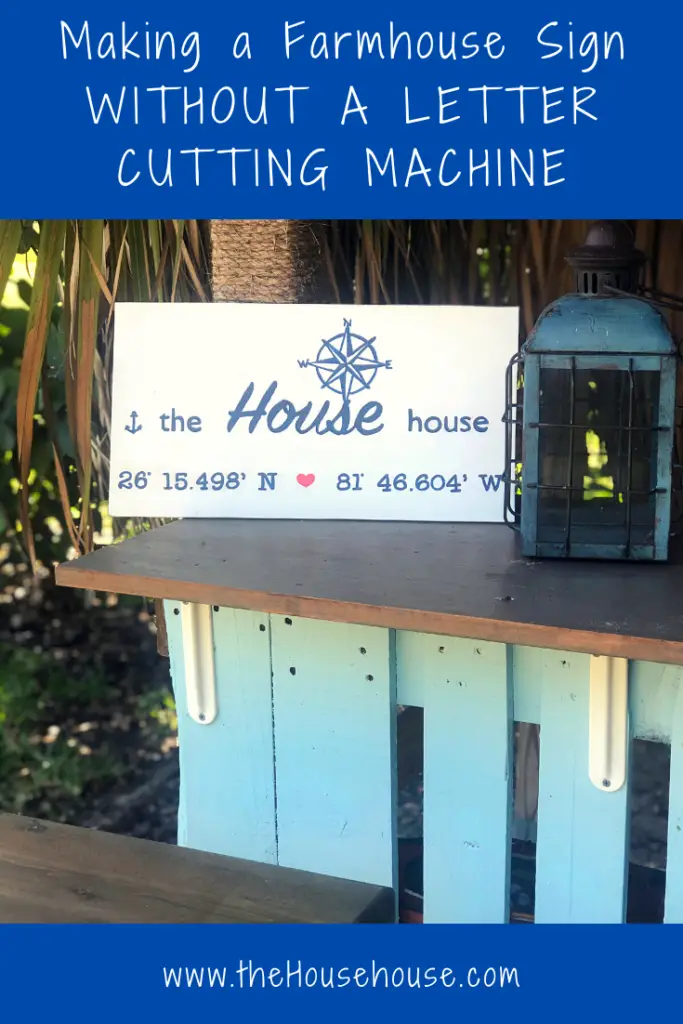
I’ve seen these cute longitude/latitude signs online and I’ve been wanting to order one. My husband and I were cleaning out our garage the other day and I found this piece of scrap wood and thought it’d be a good size to try to make one instead. I don’t have a Cricut or Silouette machine to make the letters so I thought I would show you how to make a sign like this without one. I wasn’t sure if I could do it, but think it came out pretty cute! Keep reading for the full tutorial on making a farmhouse sign from scrap wood.
This post contains some affiliate links for your convenience (which means if you make a purchase after clicking a link I will earn a small commission which helps keep my blog up and running but it won’t cost you a penny more)!
Materials Used in making a Farmhouse SignPlywood (I used a scrap piece from my garage) |
Step 1 – Painting the Wood
Here is the scrap wood I found. It is approximately 9 1/2″ H x 18″ L. First, I used some left over white paint from the garage to paint my piece of wood.

Step 2, Stencil the Letters
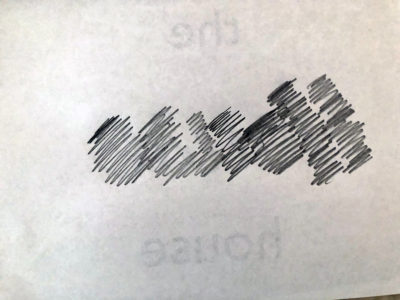
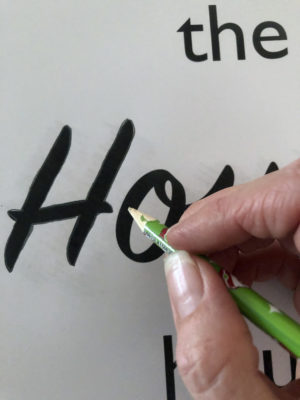
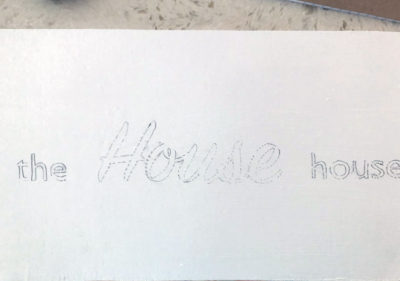
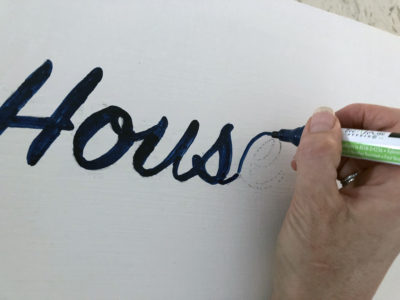
If you have a Cricut or Silouette use those to make your letters. I don’t so I used this technique instead. First, I printed each word in a font I liked on regular paper from my computer. Next, I flipped the paper over and scribbled all over the words, and then flipped them back over and traced them again so the pencil would transfer to the wood.
Step 3, Paint the Letters
Once the letters were all traced out, I used a paint pen in the color navy to fill them in. If you make some mistakes, you can take a small paint brush and paint over them in white paint.

Step 4, Repeat…
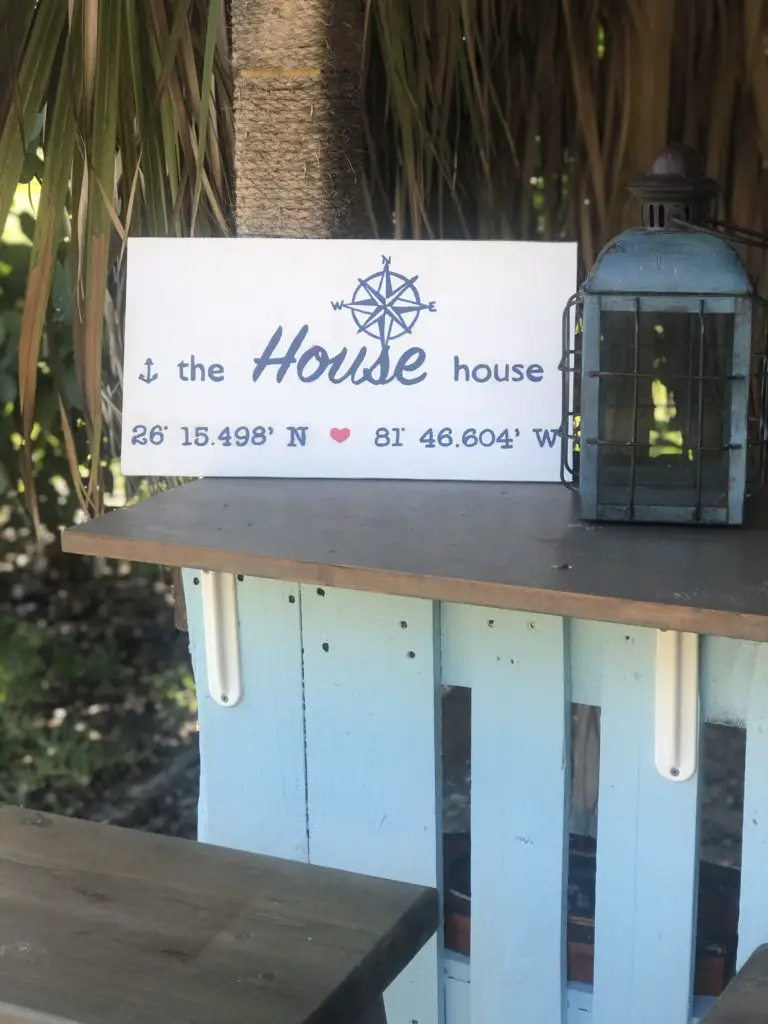
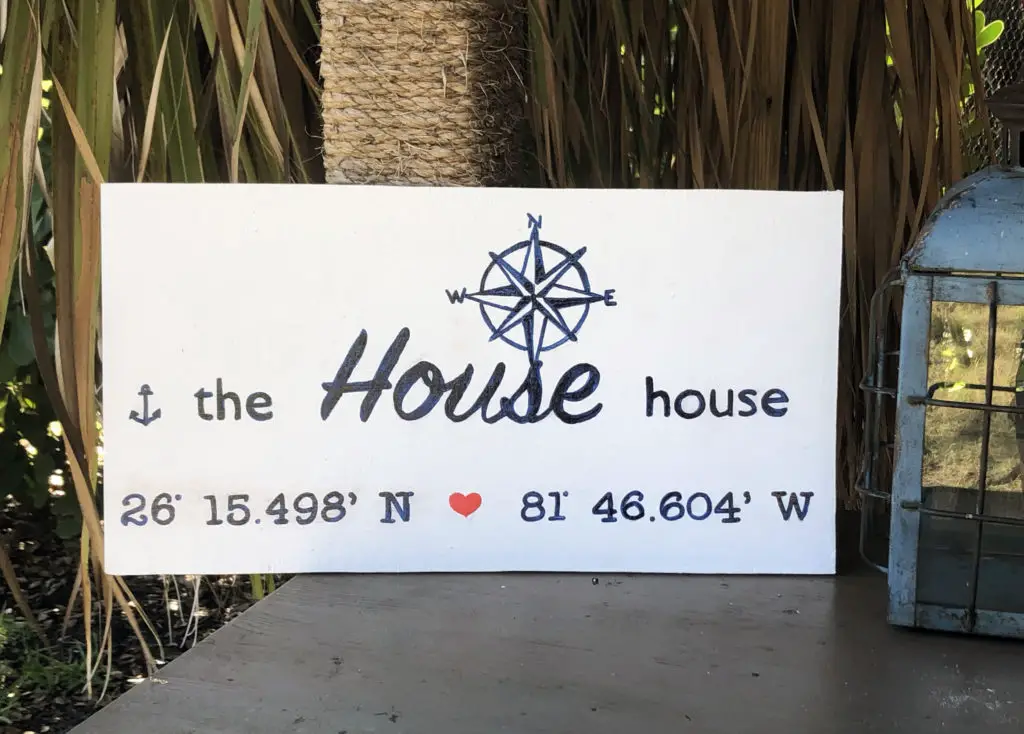
I repeated this process with the compass rose and the latitude and longitude coordinates to our house. I ended up adding a small anchor and heart too…


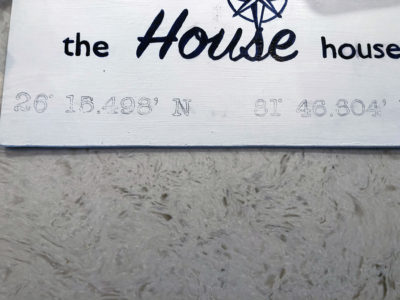
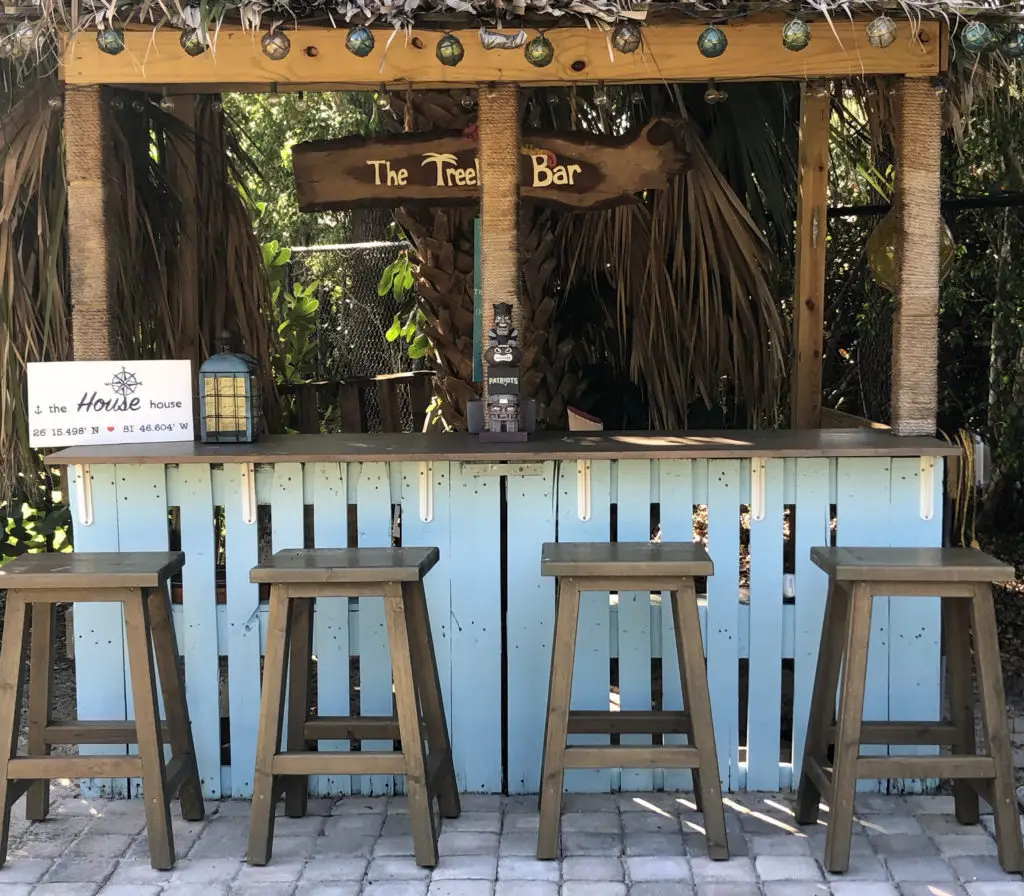
And here it the final result. Some of the letters aren’t perfect, but I am okay with that. I am not sure if it will stay in our Tiki Bar area or if will eventually get hung up somewhere in our lanai. For now, I am loving it here. (I might even add a frame to it, too. We’ll see.)
Here are all the other amazing projects that all my creative blogger friends came up with….
PIN FOR LATER…


12 Comments
Jodi what a perfect sign to place on your hut bar!!! I love the tutorial on making your sign. I have done this technique a lot and still do. It is so easy and doesn’t require much work. Happy Mother’s Day Jodi!
Thanks, Terrie! I am glad you like it. It is an old and easy technique, but works pretty well. Happy Mother’s Day to you!!!!
Your sign looks wonderful and that’s a great technique for lettering – I’ve used it a time or two! I think it looks great at the Tiki Bar!
Thanks! I am glad you like it. Yup, it is an old and easy technique but it works in a pinch! 🙂
So cute!!!! I love these. We are building a new pool and these would be great in the bar area. Plus, my husband is a wood/ leather worker and he make Lat/Long bracelets for people. I may have to surprise him with one of these!
Oh how perfect. We have a pool too, and it might end up hanging somewhere around it. Those bracelets sounds so cool!
Such a fun and cute sign for your hut bar! Thank you for sharing your technique and creativity.
You are welcome! And thank you for sharing yours!!!
It’s darling. Perfect for summer.
Thanks, Katie! I am glad you like it.
Jodi, such a cute sign for your backyard. Can’t beat free scrap lumber for projects like this. I do have a Cricut, but I would have used my adhesive stencils for this project. Printing out on your computer is also a good idea. Pinned.
Thanks, Carol! Sometimes I am glad my husband saves everything. This piece of scrap wood sure came in handy!