
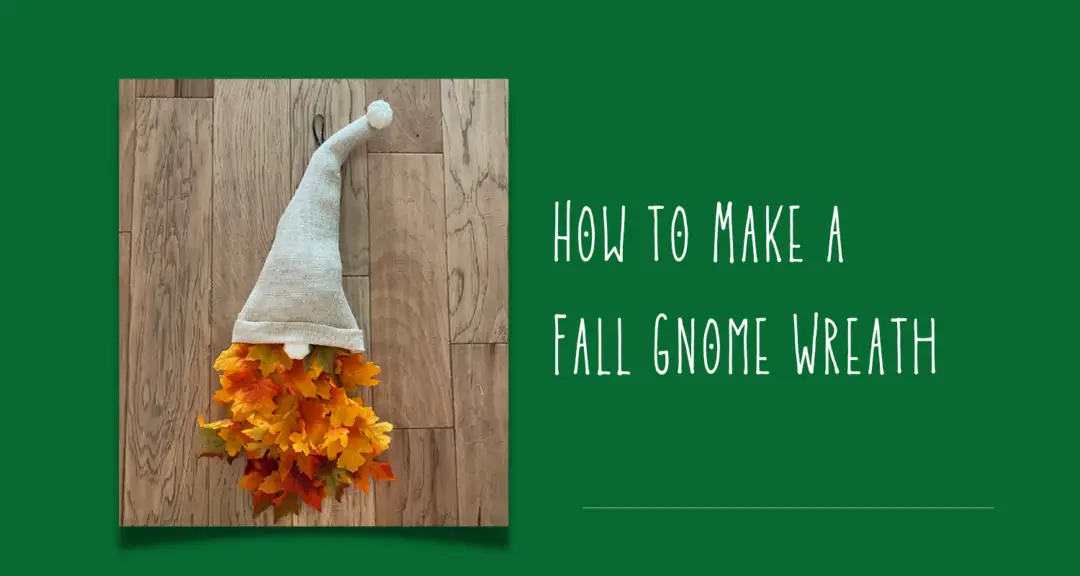
DIY Fall Gnome Wreath
Our DIY Challenge group is back together again hosted by Shae from Sweet Southern Grace. This month is about Fall. More specifically, ANY Fall DIY we wanted. I decided to make this DIY Fall Gnome Wreath after seeing one on Pinterest. It wasn’t to hard to make and it came out pretty cute. Here is how I did it..
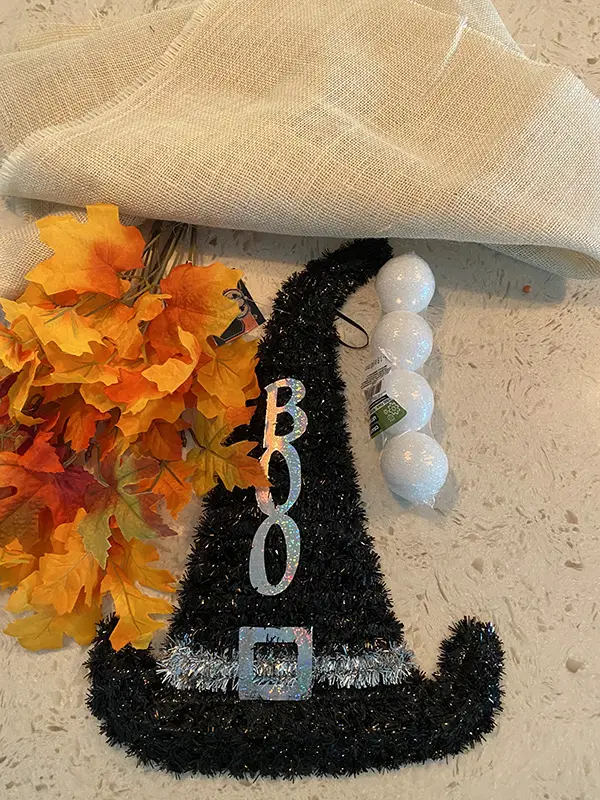
| Materials Used… |
| Witch Hat from Dollar Tree |
| Burlap |
| Glue Gun |
| Fall Leaves |
| Scissors |
| Mini Pumpkin or Stryofoam Balls for nose |
*This post contains some affiliate links for your convenience (which means if you make a purchase after clicking a link I will earn a small commission which helps keep my blog up and running but it won’t cost you a penny more)!
Luckily, I already had most of these materials on hand. I did have to buy the witch hat and the Styrofoam balls (but didn’t end up using them).
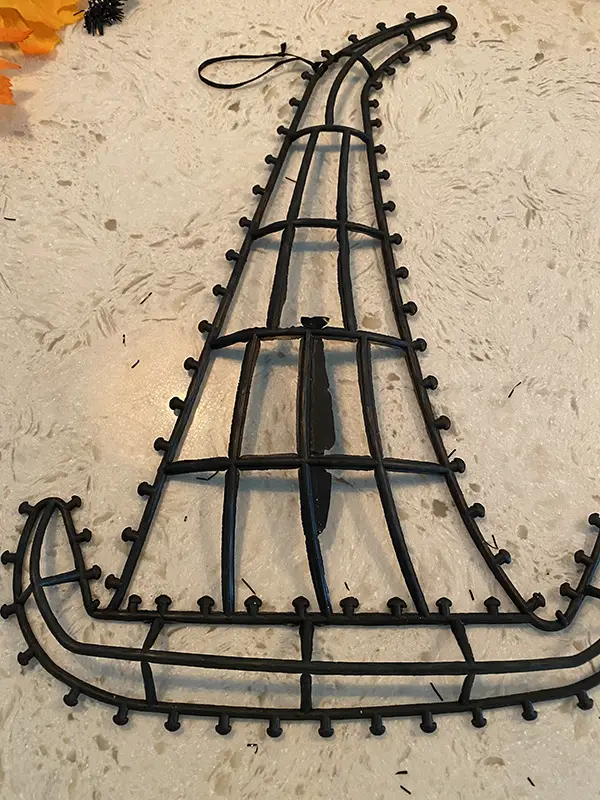
Step 1, Get the hat ready…
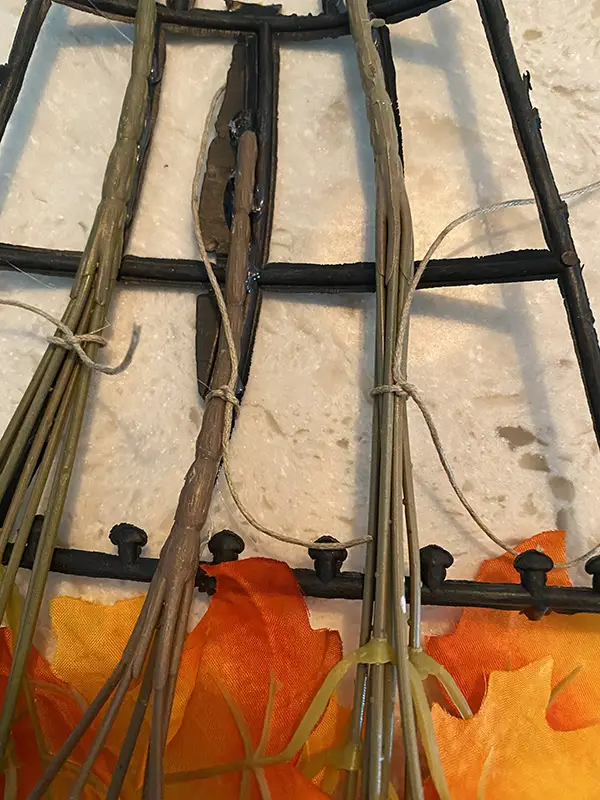
First, I took off the tinsel from the witch hat. Then, I clipped the knobs off and the bottom piece of the hat. I made sure to keep the hanging loop in tack so I could hang it easily later.
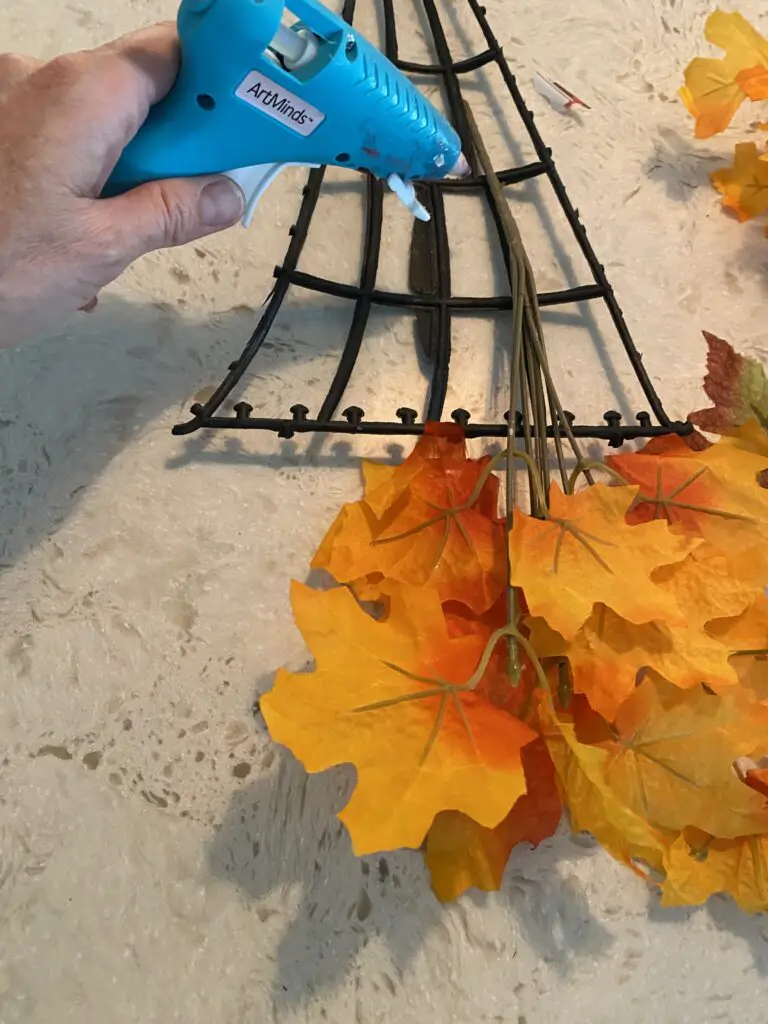
Step 2, Make the Beard…
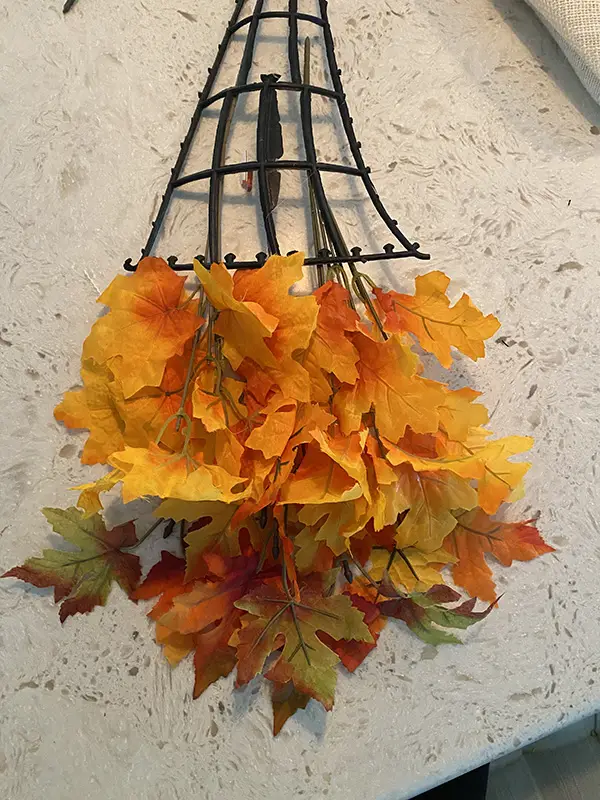
I worked on the beard next and used 3 stems of leaves that I already had from Dollar Tree. I glued them to the back of the hat, making sure to glue them in the shape of a beard. Then I tied them to the hat to make sure they stayed. You could used floral wire here but I didn’t have any on hand. I wasn’t too worried about them being perfect because I knew I would arrange and fluff them later to make them look better.
Step 3, Onto the Hat…
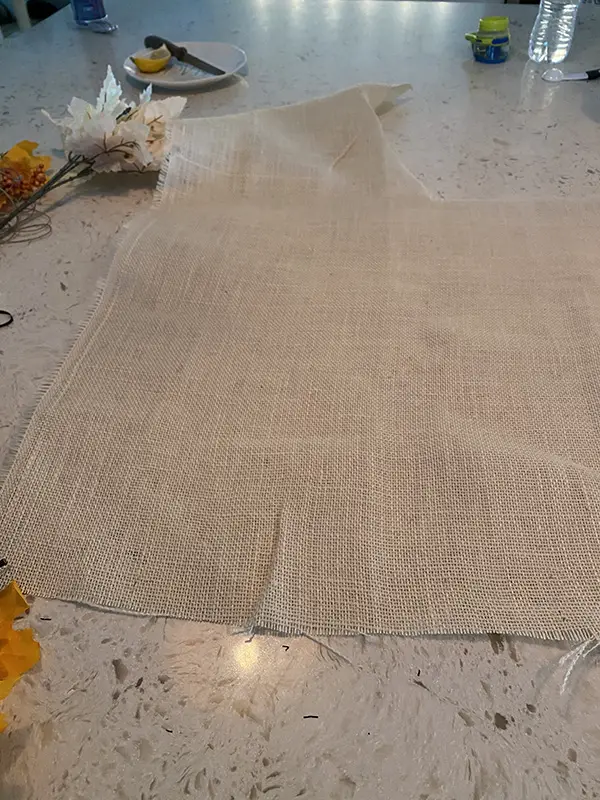
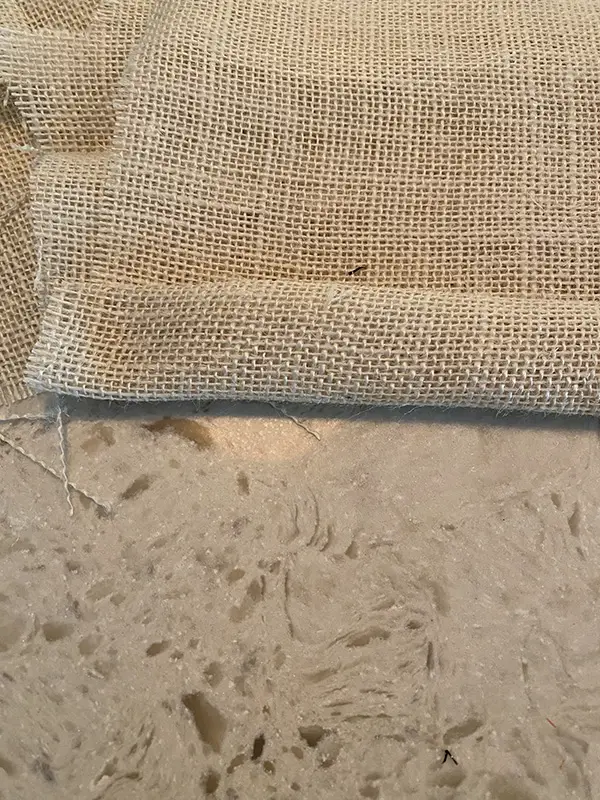
The burlap material I used was left over from this project and was perfect for my gnome hat. I just folded a large piece in half, then flipped up the edge and used my glue gun to glue it in place – making the rim of the hat. Next, I formed the piece of burlap around the witch hat, as best as I could. This was the hardest part of this entire project. I had to trim the burlap a few times to get it to fit. I used my glue gun to glue it in place making sure the seem was in the back. When I had it looking the way I wanted, I cut a small hole for the hanging ribbon to peak through so i could hang it up easily.
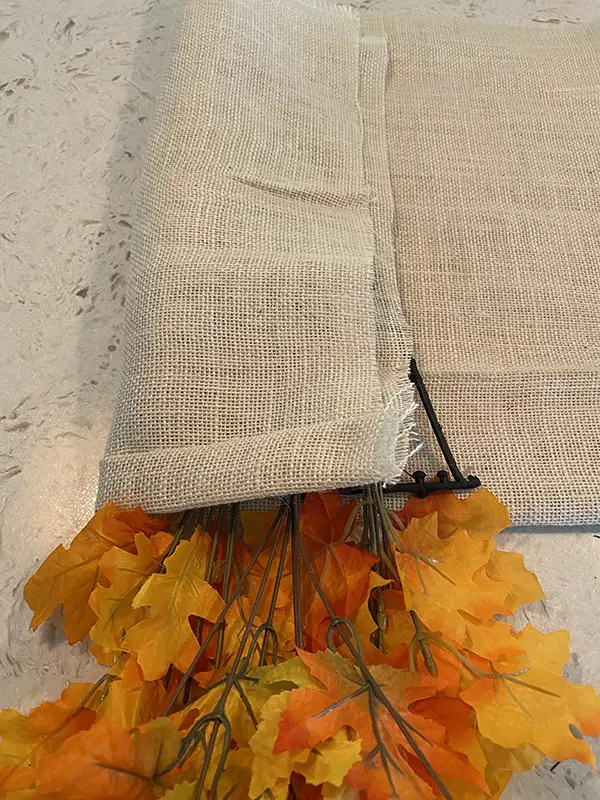
Once I had the hat the way I wanted, I flipped it over and fluffed up the beard. I ended up gluing some of the leaves into places where the plastic wire showed. I also used some of the left over cut up pieces of burlap to stuff the hat a bit to make it have more shape.
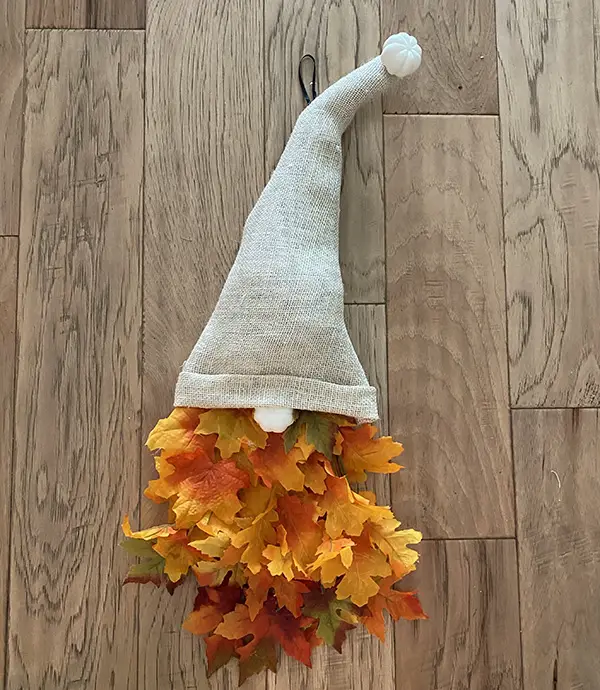
Step 4, Add a nose…
Last, I added a nose. Originally, I was going to use one of the Styrofoam balls I bought. However, I had these small pumpkins so tried using one of those instead and thought it looked pretty cute. I attached it using my glue gun and added another one to the top of the hat too.
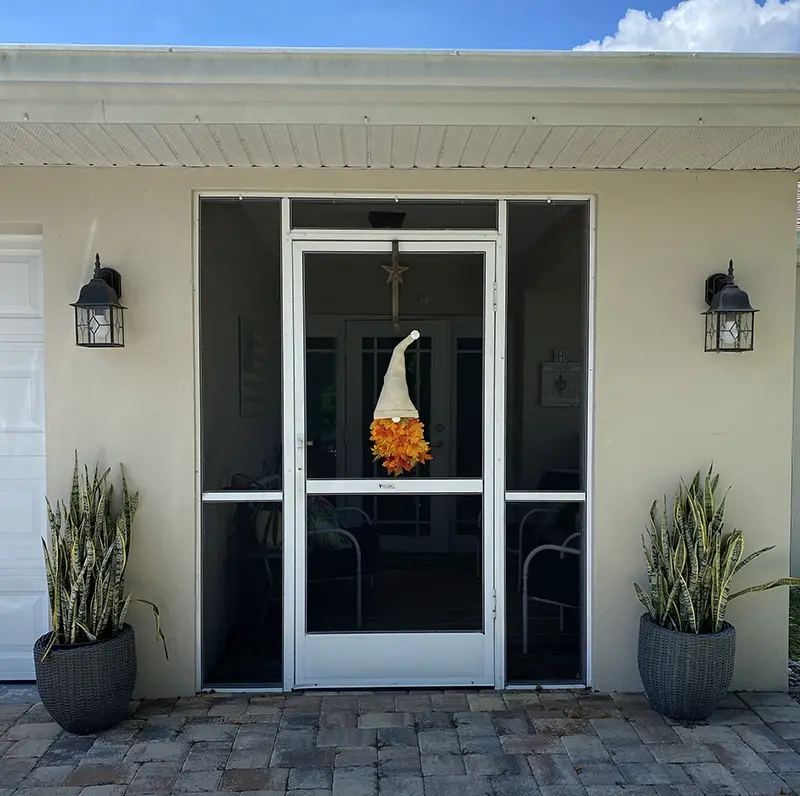
Once it was all done I continued to fluff up the leaves as best as I could until I was happy with the look. And here it is. Pretty cute, right?
PIN FOR LATER…

Check out all the other projects this month…

6 Comments
Your Fall gnome wreath is so cute and adorable, Jodi! Looks awesome on your door to welcome Fall!
Thank you so much, Gail!
Jodi, your wreath is so cute!!! Love it!
Thank you so much!
These are so cute. I’ve been on a gnome kick lately and have been making them with yarn. I’ll have to try one of these. I have the perfect hat frame to use. Thanks for the idea.
Glad you like it! I hope you give it a try.