
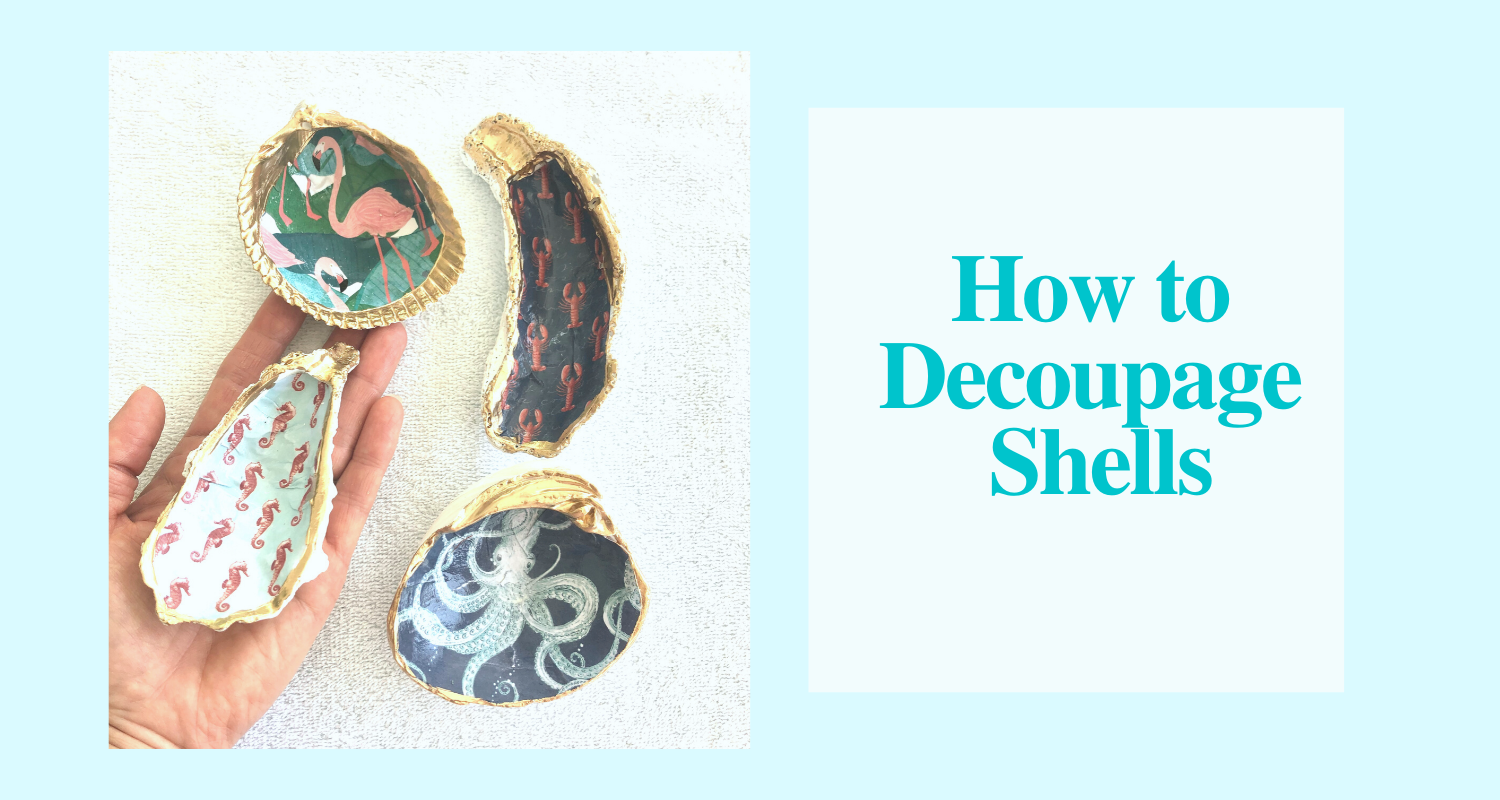
How to Decoupage Shells
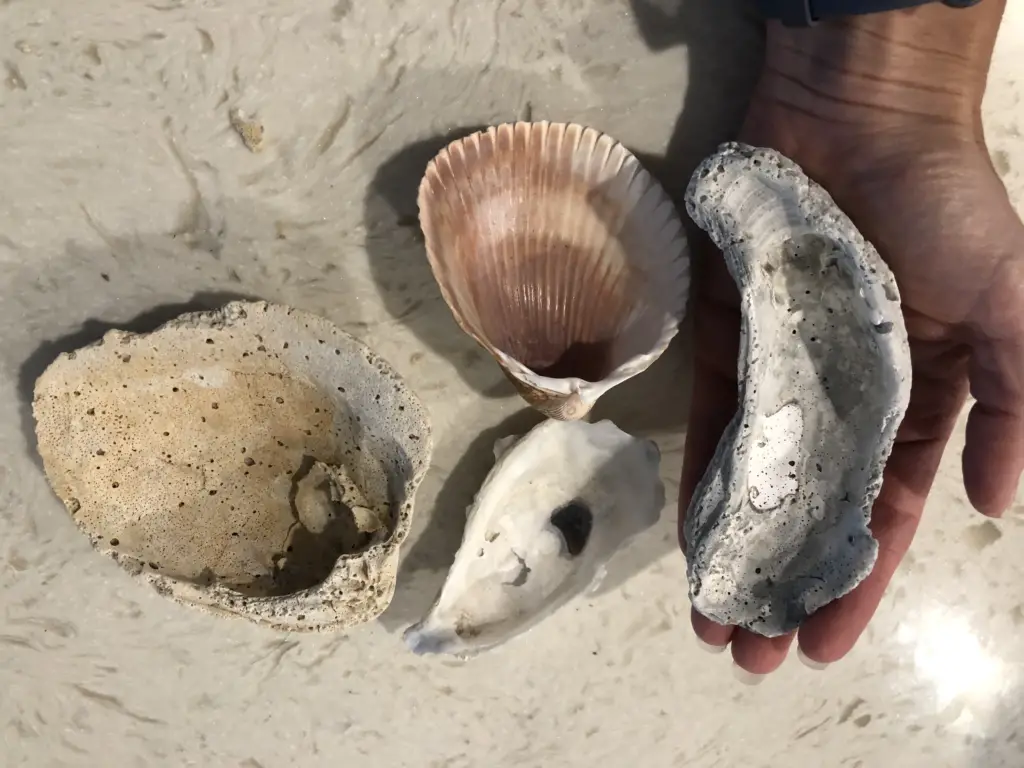
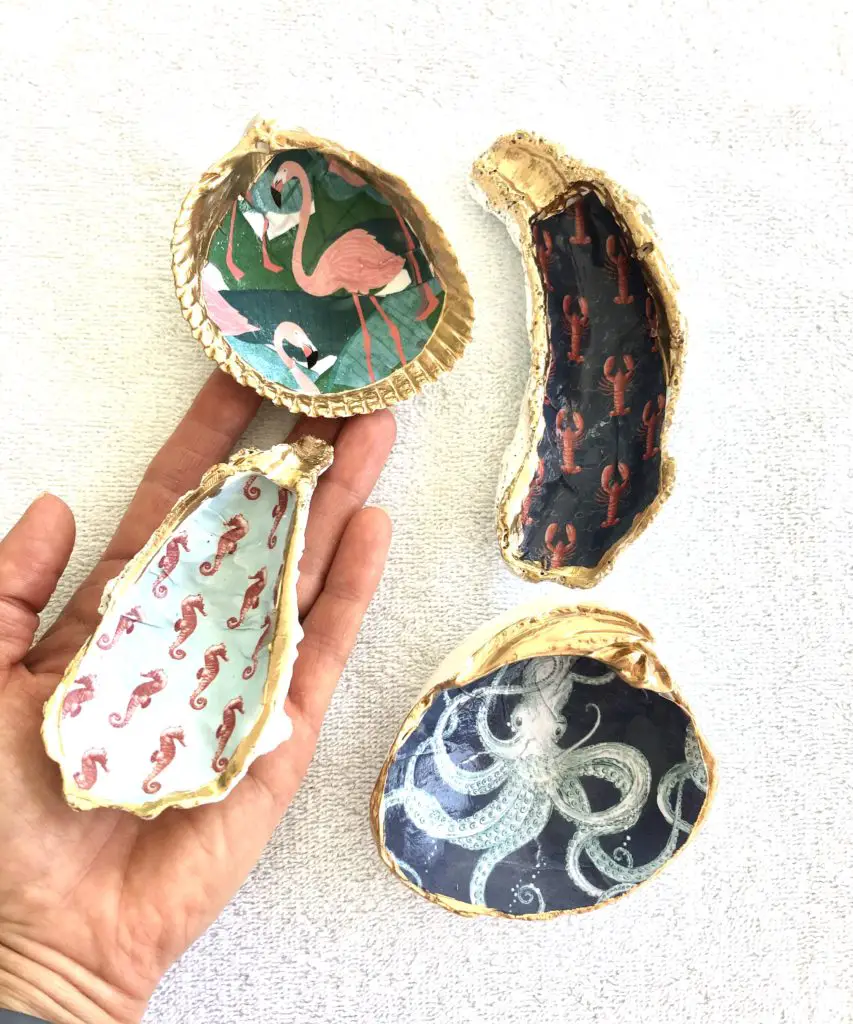
On a recent boat day, we stopped at a beach and found a TON of shells. My friend and I collected a bunch of oversized shells to try our hand at painting them, like the ones we’ve seen in the shops and on Etsy. Here’s the thing, she is a legit, professional and AMAZING artist who can draw and actually paint pictures (check out her work HERE). I am not, so I decoupaged mine instead. Here is how to decoupage shells…
NOTE: I have had such a nice response to these. I started my own Etsy Shop and started selling my creations. Please check it out!
*This post contains some affiliate links for your convenience (which means if you make a purchase after clicking a link I will earn a small commission which helps keep my blog up and running but it won’t cost you a penny more)!
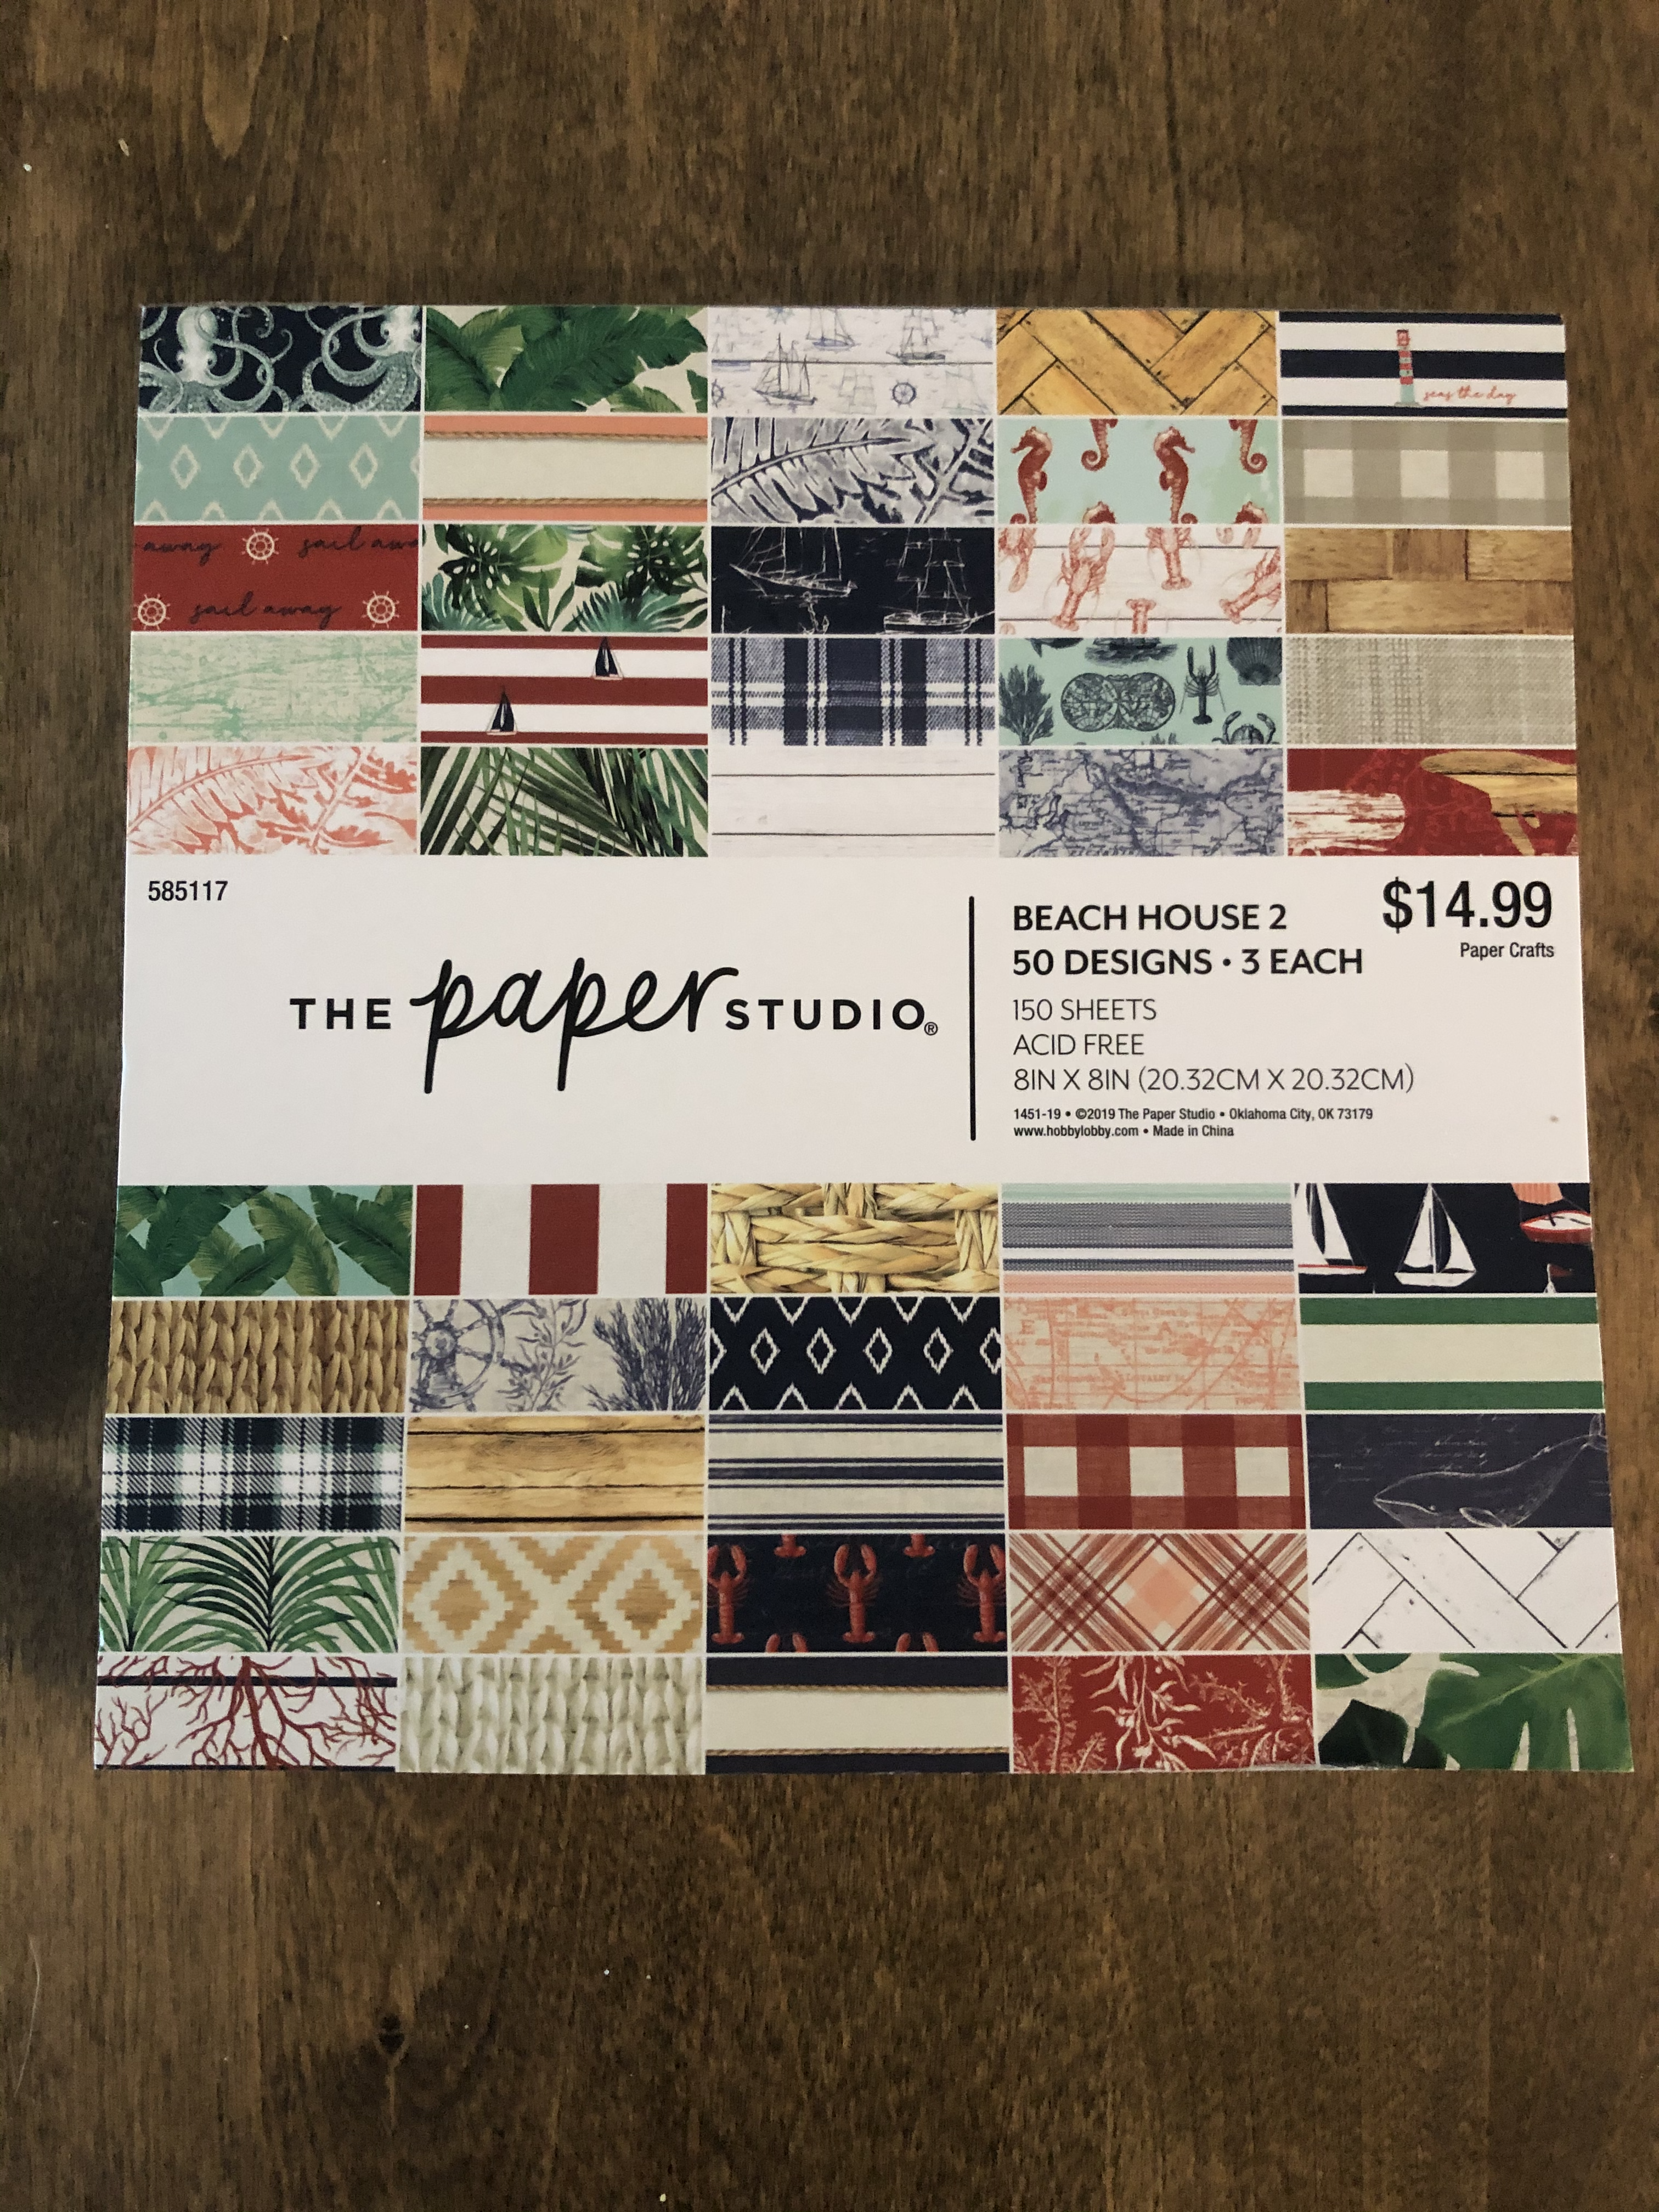
How to Decoupage Shells – Materials Used for this Project…Shells I found on our local beaches |

Book of Paper I used 
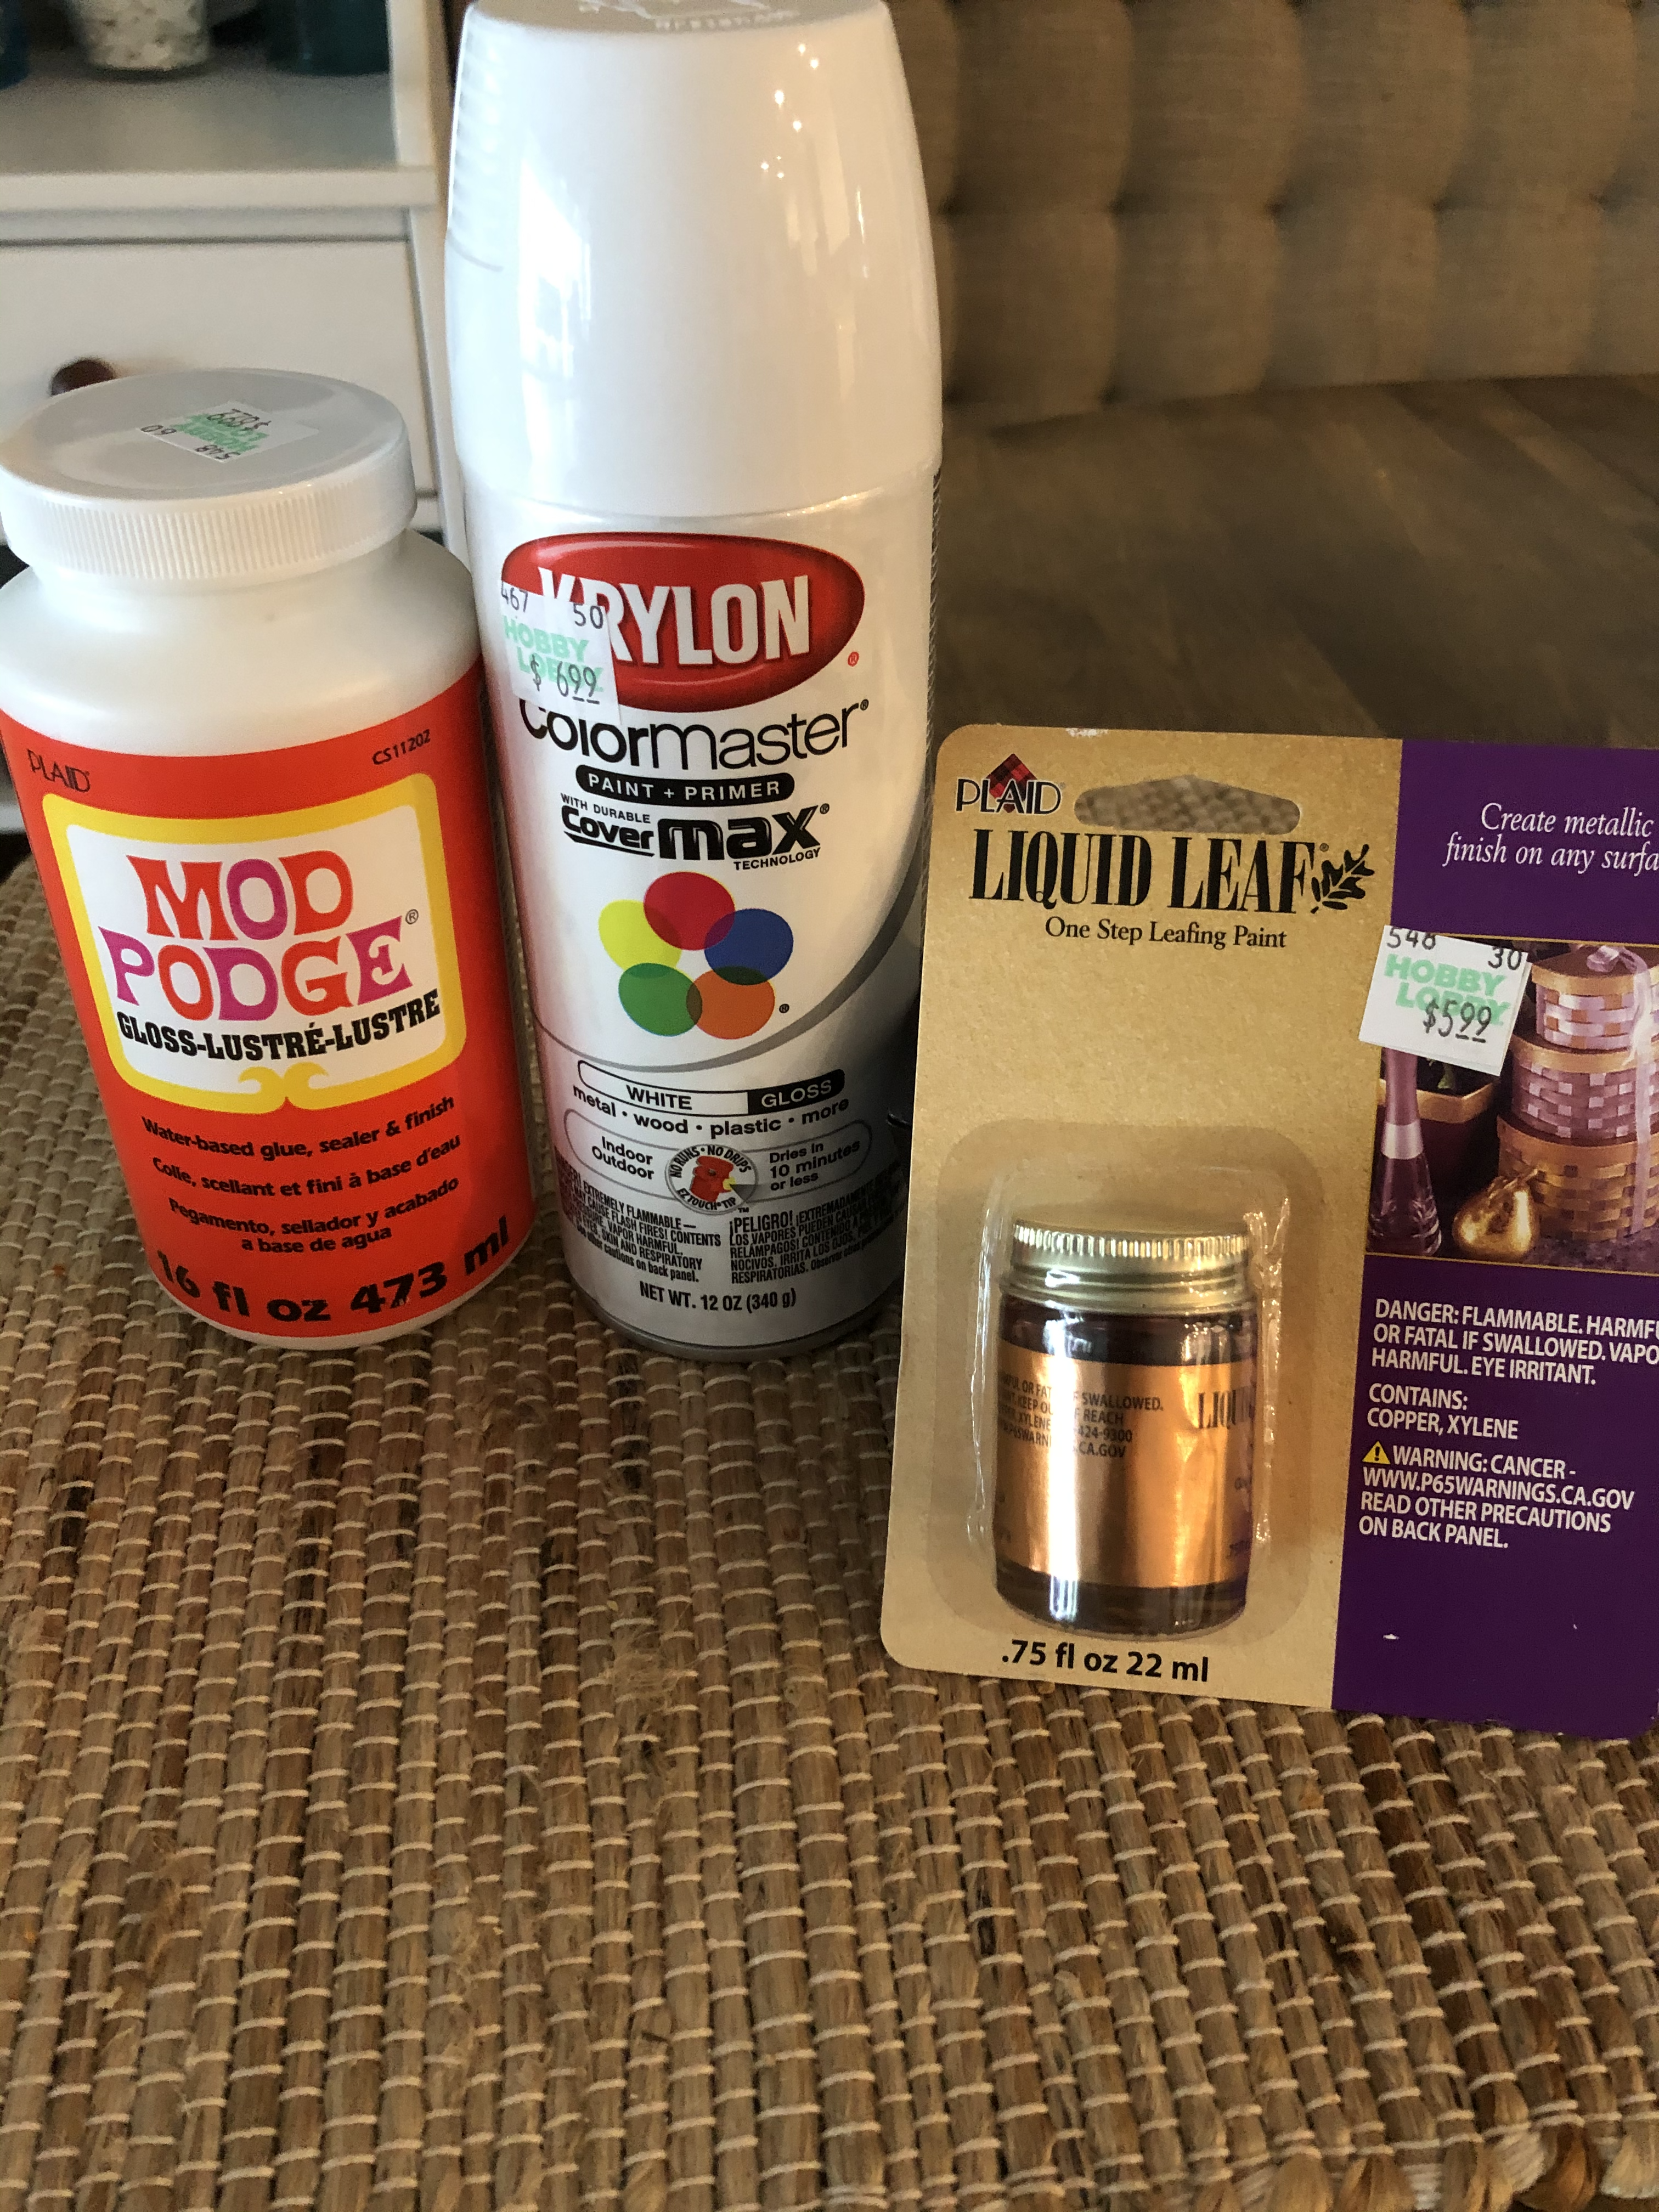
Supplies
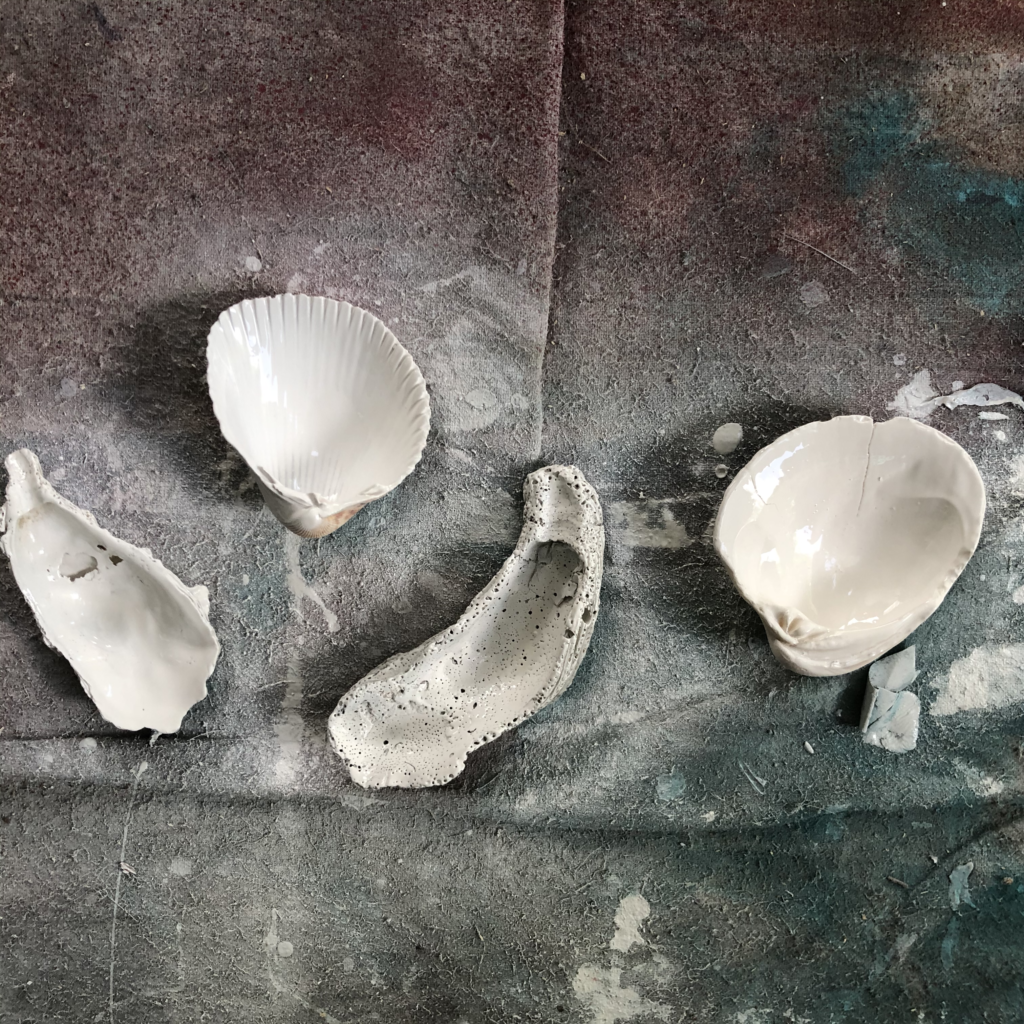
Here are a few of the oversized shells we found.
Step 1, Spray Paint…
First, I spray painted my shells. I used white gloss spray paint because I wanted the shells to have a nice, shiny finish. I sprayed both sides.
Step 2, Cut and Glue Your Paper…
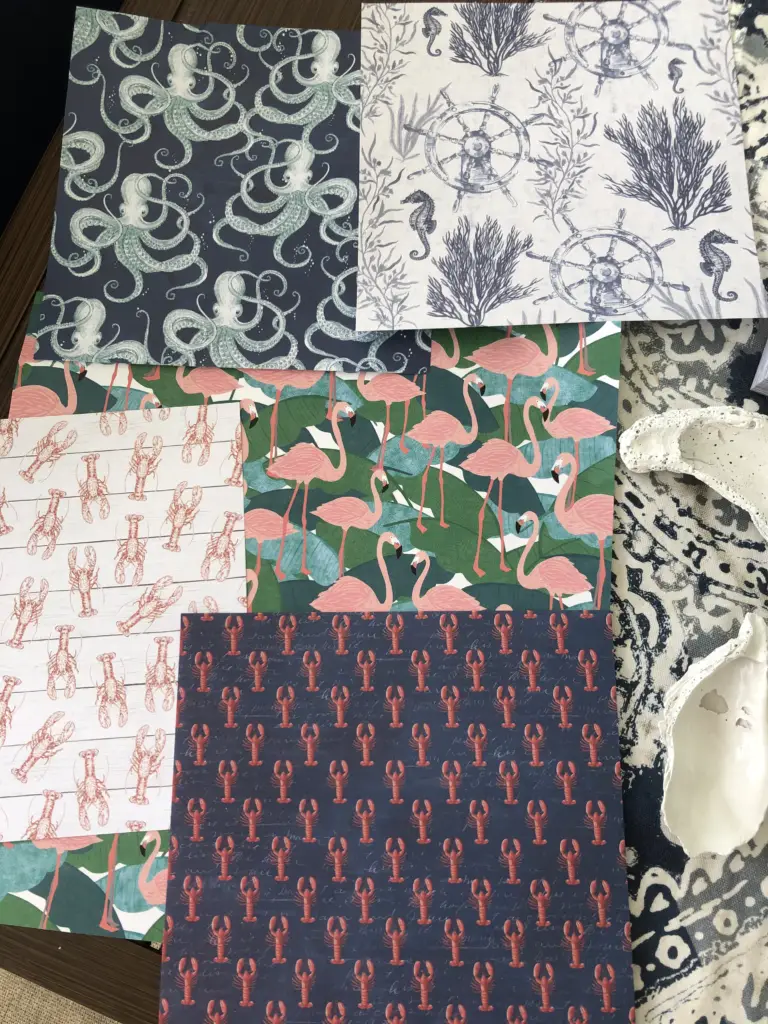
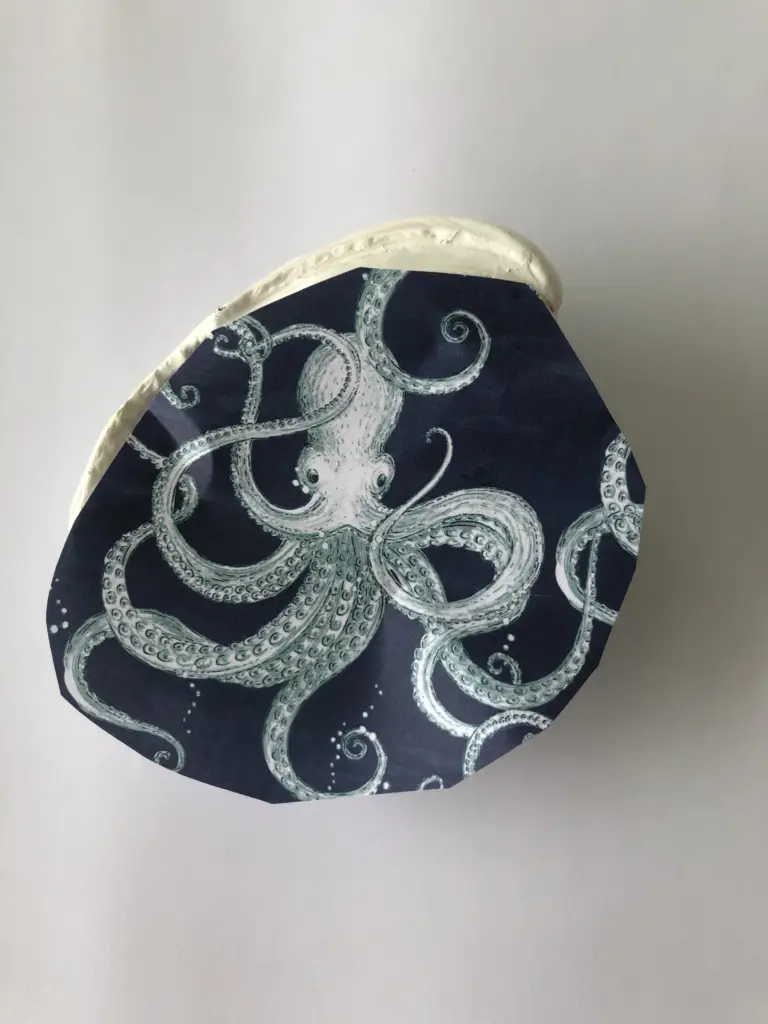
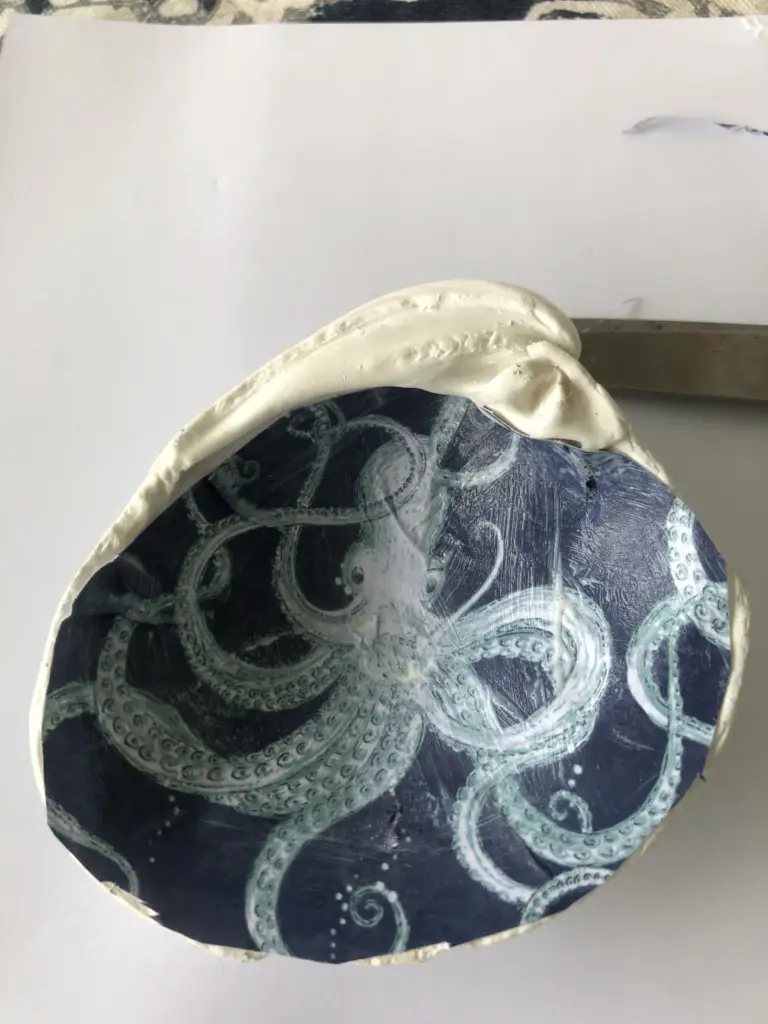
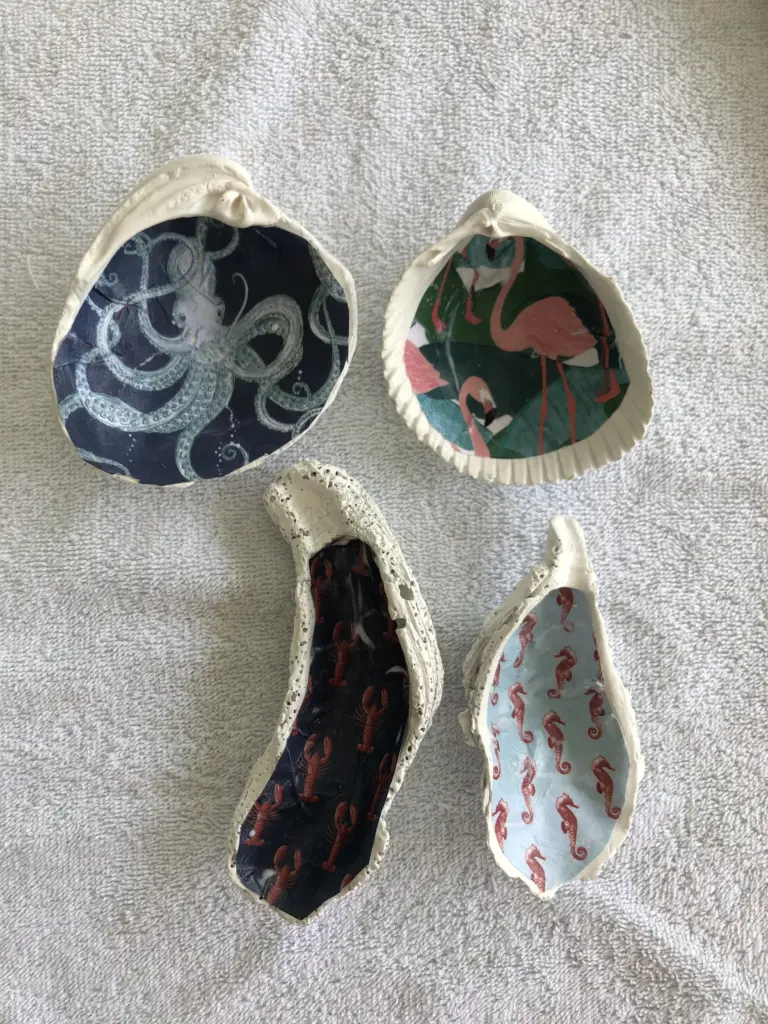
Second, cut and glue your paper to the shell. I purchased this awesome book of paper from Hobby Lobby and selected a few nautical pieces that I liked. You can also use tissue paper, wrapping paper, or paper napkins too (although these have a tendency to rip easier). Use anything with a print that you like.
To fit the paper to the shell, I just flipped the shell right on top of the paper, and used my scissors to cut it out.
Step 3, Glue…
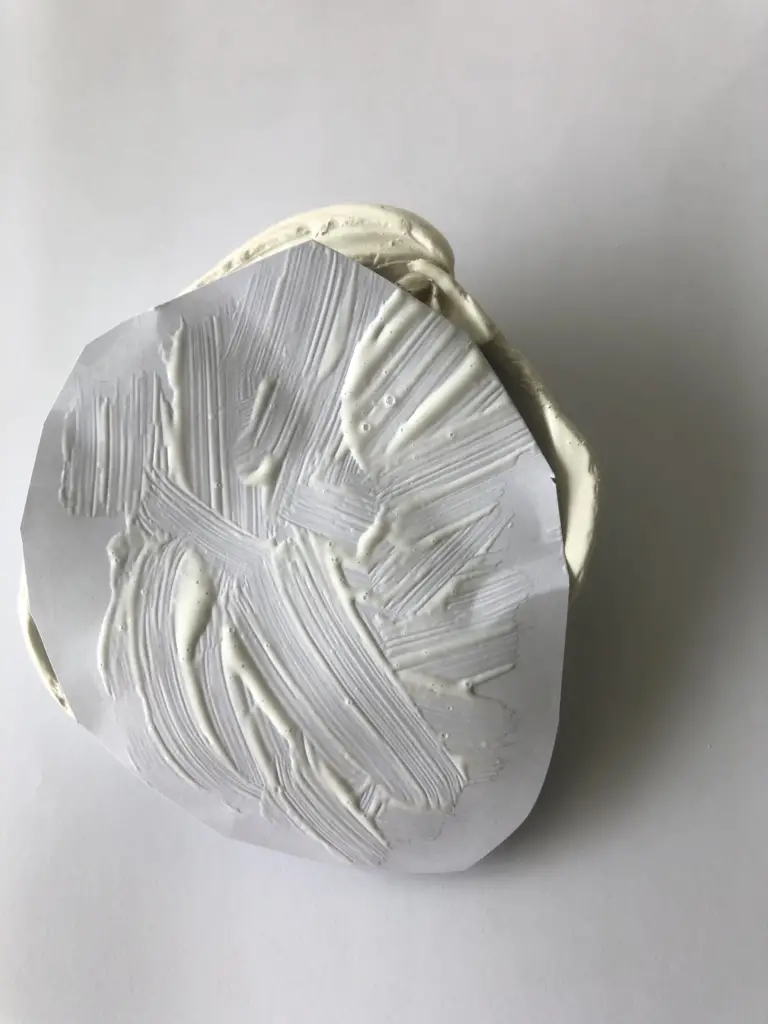
Third, I used Mod Podge to adhere the paper to the shell. I applied a bunch to the shell itself AND to the back of the paper. Once it is placed into the shell, add more to the top. Let dry and then apply another layer to the top. Trim any excess paper.
Step 4, Gold Leaf (Optional)
Lastly, and this is optional, once the Mod Podge is dry, apply a layer of gold leaf paint to the edges. I like how they came out but you can skip this if you don’t like how it looks. OR, feel free to apply gold leaf to the entire backside as well. I just trimmed mine.
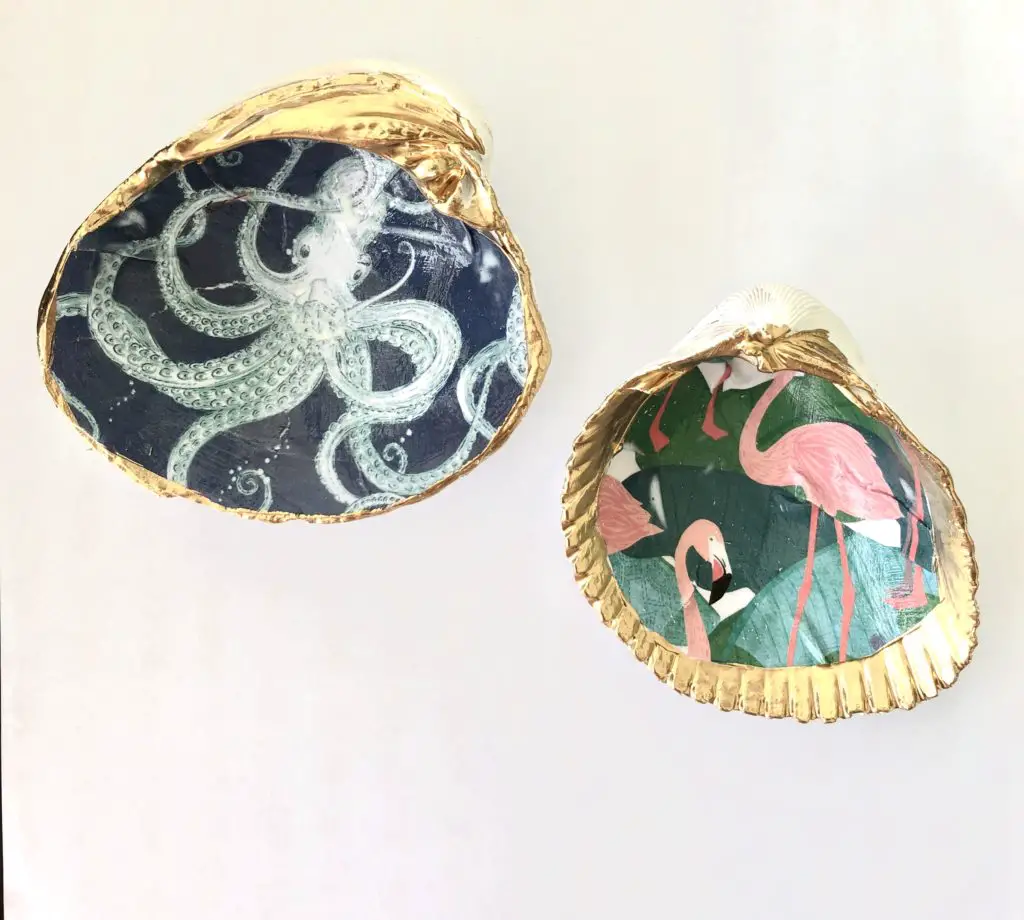
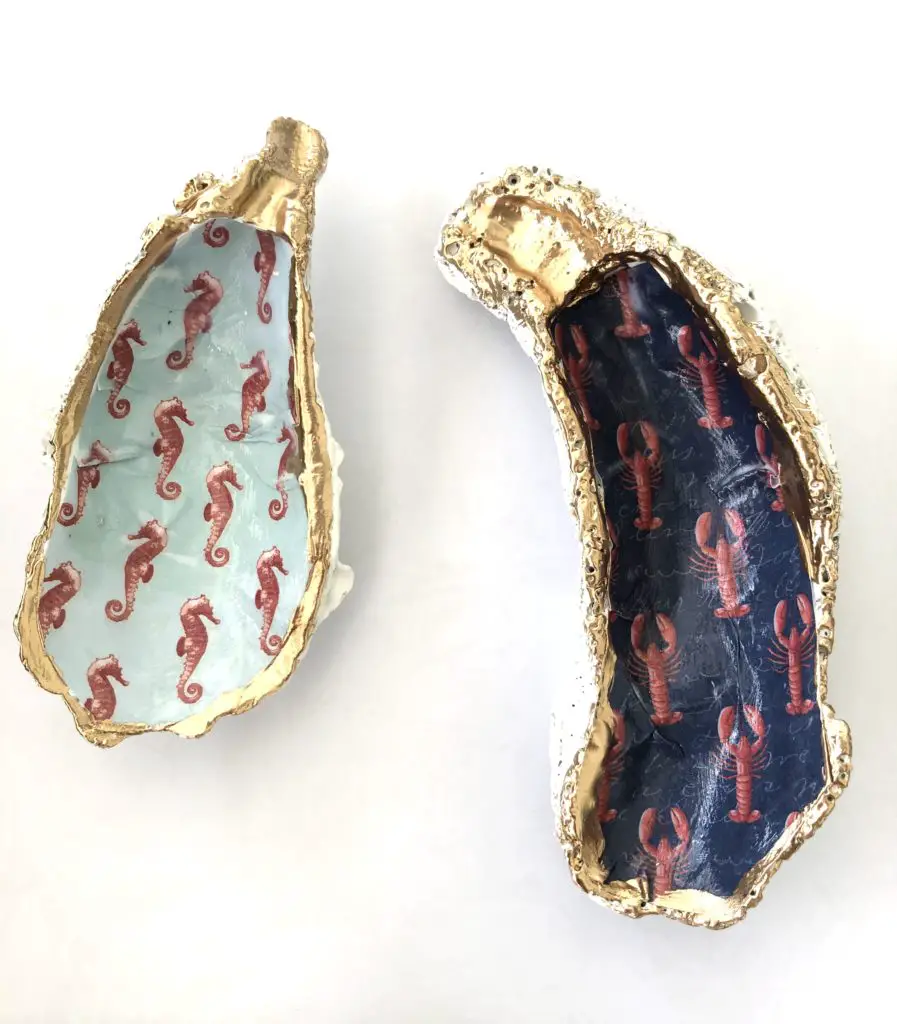
That is it! Pretty simple and pretty fun to make! Use as a jewelry, or trinket dish, or just put on display to enjoy.


22 Comments
Hi Jodi,
These are fantastic! So pretty too and you gave the access all year round in FL.
You should sell these at a fair, especially at Christmas. You would make out well.
Cindy
Thank you, Cindy! Good idea. I will look into that asap.
This is a really cute idea. Thanks for sharing.
Victoria, I bet you could paint some beautiful designs on shells!!!
Such a neat idea. They will go perfectly in your home. Happy Monday my friend.
Thank you so much, Terrie!
How do you get rid of the wrinkles in shells?
It’s hard and you probably will always have a few wrinkles. Using thin paper helps. Decorative cocktail napkins work well.
How do you keep the paper from bubbling up in places???
Lots of practice and patience. LOL. I don’t tend to get bubbles but sometimes it is impossible not to have some wrinkles.
I’ve just had my first attempt at doing this and I’m so happy , I’ve only used pater napkins so far not any other materials ,I also just painted the inside not the outside .
Nice! Yes I’ve gotten much better at these over time and usually only paint the inside nowadays too. They are so fun to make.
Can you use fabric material?
I have never tried that myself, but I don’t see why not. As long as you use enough Mod Podge to protect it.
I have found fabric to be better than paper. It is soft, pliable, with very thin edge lines, no wrinkles or tears. If you find a good batch of “fat Quarters” in a quilting shop or hobby store, you can have a variety of fabric designs to choose from at a reasonable price. I have only used cotton so experiment if you want with other fabrics. The thinner the fabric the better for me. Gabee
Wow! Good to know. Thank you.
Beautiful! The link to the paper doesn’t work. Would it be possible for you to add another link for the same type of paper? I’ve tried paper napkins but they rip so easily. Would love to try something else.
Unfortunately the paper I used from Hobby Lobby is discontinued. Here is something sort of similar…
https://rstyle.me/+NsSiolKHrZ2DRyuEX3FsPg
Jodi, I love your shells and, especially, the octopus because in real life they hunt for shells, on the ocean bottom, to live in. There are even some small enough to live inside these shells! Thanks for sharing how you did it and best to you with your business.
I have friends who have found tiny octopus before, living in a shell. So cool!
Thank you so much. I have had a nice response and great success with my shells, and had a great holiday season selling on Etsy and at local shows. I appreciate your response. Happy New Year!
Can also use photos! Laser jet is best to copy photo then use modge podge photo transfer …also can use tissue paper taped to piece of computer paper..look on utube
Yes! Thanks. I have since figured that out. So many options!