
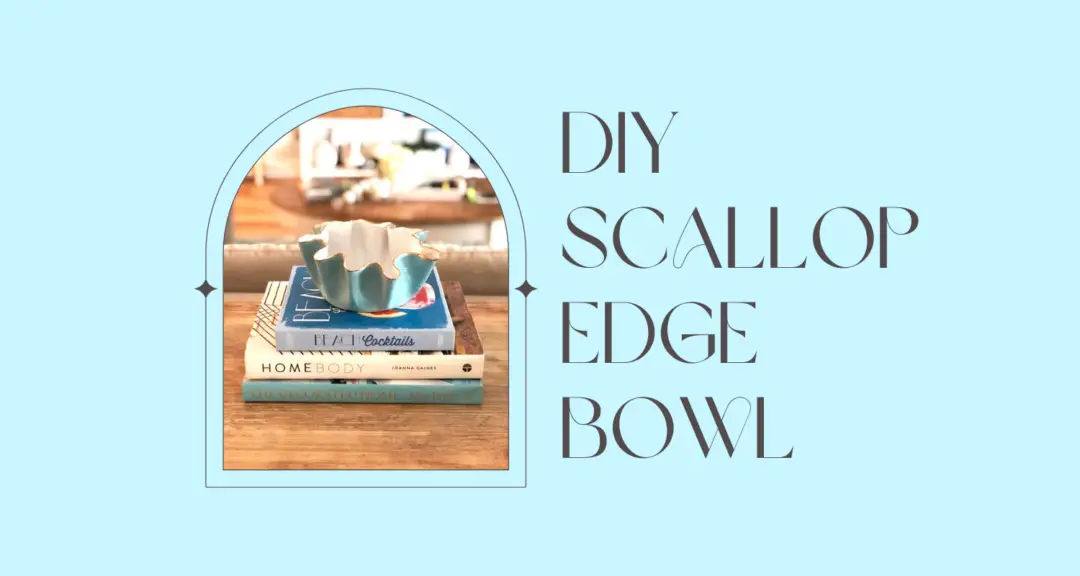
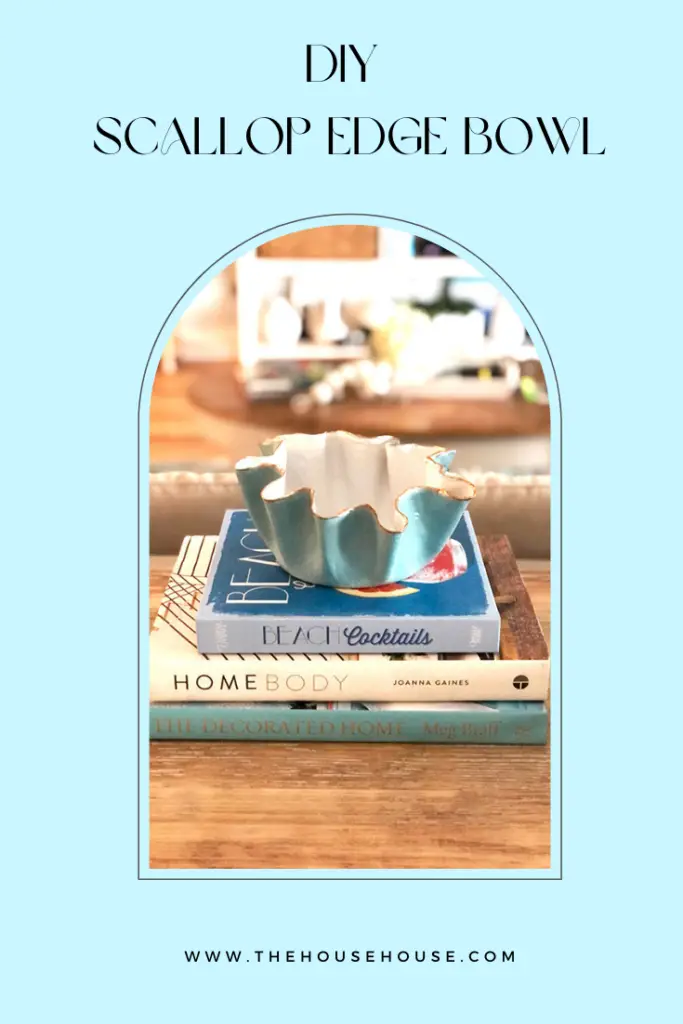
DIY Scallop Edge Bowl
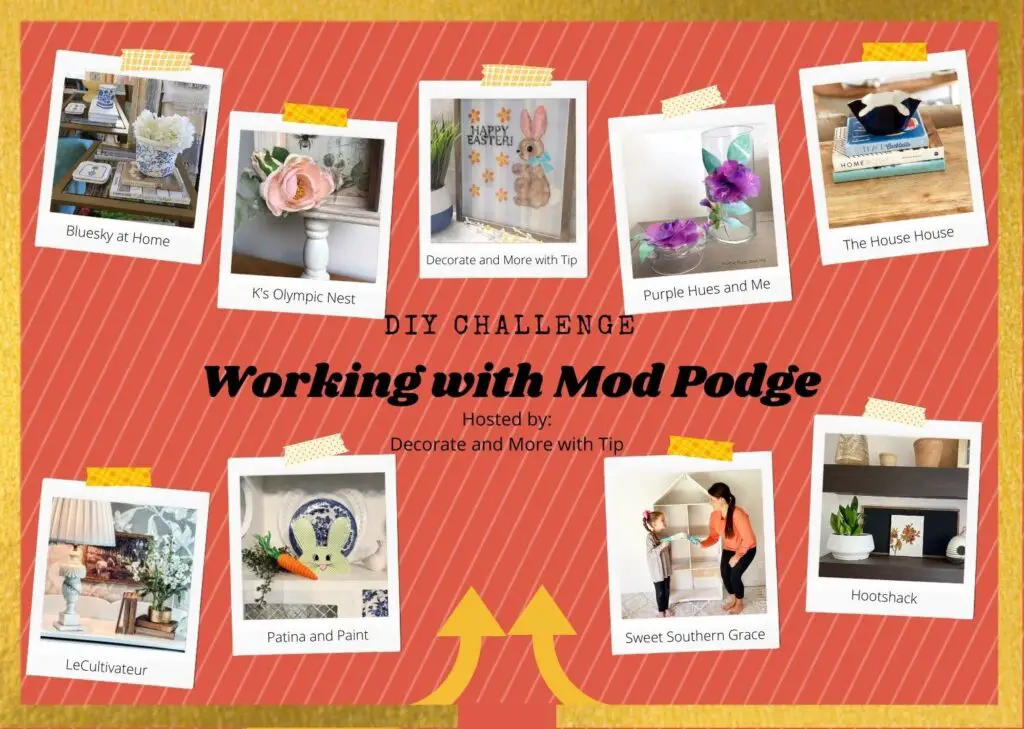
Welcome to the March 2022 DIY Challenge, hosted by Terrie at Decorate and More with Tip. (You can see my past DIY Challenges here.) This month we were challenged to create a DIY using Mod Podge. Terrie is so creative! Make sure you check out the links to the rest of the ladies in this challenge at the bottom of this post. I chose to make a Scallop Edge Bowl.
I got this DIY idea from another blogger, and thought I would give it a try. It was fairly easy and they came out really pretty. Here is how I did it.
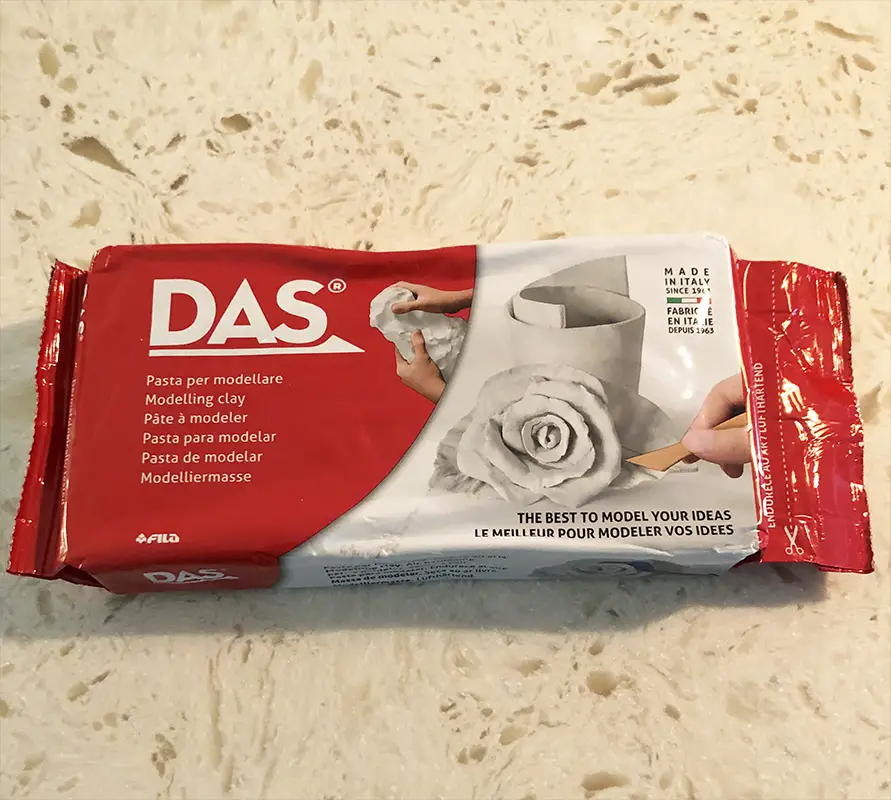
Materials Used for this Project…DAS Modeling Clay |
*This post contains some affiliate links for your convenience (which means if you make a purchase after clicking a link I will earn a small commission which helps keep my blog up and running but it won’t cost you a penny more)!
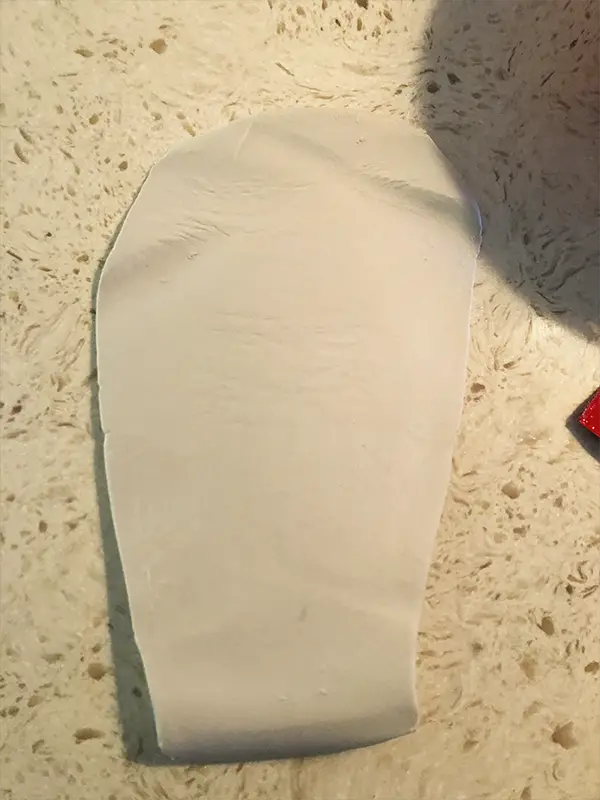
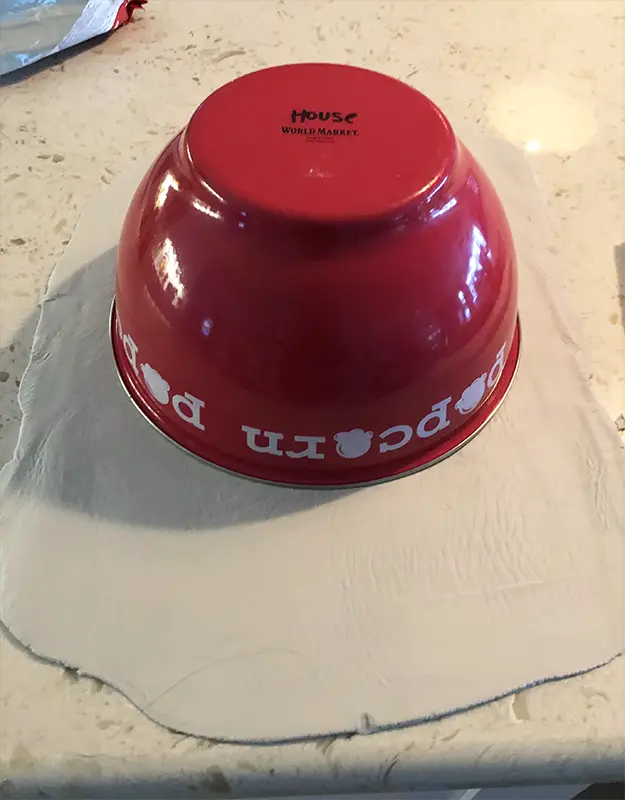
Step 1, Roll Out the Modeling Clay….
You can start this project by rolling out the modeling clay with a rolling pin. I rolled mine out to my desired thickness and then used a bowl I had on hand to cut out a perfect circle.
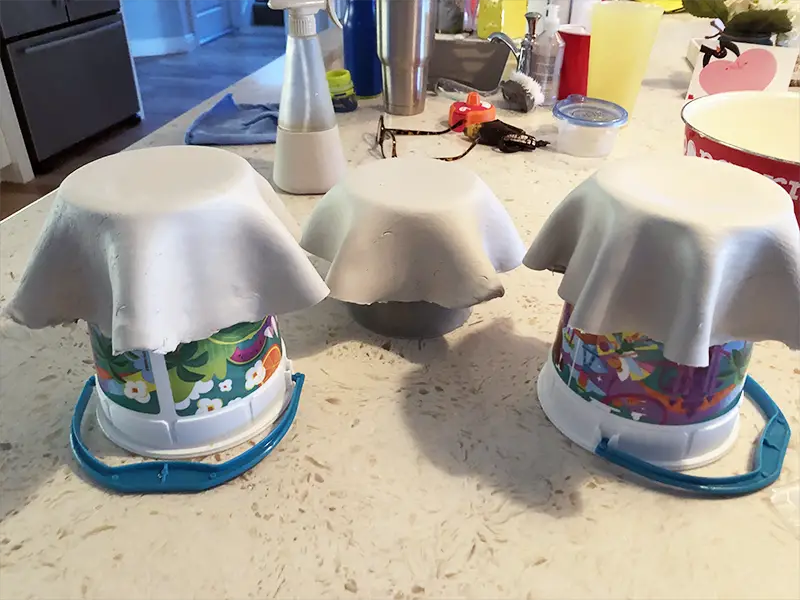
Step 2, Drape and Shape
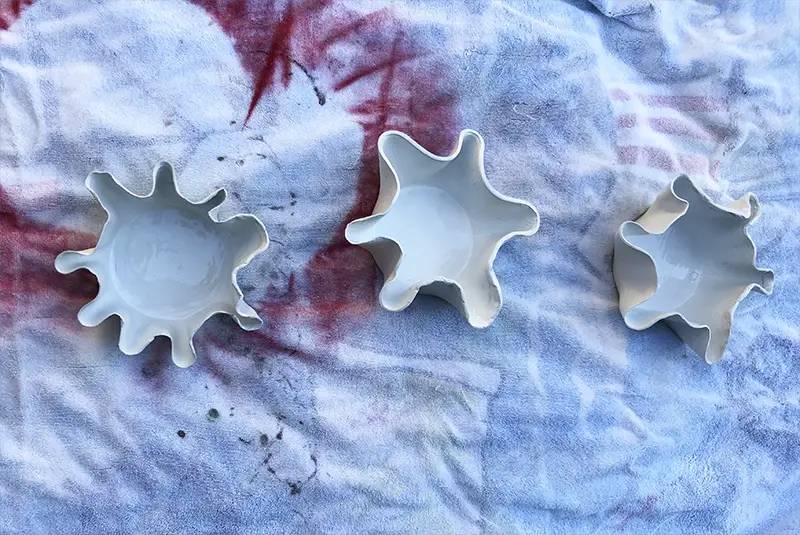
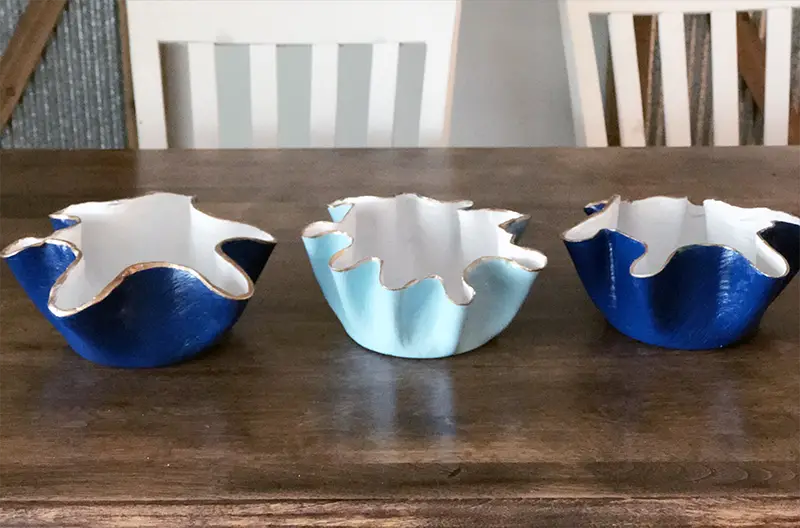
After the clay was cut out, I draped it over a jar that was the size of bowl I was looking for. It naturally makes a scallop edge once you do this. You just need to shape it a little to your liking. I was able to make 3 bowls with this package of clay. My third bowl was the thinnest of them all, but it still worked. Anyway, once the bowls are draped like this, you just need to shape them with your fingers as best as you can into the shape you want, and smooth out any imperfections and wrinkles. Note: I could have done a better job with this part, but they do look pretty good.
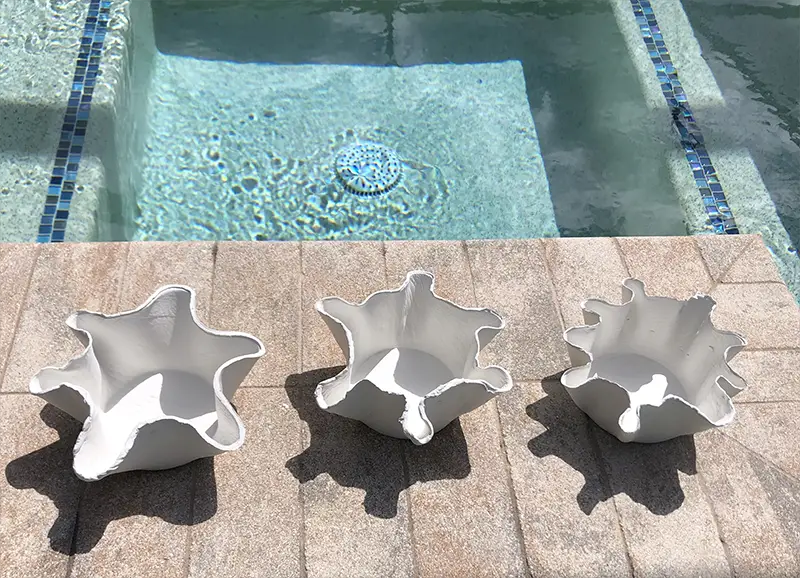
Step 3, Let dry Overnight…
I let mine dry over night on my kitchen counter, then took them outside by the pool to dry them even more in the sunlight.
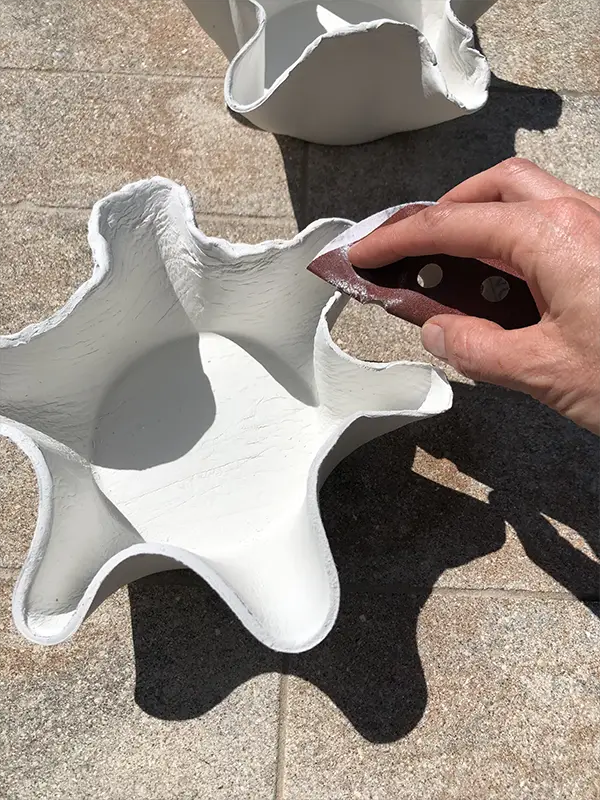
Step 4, Sand…
Once dry, sand off any excess clay, and smooth out the edges using a piece of sand paper.
Step 5, Paint…
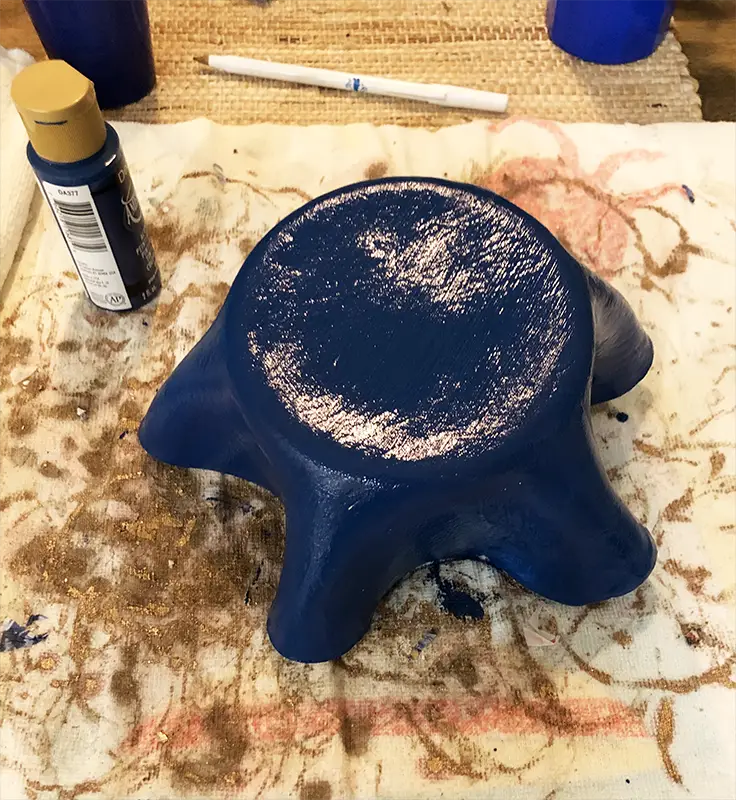
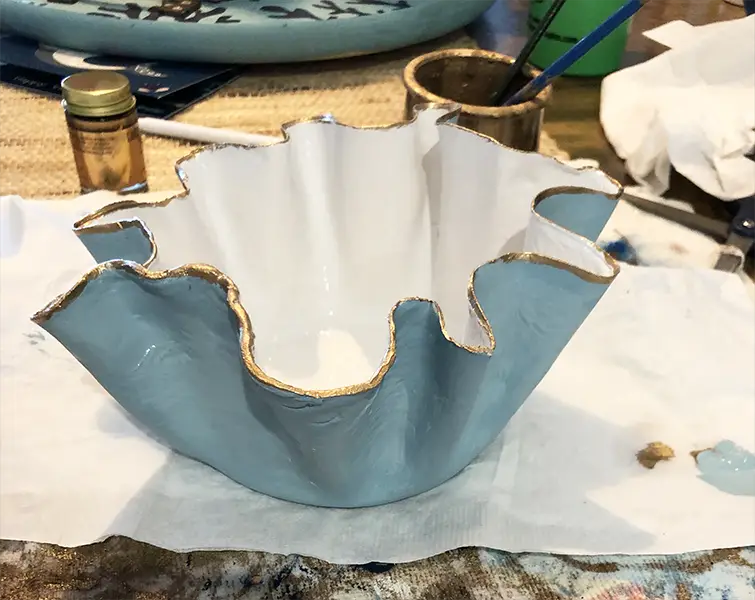
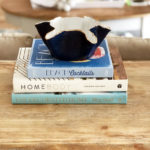
Next, I took my bowls outside and spray painted the inside white. I won’t be using these bowls to eat, so I wasn’t worried about the paint interacting with food. They are for decorative purposes only.
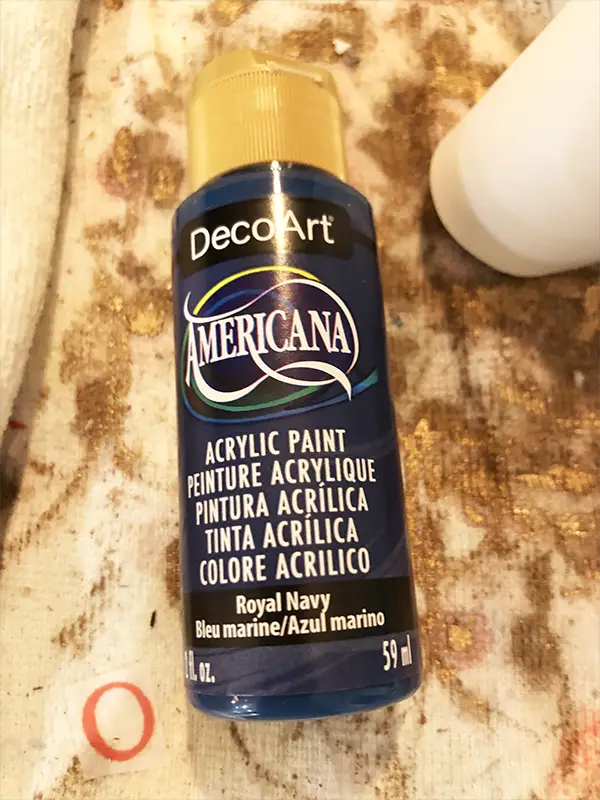
Once that dried, I took them inside, flipped them over and painted the outside. I did 2 navy, and 1 light blue using my craft paint. It took about 3 coats.
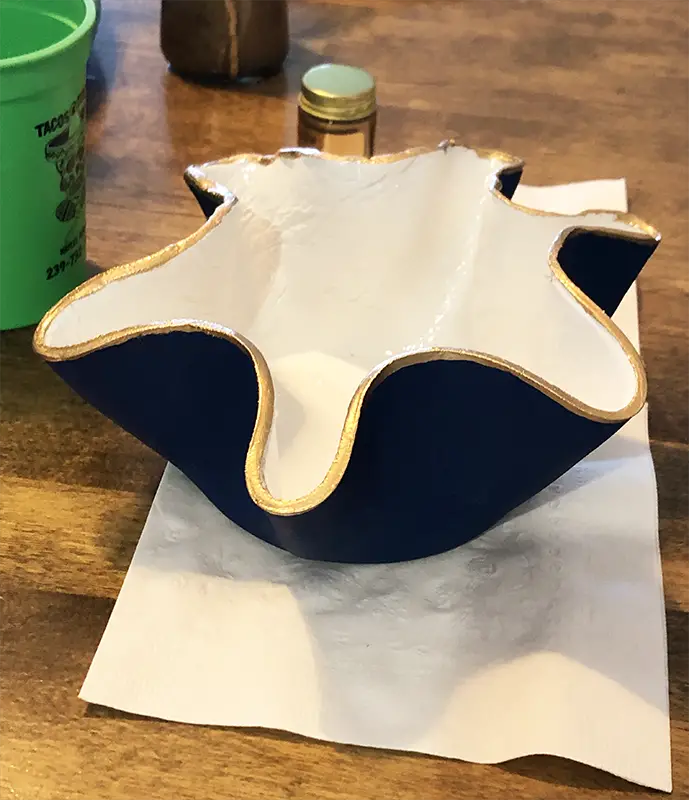
Lastly, I used my gold leaf paint to outline the edge. I used paint for this, only because I had some on hand. I use it to make my shells that I sell on Etsy. However, they also make gold leaf pens, and honestly that might have worked better as I had a little bit that dripped and ran a bit that I needed to correct.
Step 6, Mod Podge…
Finally, here is where the Mod Podge comes in. I used Gloss finish Mod Podge inside and out to give it a nice shiny surface. Again, I won’t be using these for food (although I believe they make food grade and dishwasher safe Mod Podge) so I wasn’t worried about contaminating any food with chemicals.
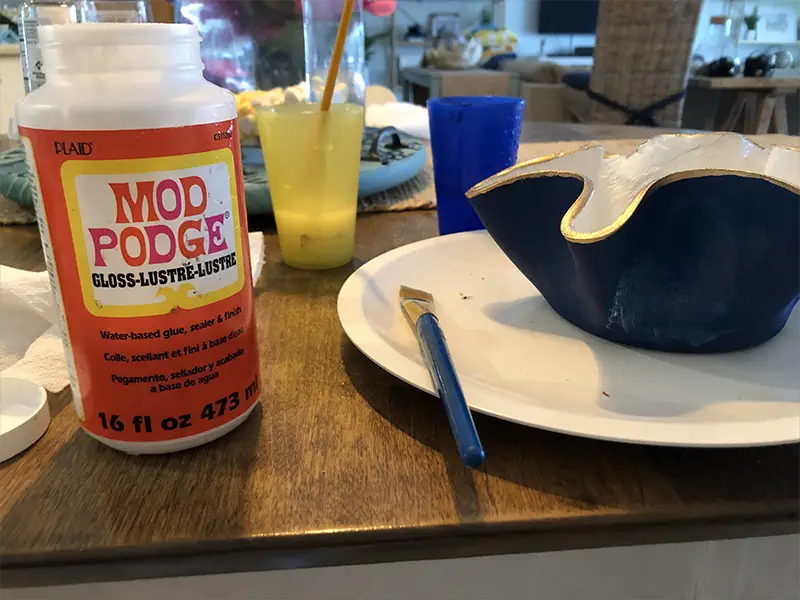
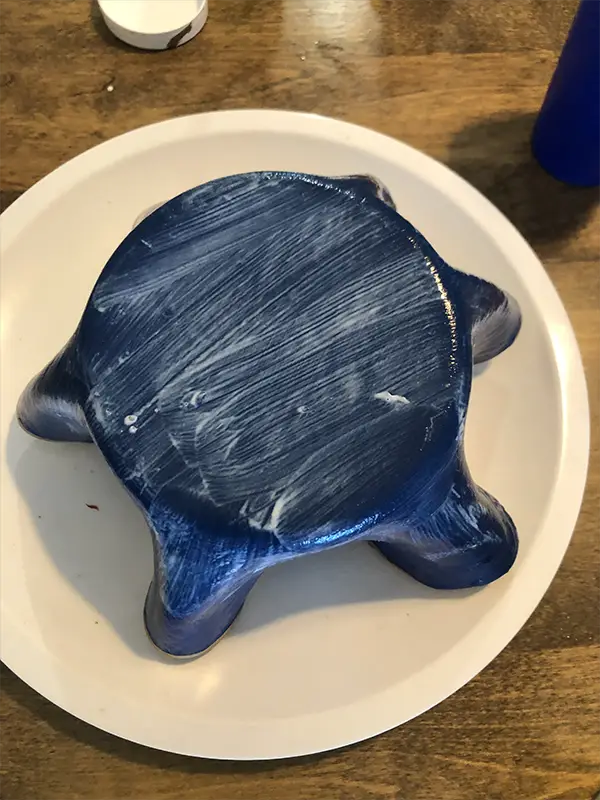
After I painted on the Mod Podge I brought them outside again to dry.

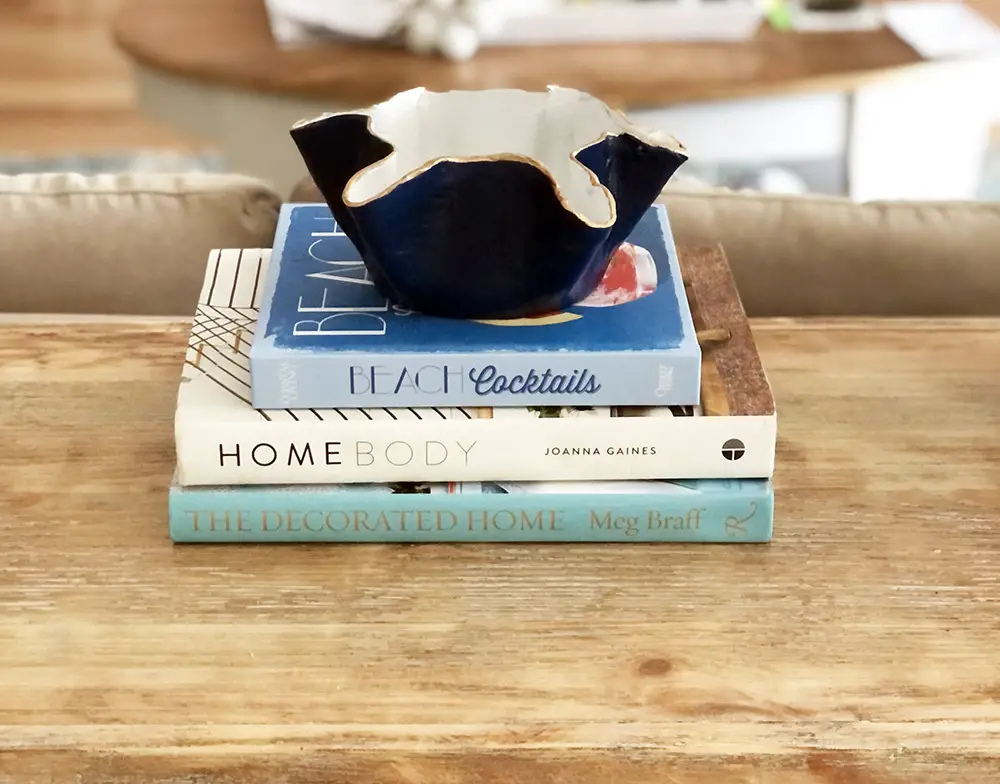
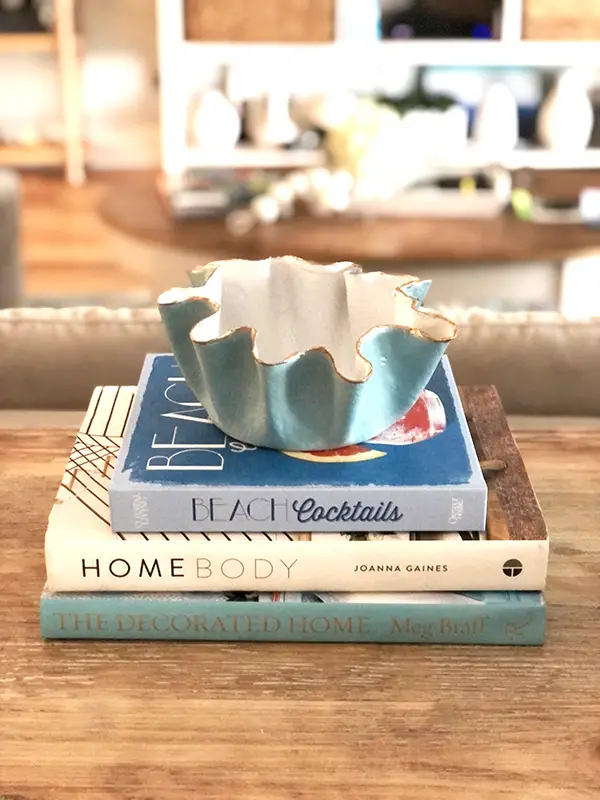
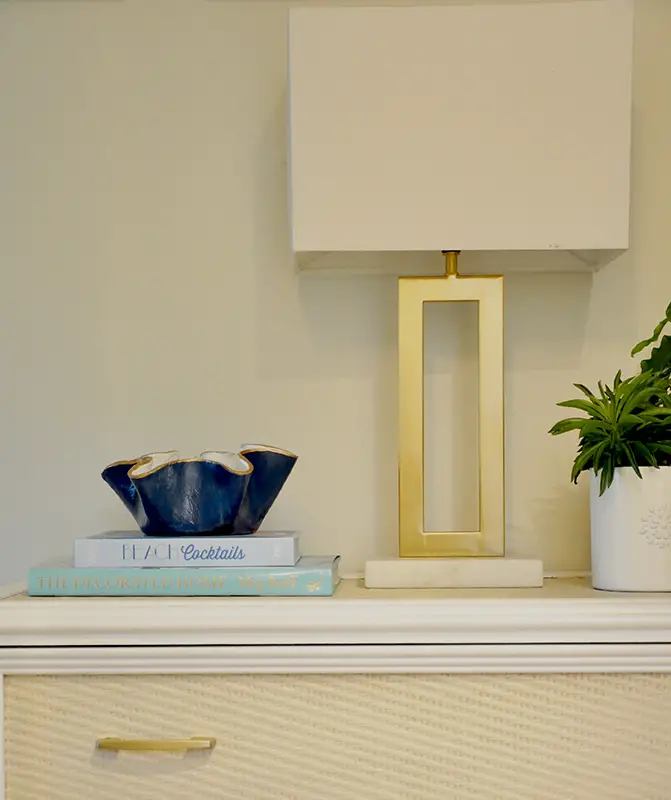
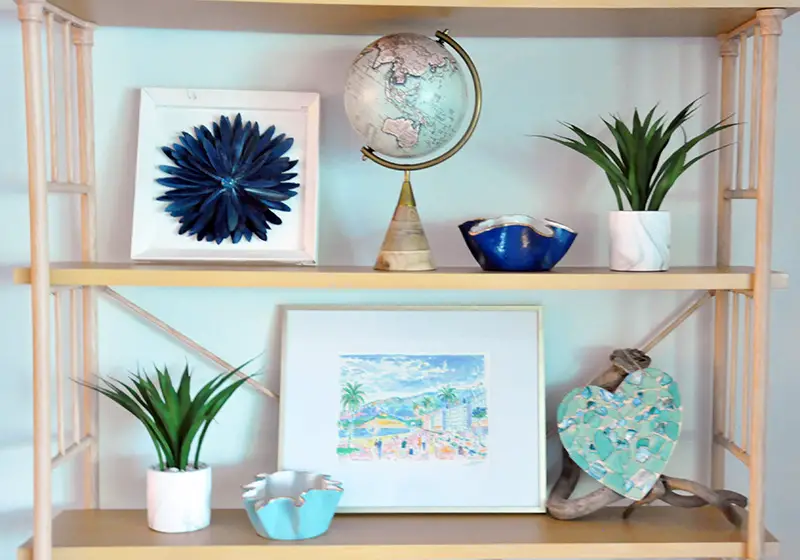
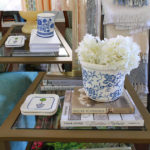
The Final Look of my DIY Scallop Edge Bowl…
Here they are. I think they came out so pretty! May not be perfect, but not bad for my first time doing ‘pottery’. LOL They look pretty in my home.
PIN FOR LATER…
Check out all the other bloggers Mod Podge projects here…
DECORATE AND MORE WITH TIP • THE HOUSE HOUSE • PURPLE HUES AND ME

SWEET SOUTHERN GRACE • PATINA AND PAINT • LECULTIVATEUR
14 Comments
Jodi, I love how your bowls turned out. I have not worked with the clay, but you have inspired me to try it. Thanks for sharing your creativity.
Glad you like it. I actually got the idea from another blogger. I’m glad I tried it though. It wasn’t to hard. I hope you try it too.
Very pretty! I think these go really well in your home and with your shells. Great project. I’ve never used the clay, you’ve inspired me to give it a try!
Glad I could inspire you. I was inspired myself from another blogger. Give it a try.
Oh boy, Jodi! Is this a great, easy way to make all sorts of decorative bowls! Image the possibilities of designs and themes that can be painted on them and I love working with air dry clay! Thanks for sharing!
Yes! So many possibilities. This was definitely a fun DIY.
The bowls turned out so pretty. That looks pretty easy to do. I love the gold leaf on the side.
Thanks. They weren’t to hard at all. Glad you like them.
I think your imperfect bowls are perfect. How fun to create your own decorative bowls. I am going to try this too!
Thanks! Give it a try. It was really fun.
Jodi, your bowl turned out beautifully! I have not worked with clay in a very long time but you helped me remember how much I love it!
Thank you!
Jodi, I’m seeing more and more projects using air-dry clay. I think I have to try it, too. I love your project, the paint colors you chose and the touch of gold on the rim. I have not heard of glass Mod Podge and that will definitely be my next buy.
Glad you like it. Not sure what Glass Mod Podge is. I mentioned Gloss Mod Podge, but Glass sounds cool too. LOL!!!!