
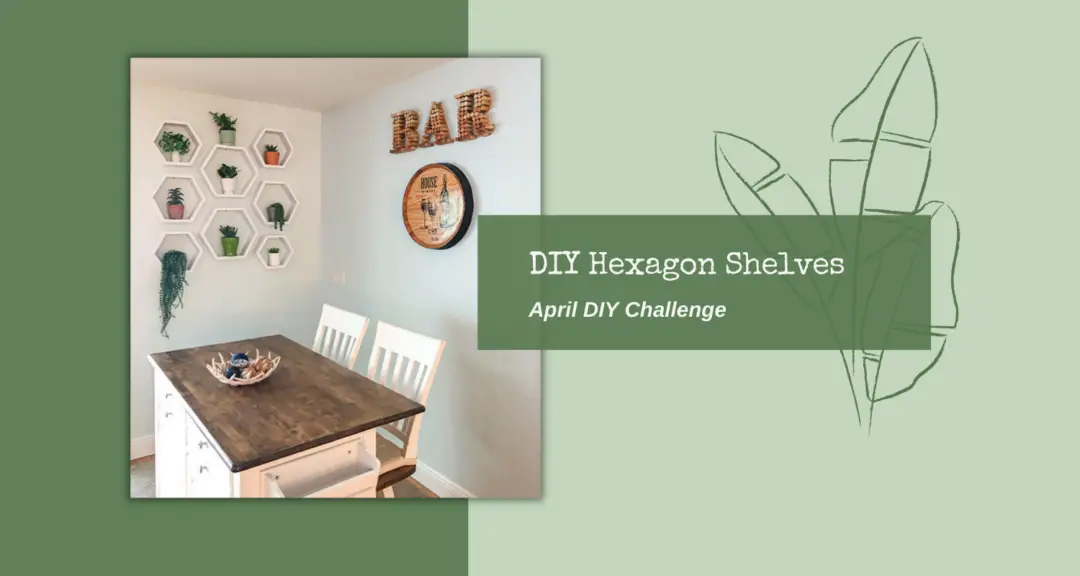
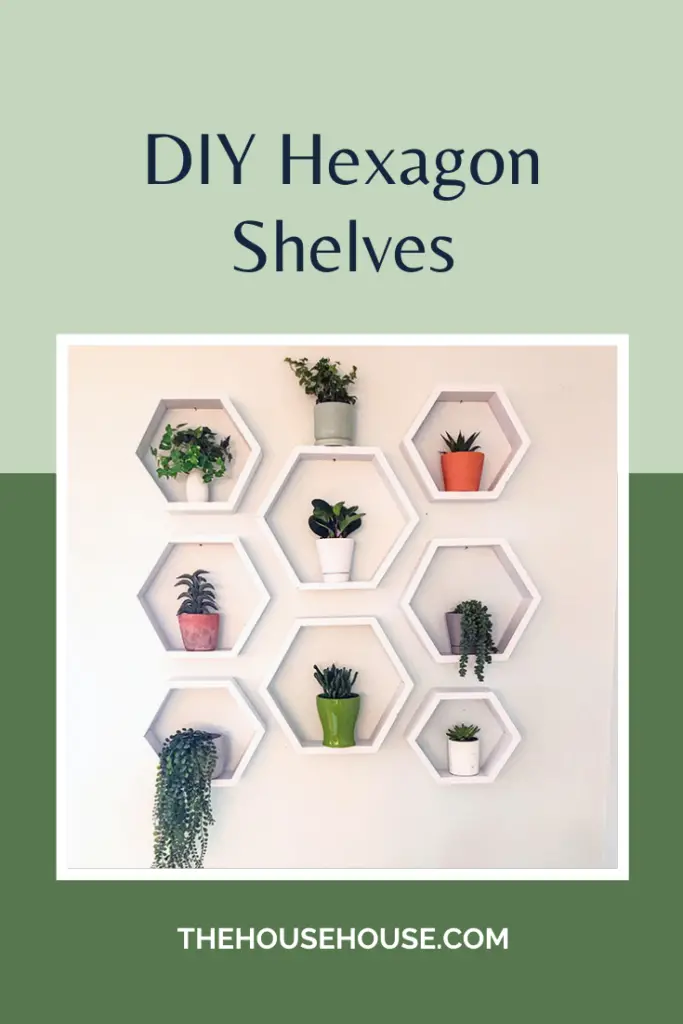
DIY Hexagon Shelves
Welcome to the April DIY Challenge, hosted by Terrie at Decorate and More with Tip. This month we were challenged to create any DIY we wanted. It was our choice. The possibilities were endless. The wheels in my head immediately started turning. hmmmmmmm……What to do? What to do?
(You can see my past DIY Challenges here.)
Please check out all the other bloggers projects at the bottom on this post.
My DIY Project this month…..
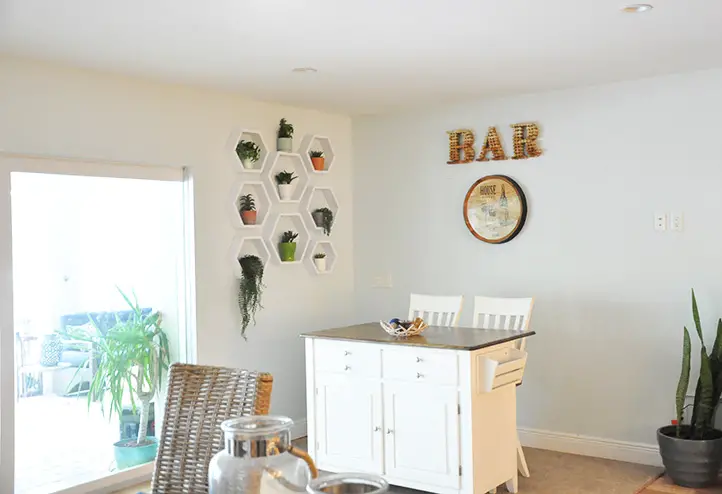
The possibilities really were endless, and I didn’t want to make something just to make something. I wanted it to be something I would actually use. So, I was on Instagram recently and saw a picture of some fun shelves that were holding plants. They were shaped like hexagons. I thought, that’s it! Why not try my hand at making some DIY Hexagon Shelves for myself? I even have the perfect spot to hang them. So, that is what I did and here is how.
*This post contains some affiliate links for your convenience (which means if you make a purchase after clicking a link I will earn a small commission which helps keep my blog up and running but it won’t cost you a penny more)!
Materials Used for this Project…2 – 4inch x 1inch x 6ft boards |
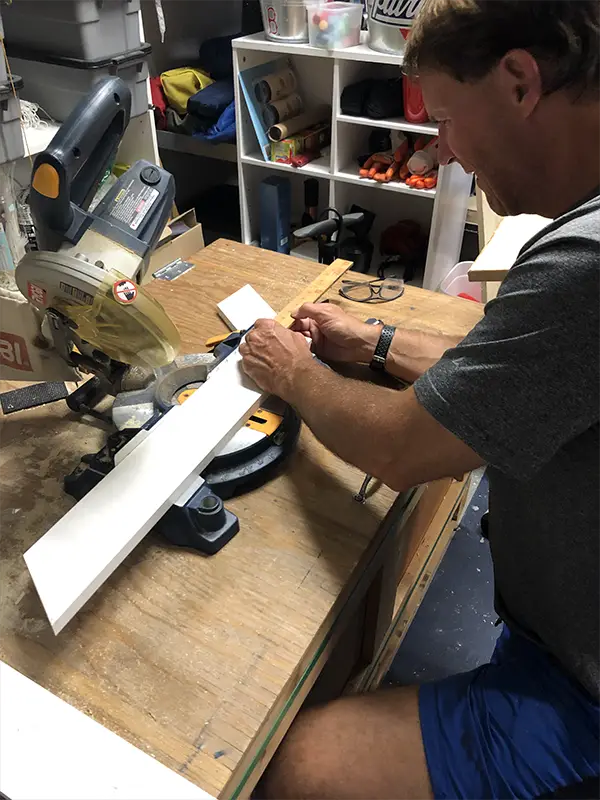
Step 1 in making DIY Hexagon Shelves, Make a Test one….
I thought it would be a good idea to make a test one before I went any further to see if I could do it.
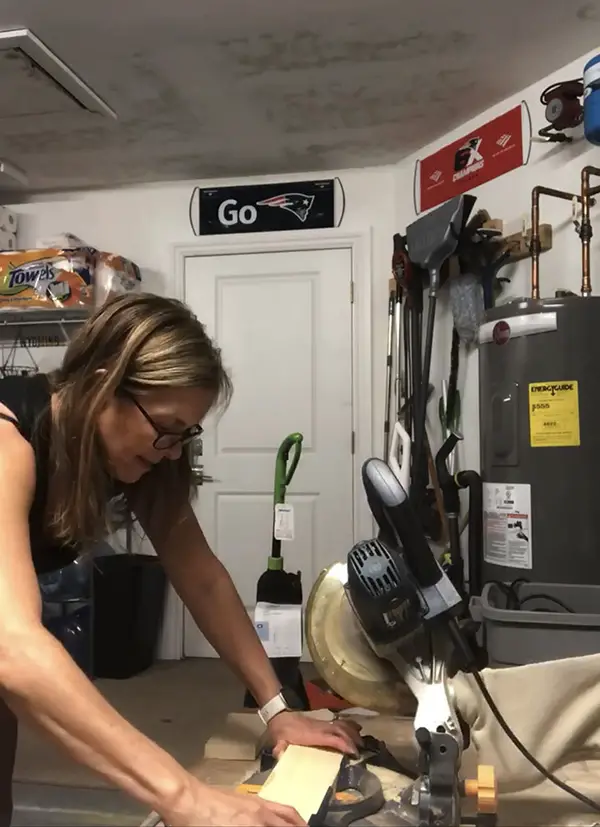
Off to the garage I went, and was happy to have found the perfect piece of scrap wood to test out my building skills. It was a 4 inch wide by 1 inch deep x 5 foot long piece of white wood. Not sure where it came from, but I thought it would be a good piece to try my hand at making one shelf before I bought more wood.
My husband helped me adjust the saw, but then I was able to figure out how to make one on my own.
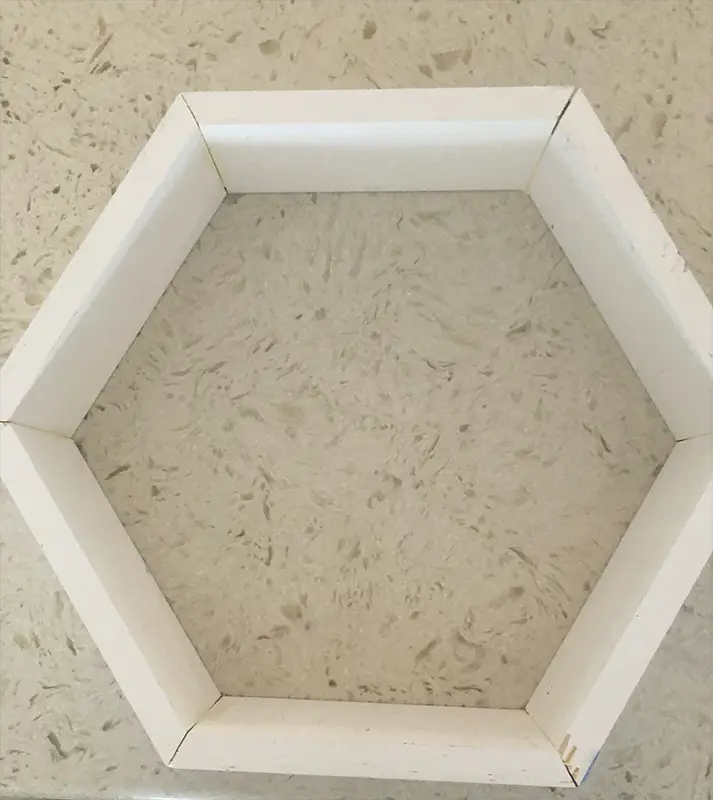
Once assembled, I decided that my test one came out pretty darn good and that I would keep going! The image below was before I sanded, filled in any gaps and painted. It’s also not perfect so don’t look to close. LOL
Step 2, Cut Your Wood…
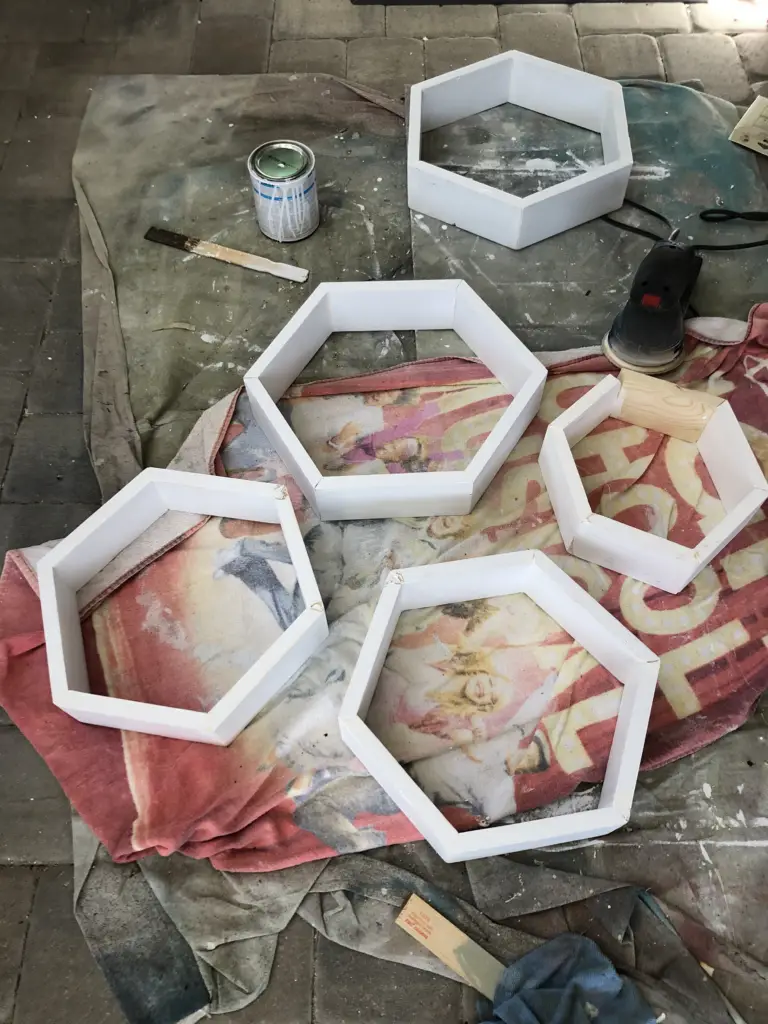
Off to Lowes I went to get some wood. I decided to make another 8 inch hexagon (like my test one), 2 – 6 inch, and 4 – 5 inch sized ones. To do this I bought, 2 pieces of wood measuring 4 inch wide x 6 foot long and 1 piece at 4 inch x 8 foot. Each piece of wood cost under $10.
Once home with my new wood, I started cutting and was pretty proud of myself for doing this all by myself. First, you will need to put your saw at a 30 degree angle. Next, figure out the length you want. My ‘test’ hexagon was cut at 8 inches with a 30 degree angle on each end.
Go me!!! Okay, okay, maybe not all of them were perfect, but still, I did it.
Step 3, Sand and Assemble….
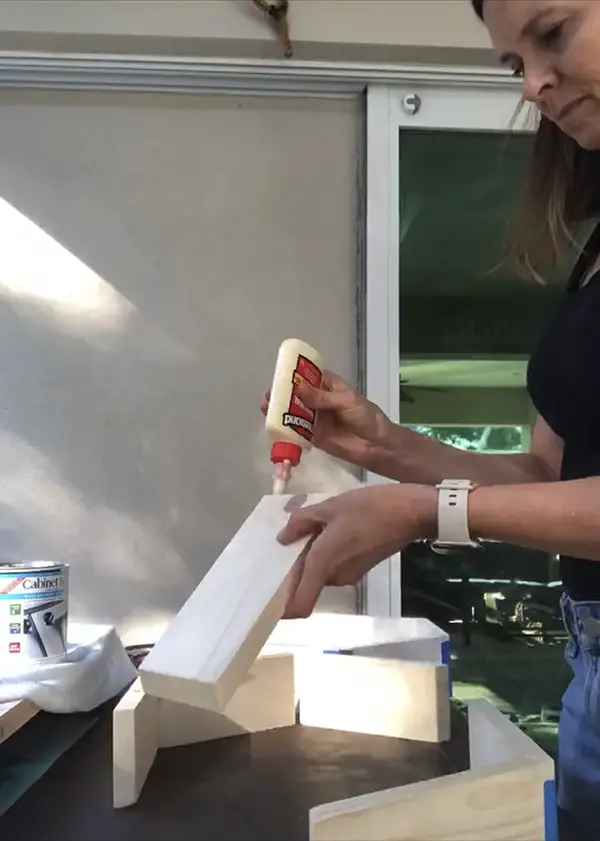
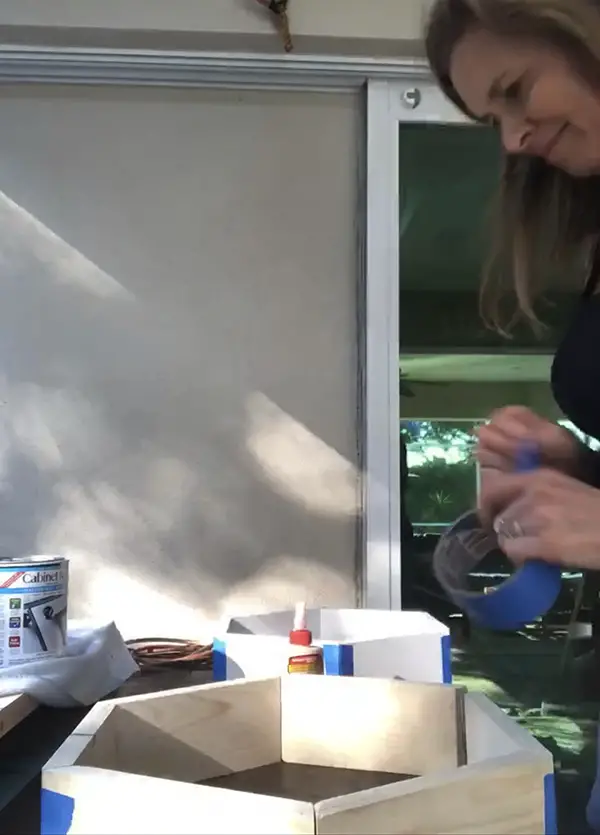
After all my cuts were made, I brought them outside and gave each piece a light sanding. Next, I glued them together. I used wood glue and then applied painter’s tape to secure them in place while they dried. After the glue dried, I used some wood filler to fill in any gaps. You could also use a small brad nail to secure them as well, or a staple gun on each corner. I used a staple on a few of mine where my cuts weren’t exact.
Step 4, Sand Again and Paint…
After the glue and wood filler dried over night, I gave them another light sanding. Once they looked good, I painted them white using some furniture paint I already had on hand.
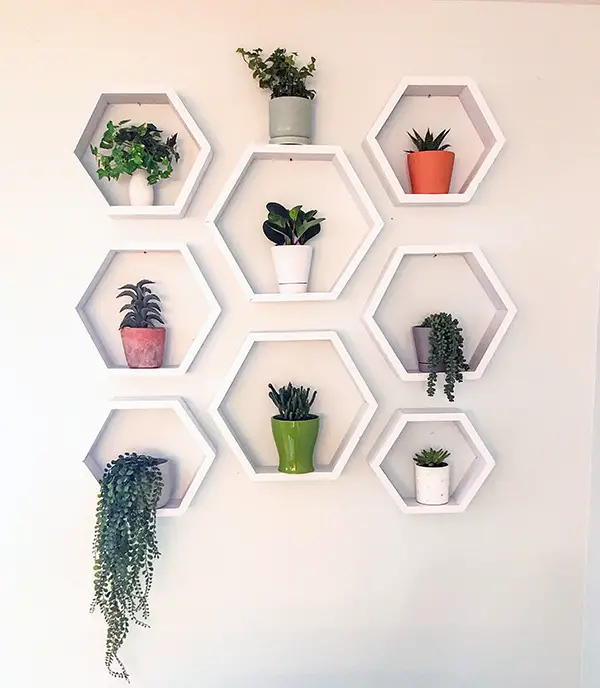
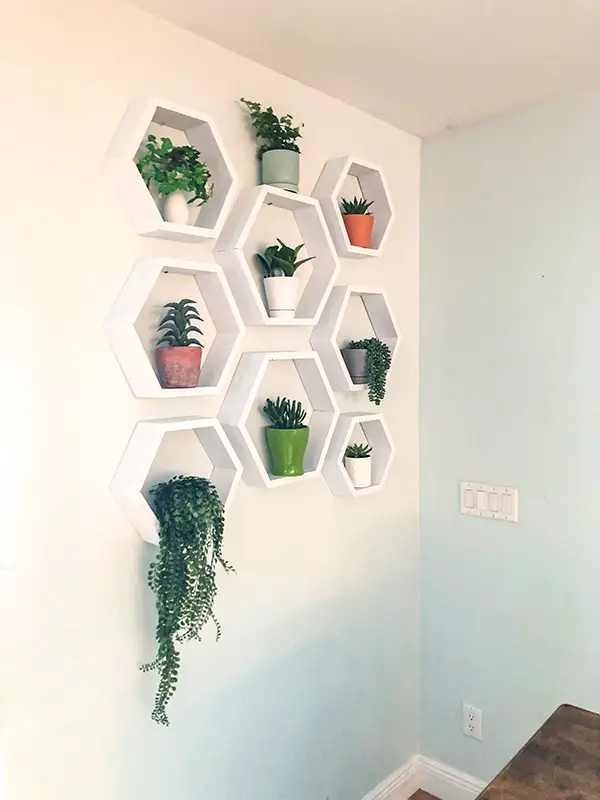
Step 5, Hang and Enjoy…
Now the fun part. Once they were all sanded, painted, dried and looking good I hung them up and filled them with plants. Half of these plants are real and half are faux. Can you tell which is which?
Also, please note, I realize these are not all perfect looking. BUT, I don’t mind that. I think it is part of the look and charm, and it was my first time making them.
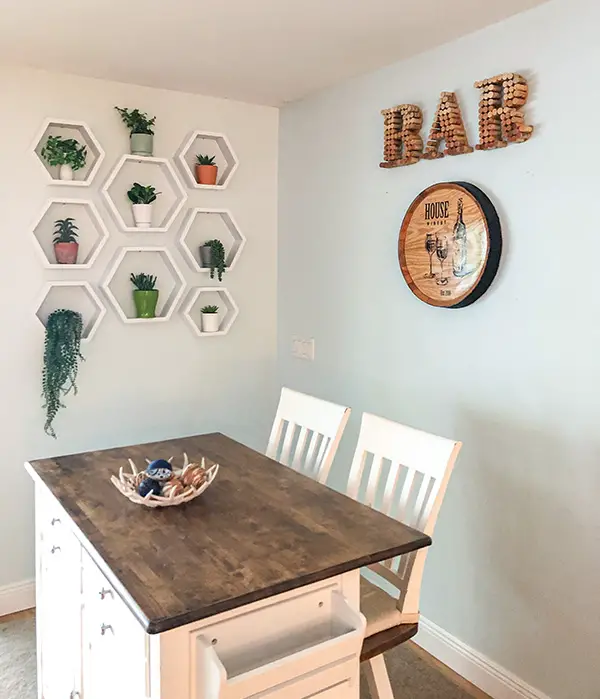
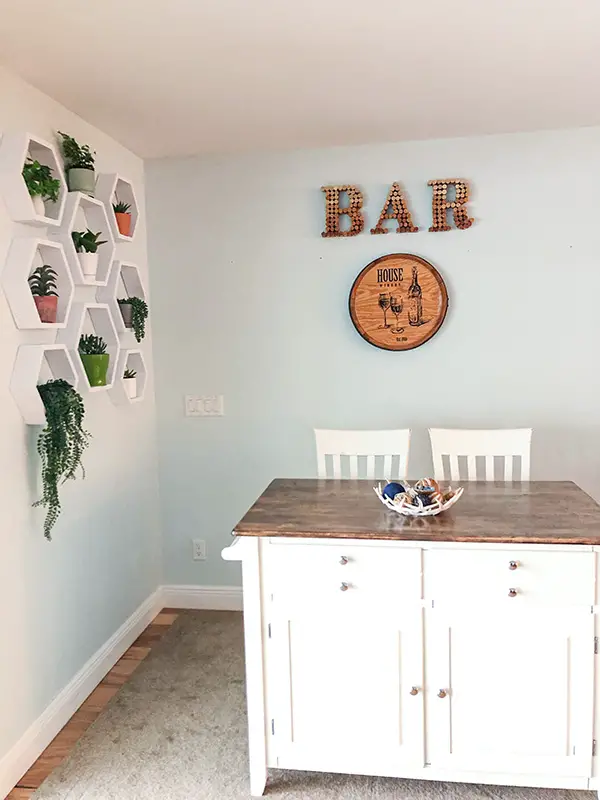
In case you were wondering, the wine cork BAR sign was another DIY I did a few years ago.
PIN FOR LATER…
Check out all the other bloggers DIY Projects this month…
Terrie – DECORATE AND MORE WITH TIP
Gail – PURPLE HUES AND ME
Emily – LE CULTIVATEUR
Denise – THE HOOTSHACK
Carol – BLUESKY AT HOME
Teresa – THROUGH A VINTAGE DOOR
Jodi – THE HOUSE HOUSE


12 Comments
Wow, Jodi! I am blown away with you actually making your very own hexagon shelves! Just gorgeous! You have some serious woodworking skills! And they look absolutely fabulous on your wall! I’m so impressed! Great job!
Oh wow! Thank you so much. I wasn’t sure if people would like these or not. Glad you do.
Jodi, I am so impressed with your woodworking skills. The shelves turned out great. Pretty and so practical for adding decorative items.
Thank you so much!!! I am so glad you like them.
Jodi, your wall looks amazing. I have been wanting to do this in our kitchen but am not very good with the angle cuts. I love working with my table saw, apparently you aren’t afraid with working with yours. Nice job, it looks perfect.
Thanks, Terrie. I was a little nervous using the saw, but just made sure to be really careful. It wasn’t so bad.
Oh my , just wow!! These look store bought and amazing!! Great job on making them and love the styling.. Perfect!!
Teresa
Thank you so much!
This post came at a perfect time! I’ve been wanting to make some of these for my dining room wall. I have too many plants and not enough shelves. They turned out great!
Cool. I hope you give this a try.
This is such a fun DIY!!! The shelves are soooo cute! I love how you have hung multiple on that wall! Brilliant!!!
Thanks so much, Emily! I am so glad you like them.