

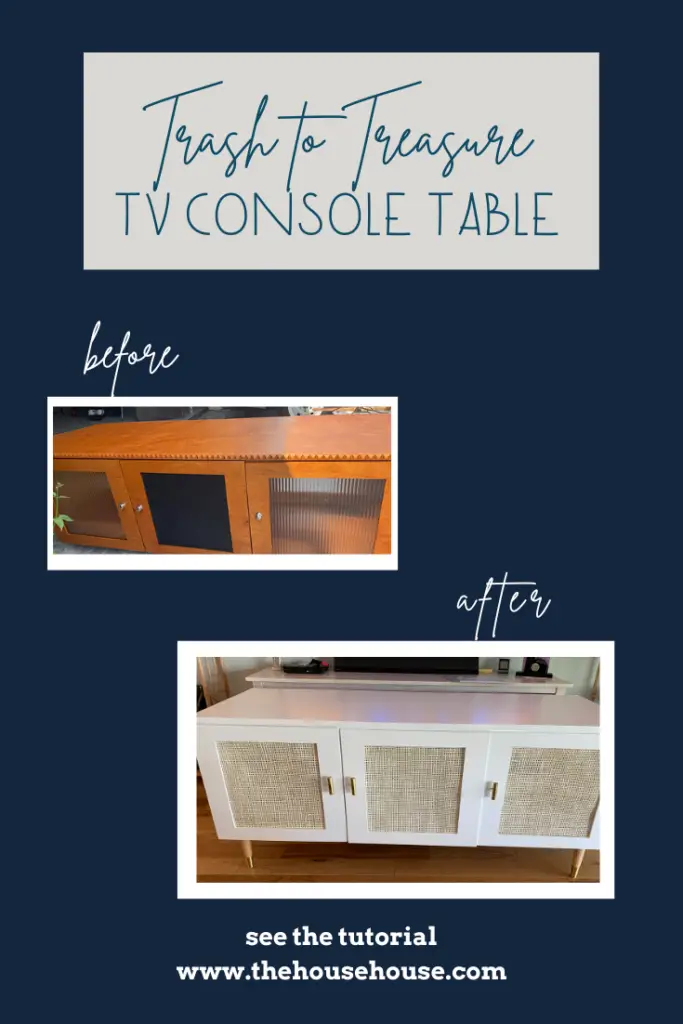
Trash to Treasure TV Console Table
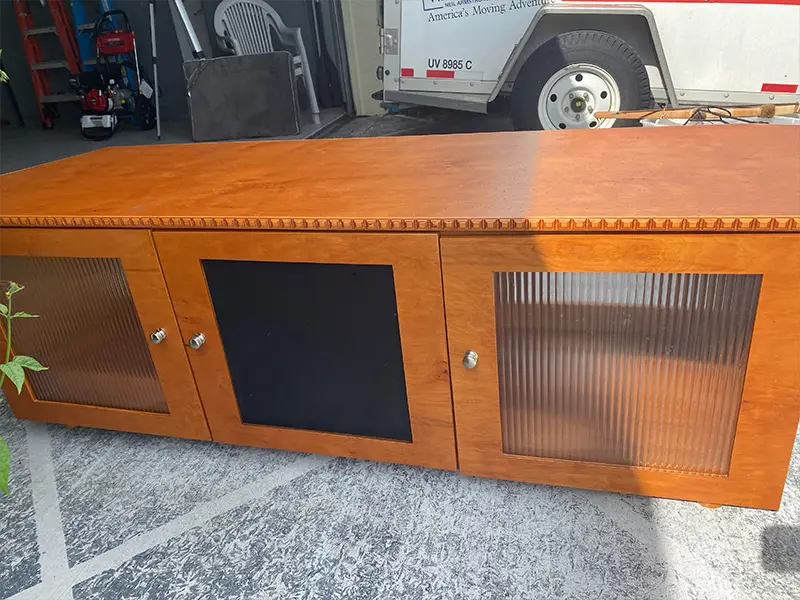
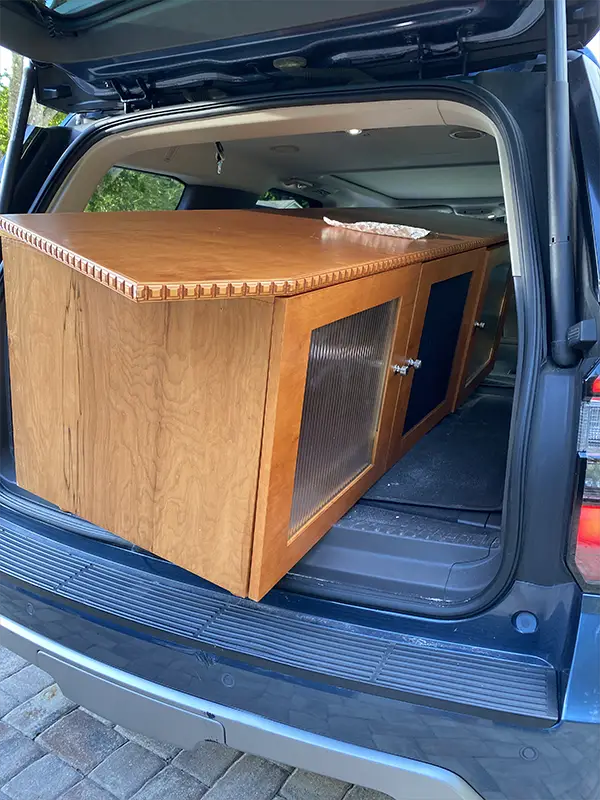
Y’all. I am pretty proud of this Trash to Treasure TV Console Table transformation. I’ve been wanting to do a piece like this for a while. In fact, probably 3-4 weeks ago, I saw a similar piece for sale on facebook marketplace. Unfortunately it sold by the time I asked about it. So, when my friend/neighbor texted me that this piece was on the curb near her house. I wrote back pretty quickly saying….”I want”! I dragged my husband, reluctantly, to help me get it.
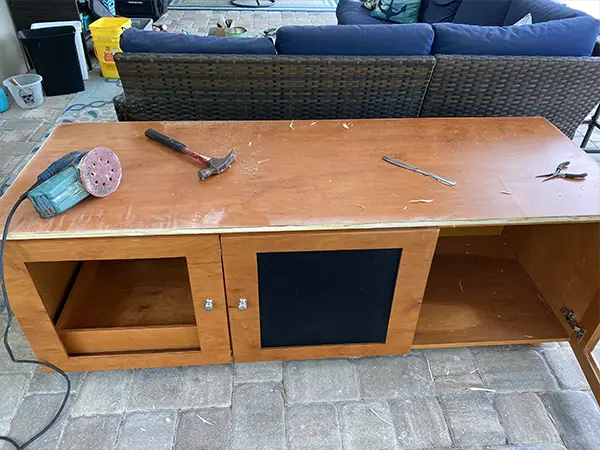
It was pretty heavy, was a homemade piece, and had a weird shaped top, but I knew exactly what I wanted to do to it. Here is what I did with my trash to treasure TV console table.

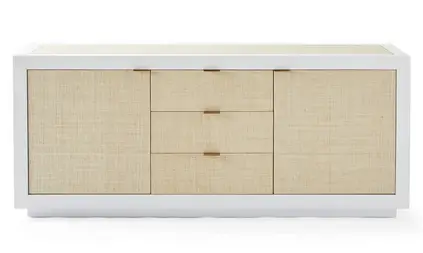
I was going for a Coastal, Serena and Lily vibe – surprise, surprise. LOL My last 3 or 4 furntiure makeovers have all had this vibe. I can’t help it, it’s my jam. I love these pieces, just not the prices and once again I tried to do this piece as inexpensively as possible…..although I do admit I spent more than I normally do to get this piece right. Here are a few Inspo Pieces….

Step 1, Fix the Top…
The first thing I did was cut the angled pieces off the top. I used my Skill Saw for this. The first side I tried didn’t come out great, as you can see. I kept working at it until it looked decent. Then sanded the edges as best I could. This side isn’t perfect, but not bad either. I did the same to the other side too.
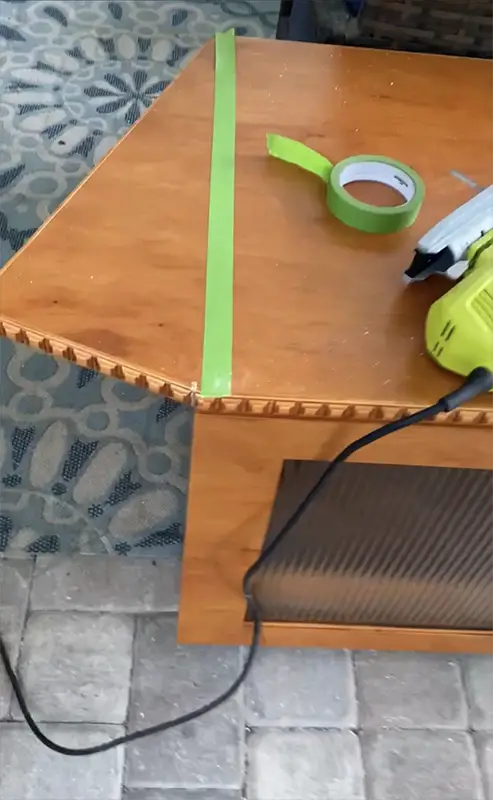


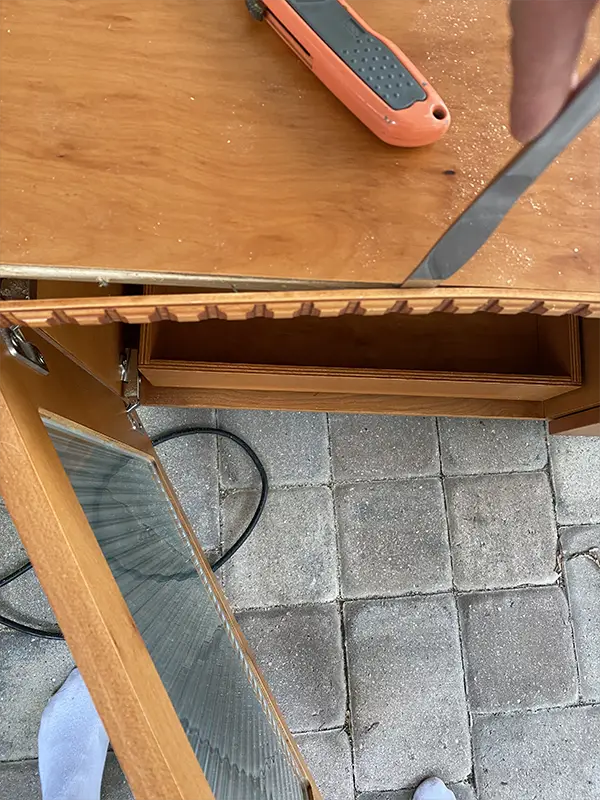
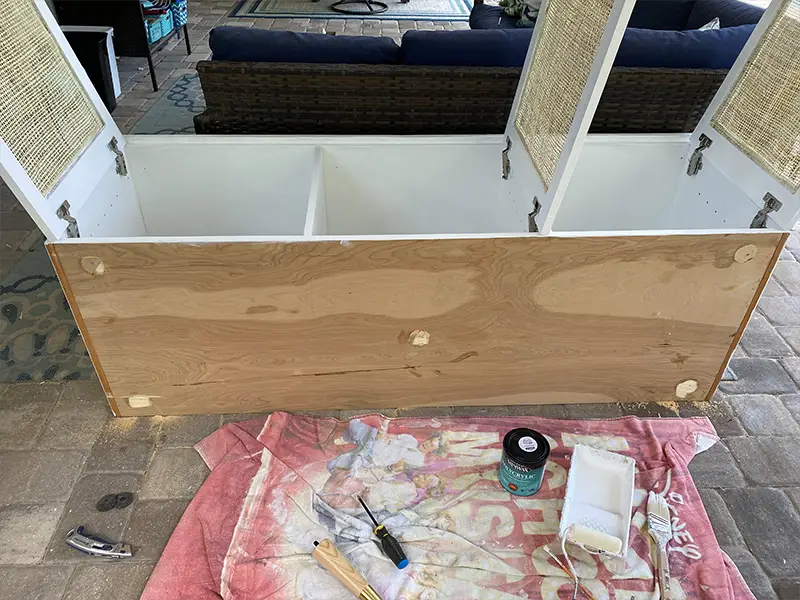
Step 2, Remove the trim…
The trim on this piece wasn’t to my taste so I removed it. This wasn’t easy to do. I scored it using my exacto knife, then used a knife to pry it off. Once it was all removed, I had to then remove all the nails that were left behind. Lastly, I sanded the edges to make them as smooth as possible. I thought about putting on some new trim, but was happy with how it looked without it, so I didn’t.
Step 3, Paint…
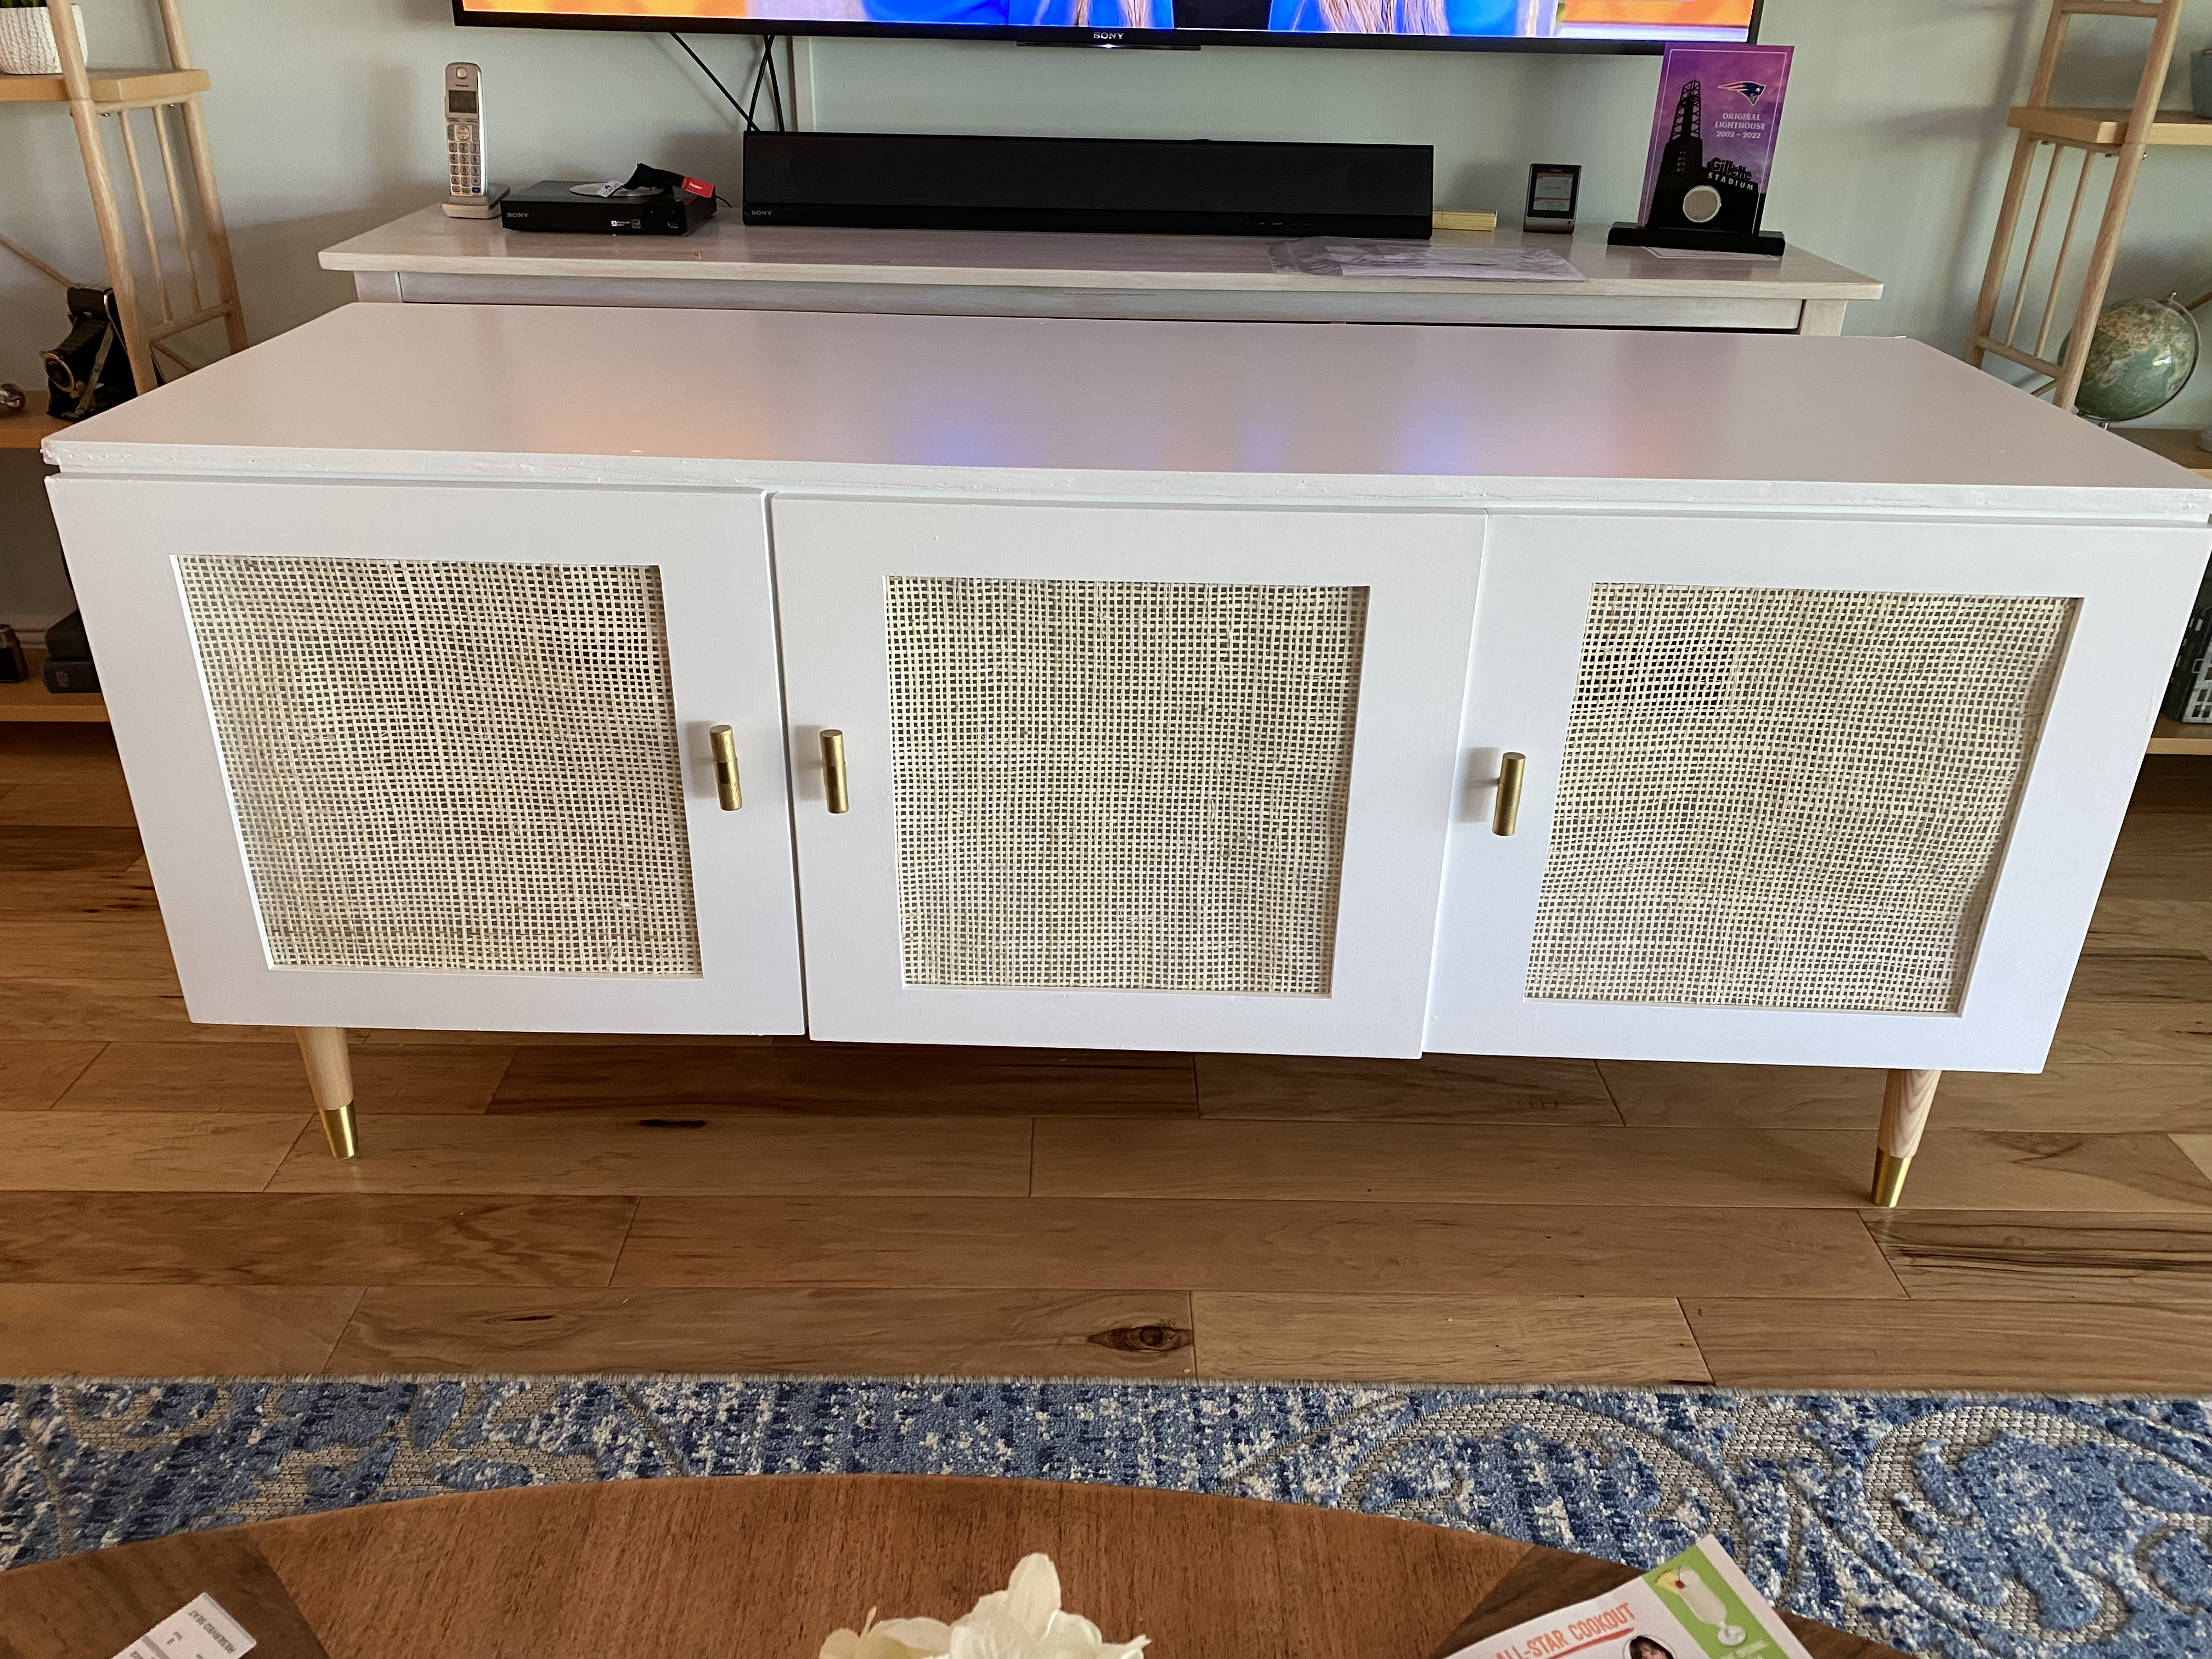
Next up, paint. I did try sanding this wood a bit and didn’t think removing the finish would be worth all the work. Instead, I used some white furniture and cabinet paint from Lowes and got to work.
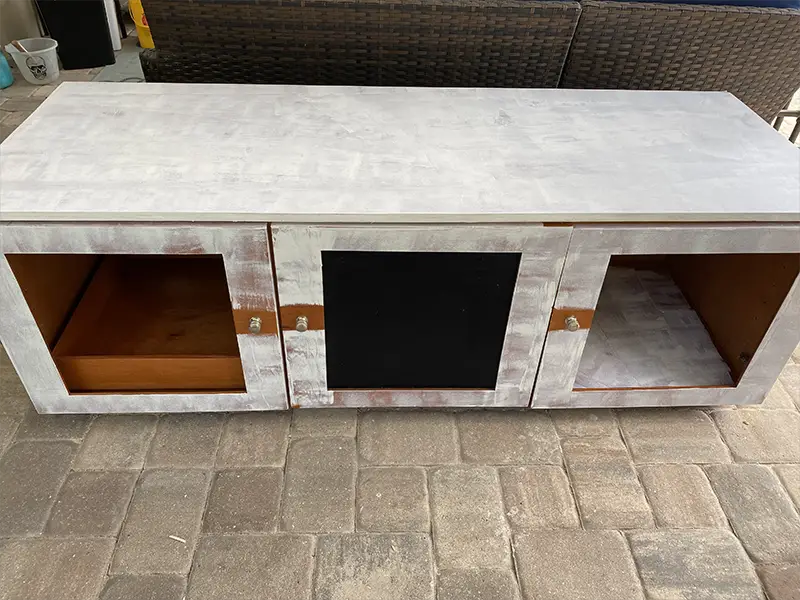
Removing the doors made them easier to paint them. I also removed the glass pieces and mesh that they were lined with.

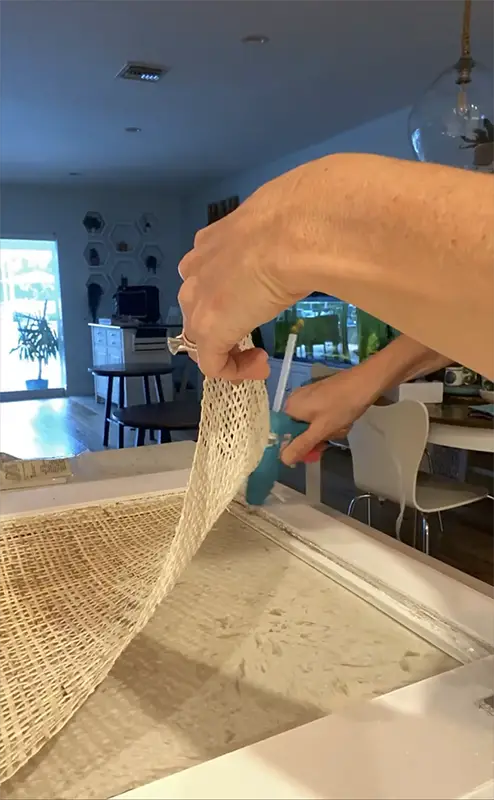
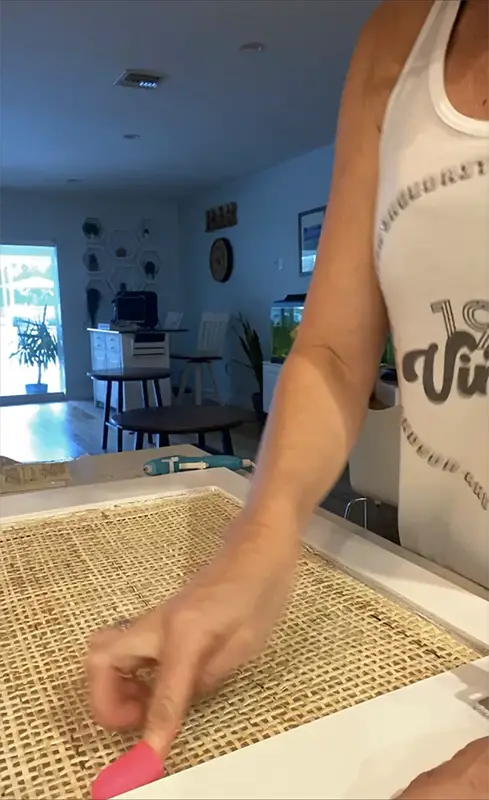
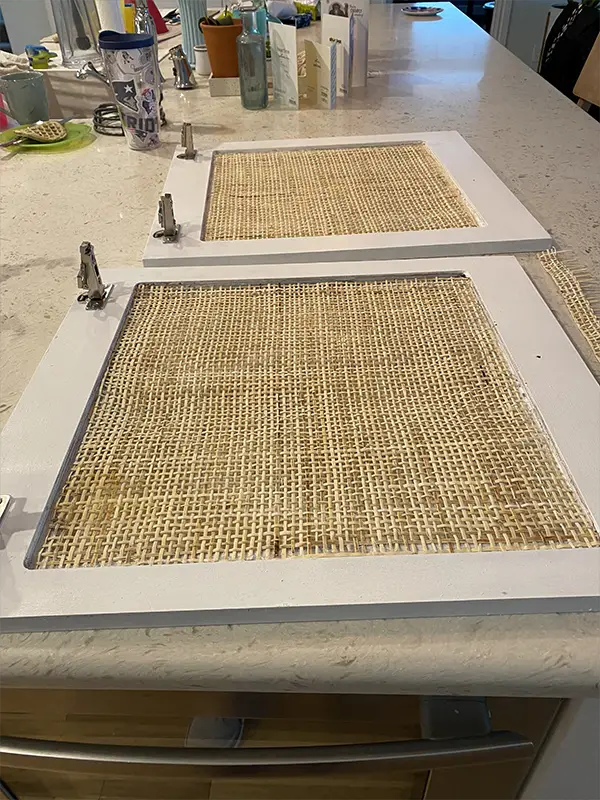
Step 4, Install the Caning into the Doors…
After doing a search on Amazon I found this beautiful caning. I ordered it and was happy I did. It was exactly what I had in mind. I used the piece of glass that was in the door as a guide to cut the caning. Once cut, I wet the caning and put it outside to dry and flatten it out. Then I used my glue gun to glue it to the back part of the door and some staples from my staple gun to secure it in place.
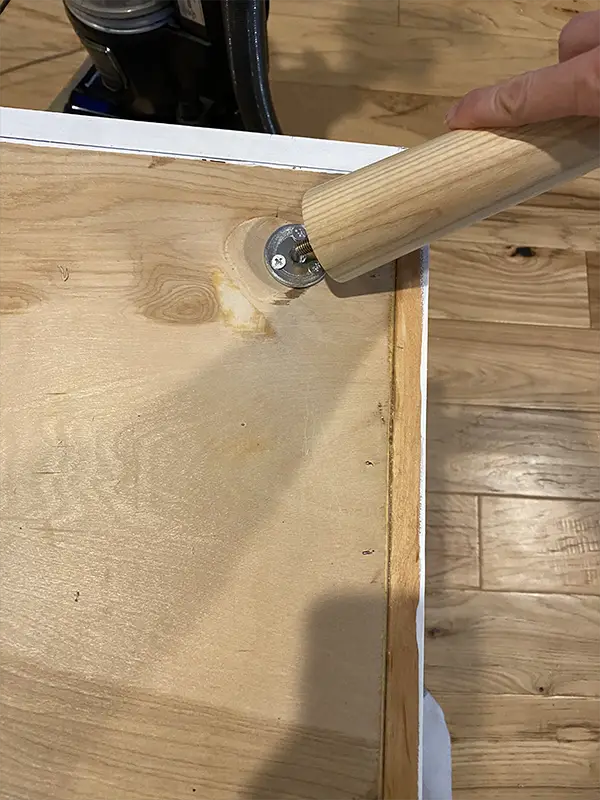
Step 5, Removing and Replacing the Legs…
Almost done, but first I had to remove the legs that were on it. Let me tell ya these things were on tight. First I unscrewed them, then scored them with my knife, then I ended up using my saw to cut them off. Some of them came off cleaner than others. Using my hand sander I smoothed them out as best as I could, but figured this was the bottom of the piece so I didn’t care tooooo much if they weren’t perfect.
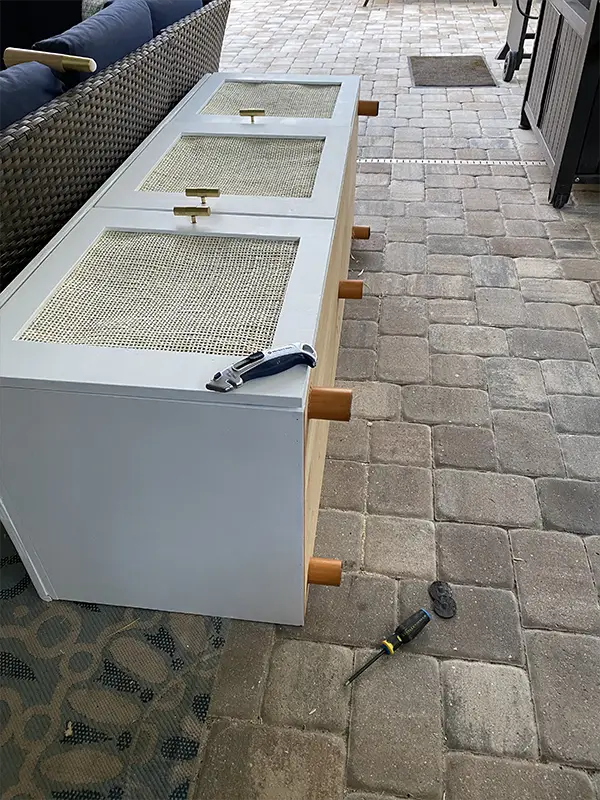
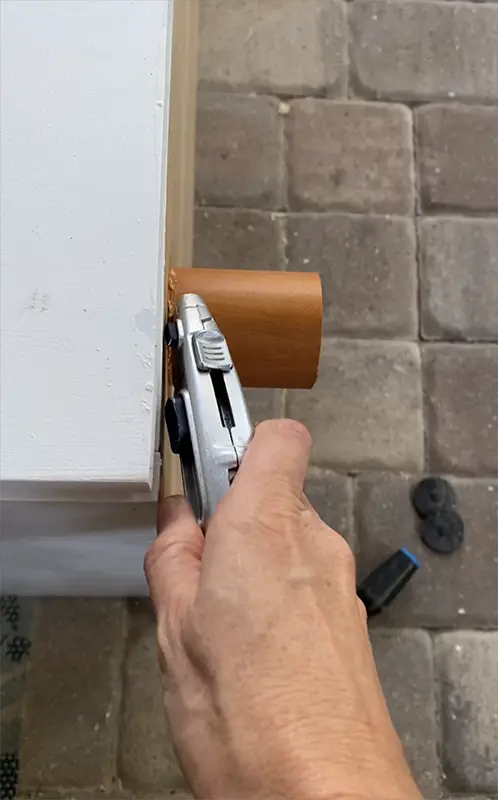
I wanted this piece to be taller. I plan to keep it to replace the console that currently sits under our TV. Amazon to the rescue when I found these fun 8″ table legs that were perfect and delivered SAME DAY. How cool is that?


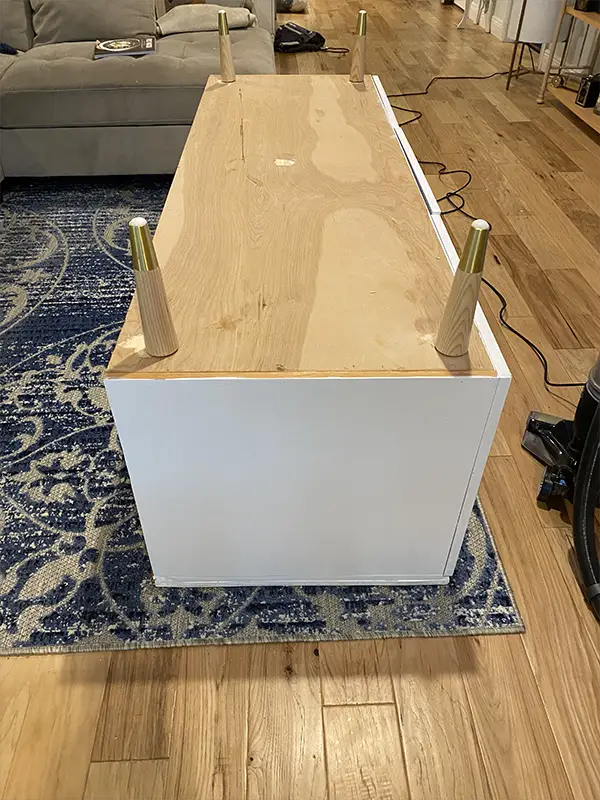

Step 6, All the Final Details…
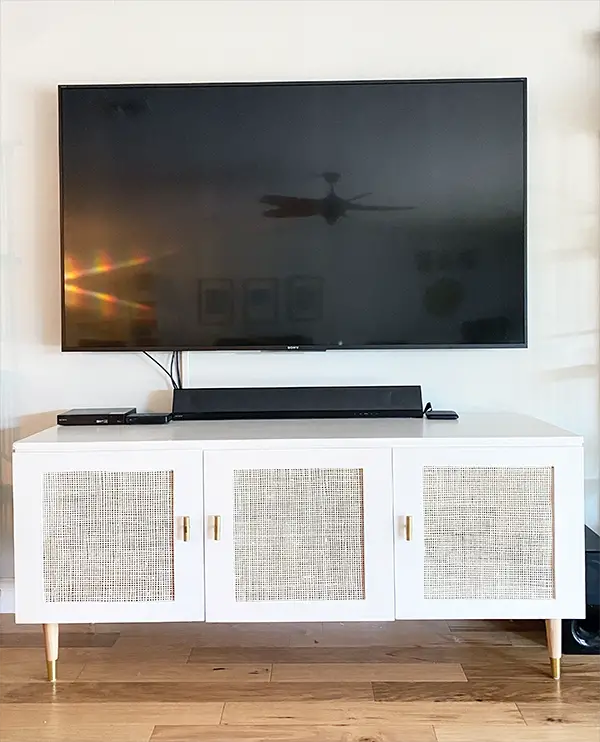
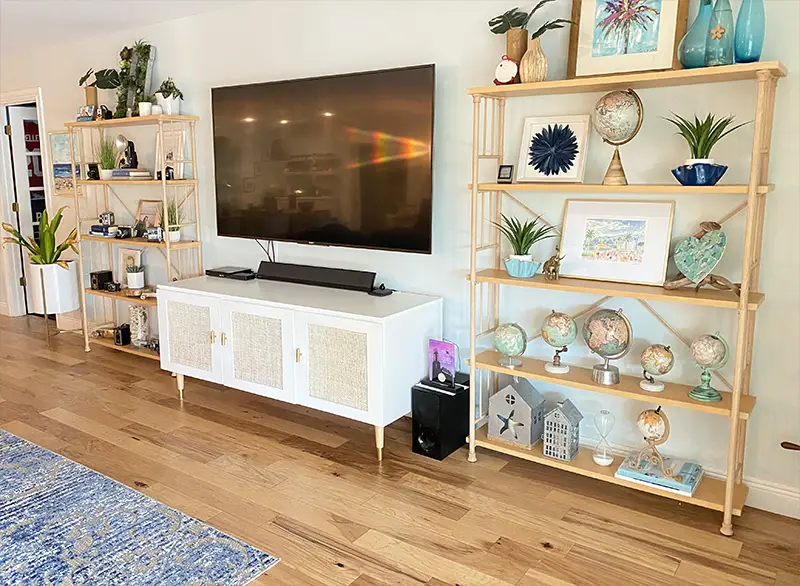
Last details….I added new door handles in gold and my husband helped me straighten out the doors as best as we could. AND, that was that.
PS – I still need to build some shelves inside so I can hide all the equipment you see on top.
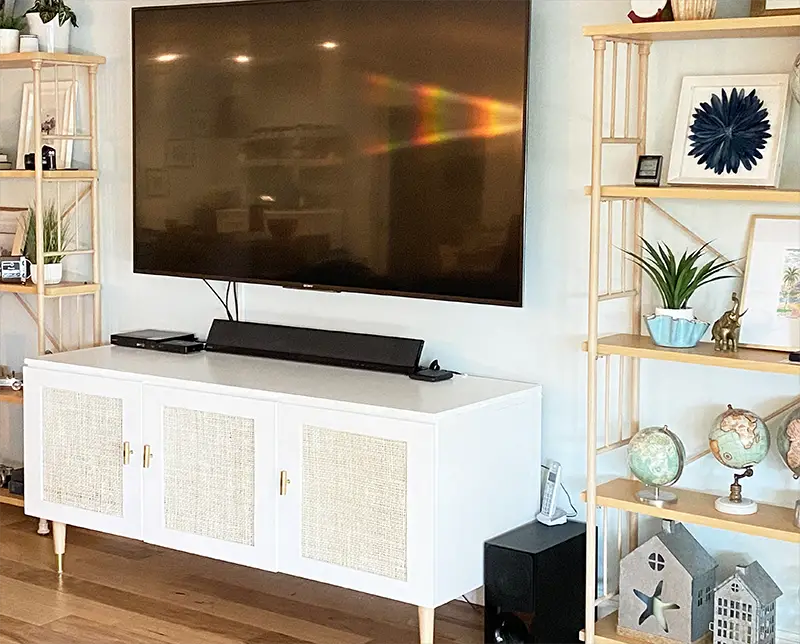
Here she is in all her glory. Do you think she has a Serena and Lily vibe?
One last Before and After…
Check out my You tube Short below…
PIN FOR LATER…

4 Comments
Had one like it, in the late 1950’s except for the handles
Oh funny. I think this one was hand made. Y the owner who was giving it away.
looks great…wonderful job
Thank you so much!