
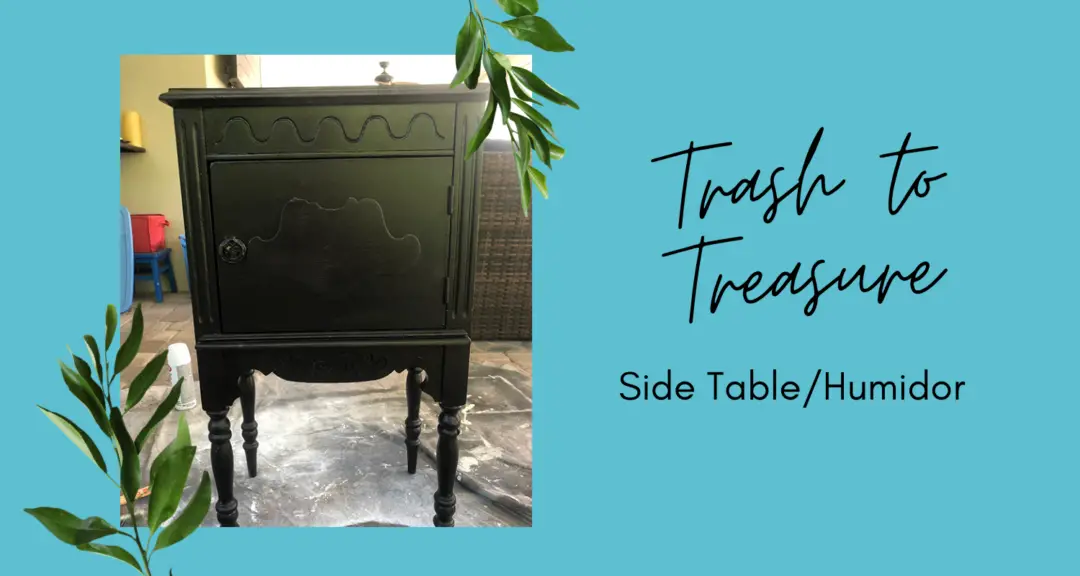
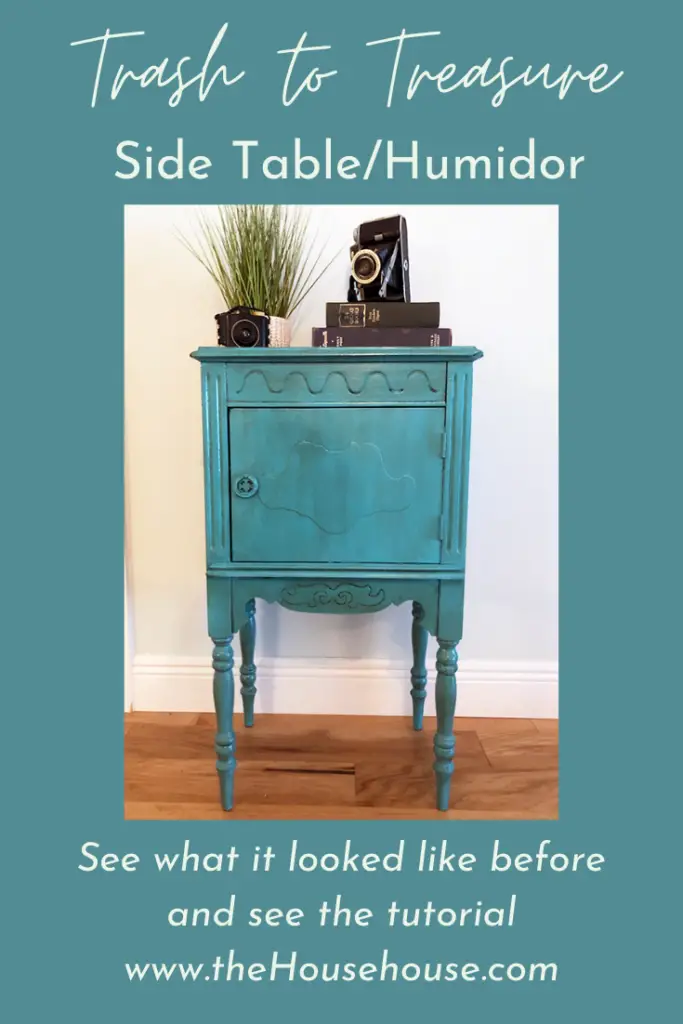
Trash to Treasure – Side Table/Humidor
There I go again, picking things out of people’s trash piles. I can’t help myself. Well, I have to admit, I usually spot something on the side of the road and then send my husband to get whatever it is. OR, a lot of times he finds things when he is out and about and brings things home for me. We make a good team. Anyway, a neighbor was getting rid of this cute little side table (as well as a few other fun things that we also took) so he went and grabbed them for me. You can see all my Trash to Treasure projects HERE.
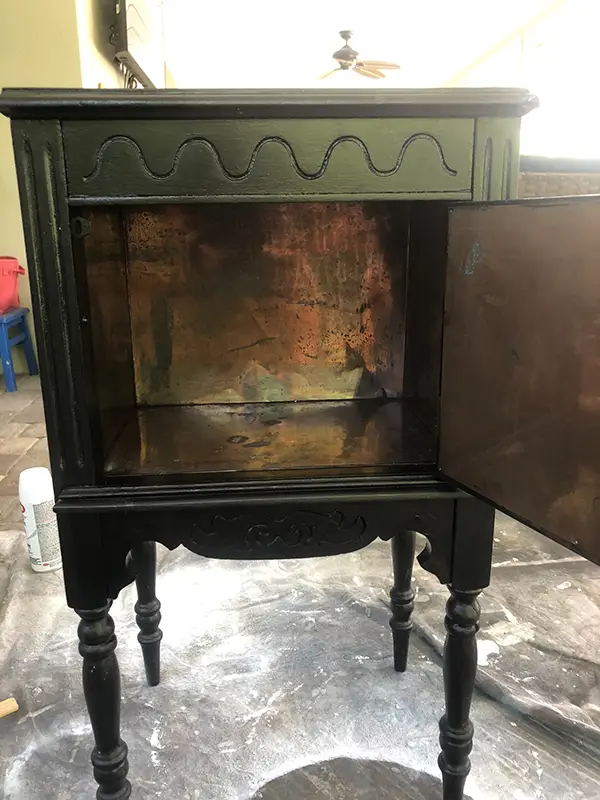
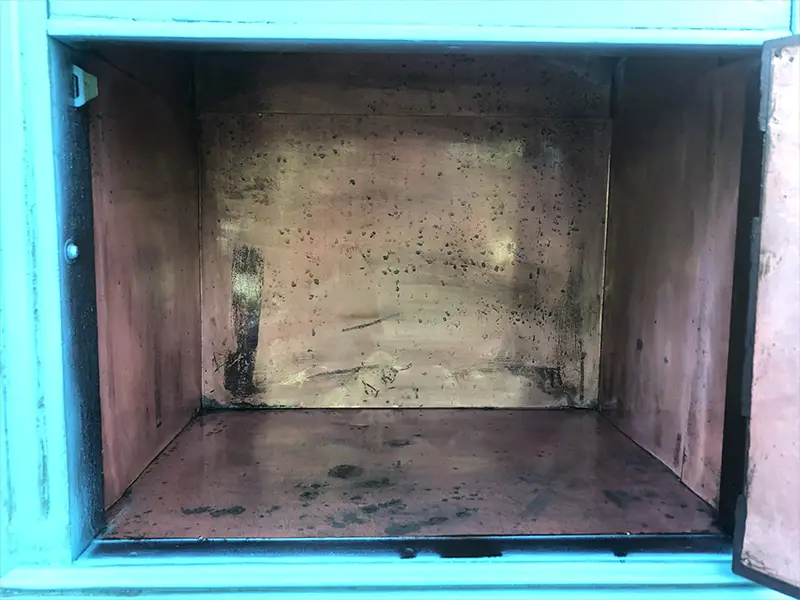
I noticed that this little table had a copper lining. I had never seen a table like that so I googled it and it turns out, it is a humidor! Cool! Obviously it doesn’t NEED to be used as a humidor, but apparently copper is good for cigar storage because it retains humidity quite effectively.
As you can see the table was pretty nice already, but I decided to kick it up a notch and give it something a little different. Here is what I did to transform this trash to treasure – side table/humidor…

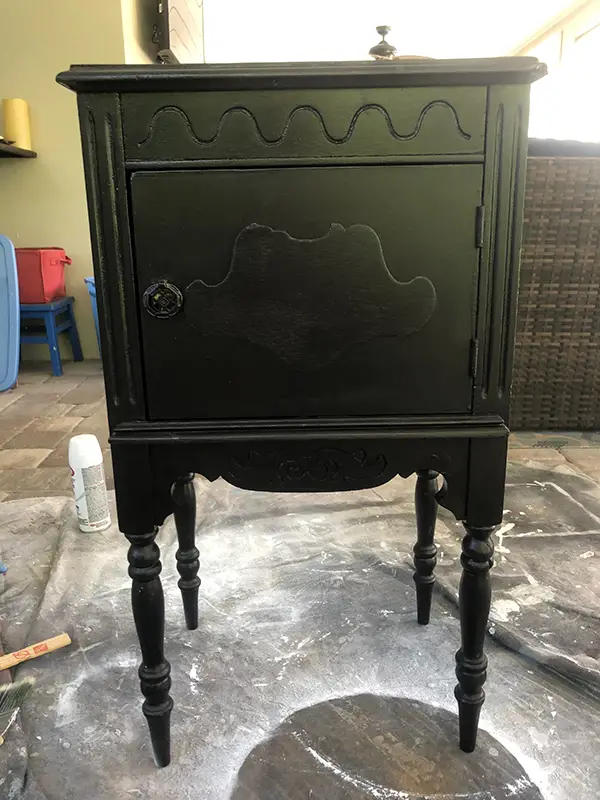
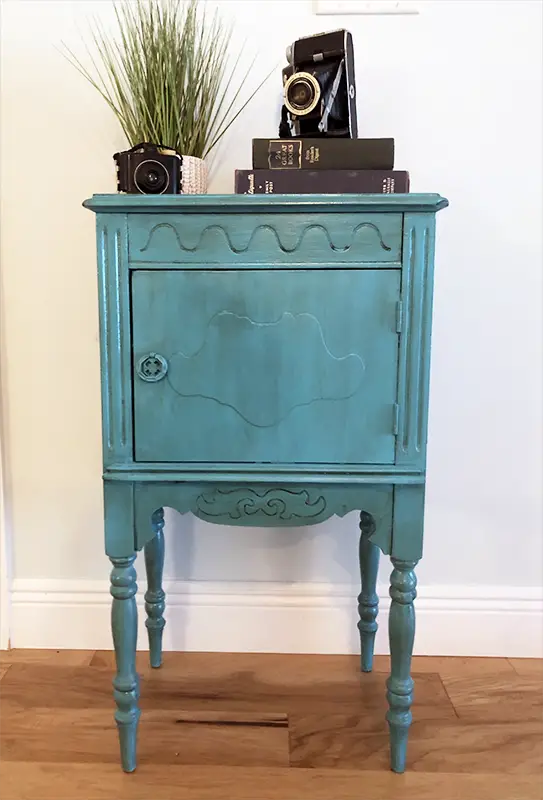
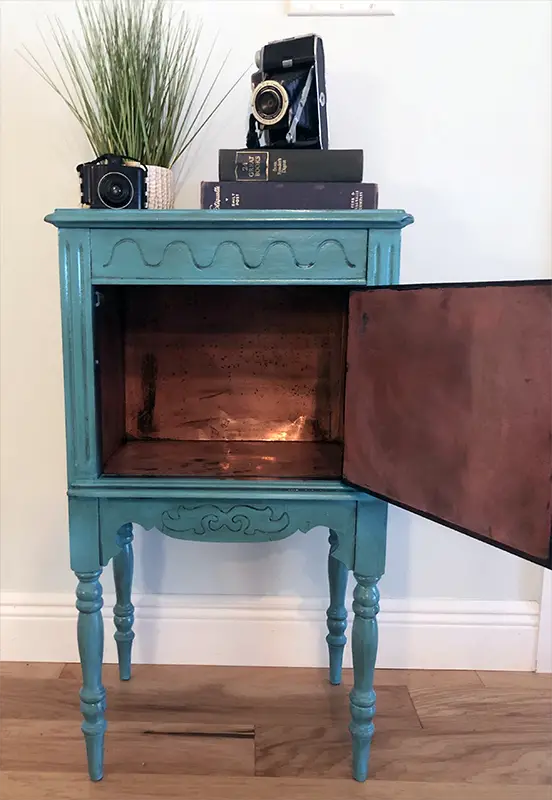
Table Before Table Before – Inside
This post contains some affiliate links for your convenience which means if you make a purchase after clicking a link I will earn a small commission which helps keep my blog up and running but it won’t cost you a penny more!
Materials Used for this Project… |
|---|
| Rust-Oleum Spray Paint in Seaside Krylon Chalk Finish Antiquing Wax in Dark Vintage Chalky Paint and Wax Natural Paint Brush Minwax Water Based Polyurthane |
Step 1 Trash to Treasure Side Table – Paint
I wanted to use a bright fun color for this piece. I had some left over Rust-Oleum Spray Paint in the color Seaside in my garage so thought I’d try painting a little spot of the table to see if I liked it. I did like it! Very much! So I ended up painting the whole table with it. This Rust-Oleum paint is amazing. It has a built in primer so you really only need about 1 coat of this stuff. It literally only took me about 5 minutes to paint this whole table! Below is the table with one coat. You can see some spots need filling in, but the coverage with only one coat is impressive!
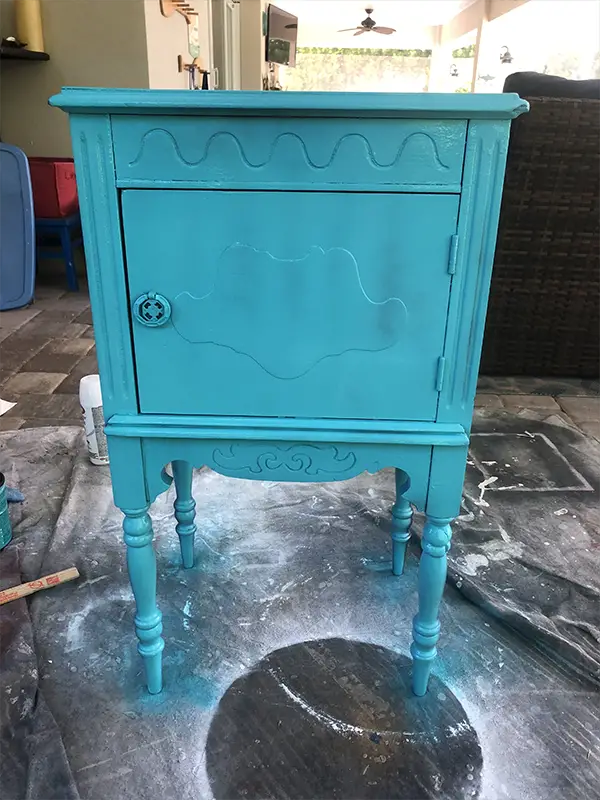
Step 2 Trash to Treasure Side Table– Add the Wax…
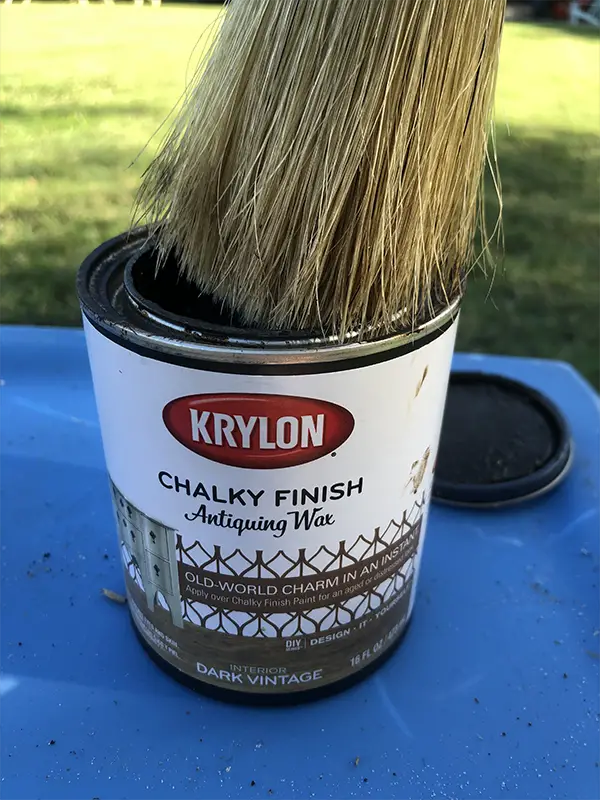
Maybe you are thinking, ok, um, ya that is a little too bright for my taste. Believe me, I’m with ya. I do love this color, but it IS a little bright. I used some Krylon Chalk Finish Antiquing Wax in Dark Vintage to tone down the piece. Using this brush I purchased, I dipped it into the wax and used just a tiny bit at a time. I used this same technique a few weeks ago when I re-finished this tropical Tommy Bahama style card table and chairs.
-
Antiquing Wax
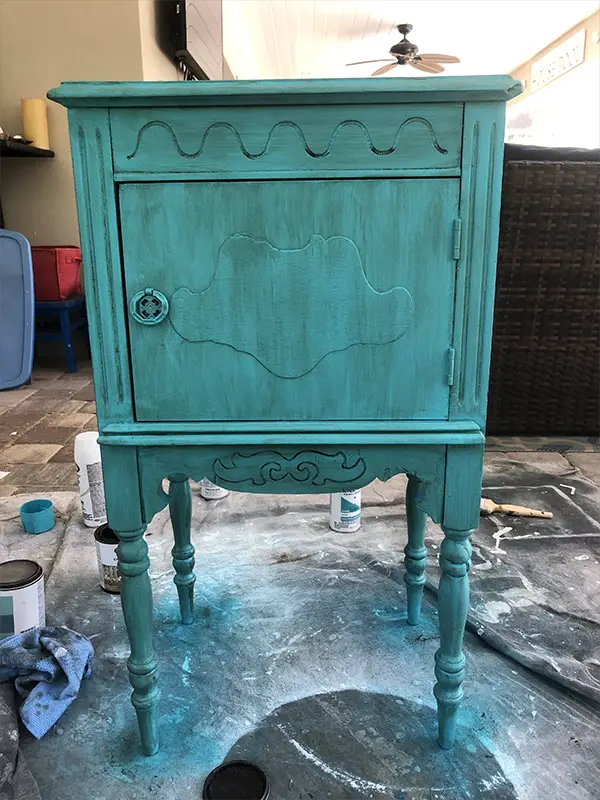
Here it is after applying the wax.
-
Table after applying the wax -
Top of the Table after applying the wax
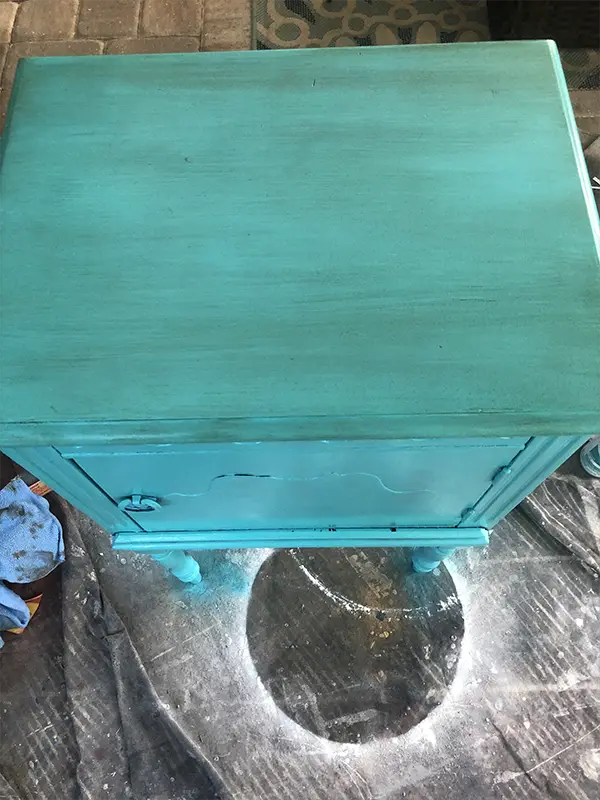
You can always go back and apply more spray paint to any pieces that you may have added to much wax to. It is also very easy to wipe any excess wax off after you apply it and before it dries.
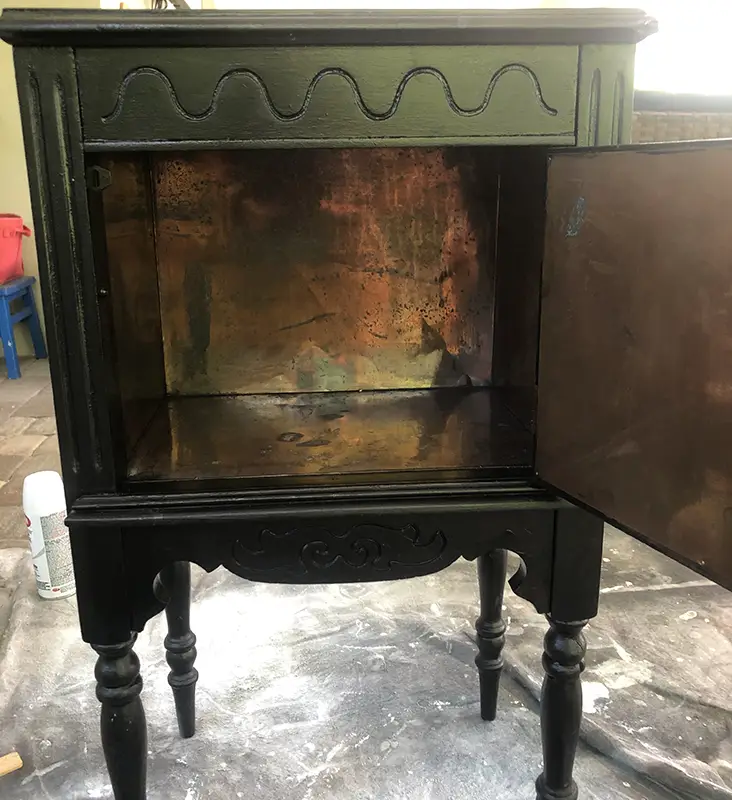
Step 3 – Clean up the Copper Inside…
I used this Weiman’s Copper and Metal cleaner that we already had on hand. I used poured some right onto the copper and used a microfiber cloth to rub it in and clean it all up. It isn’t perfect, but looks a LOT better.
-

Copper – Before -

Copper – After
Step 4 – Polycrylic…
The last step in any of my furniture flips is to always put at least 2-3 coats of MinWax Polycrylic protective finish on the entire piece. This is supposed to prevent any chipping.
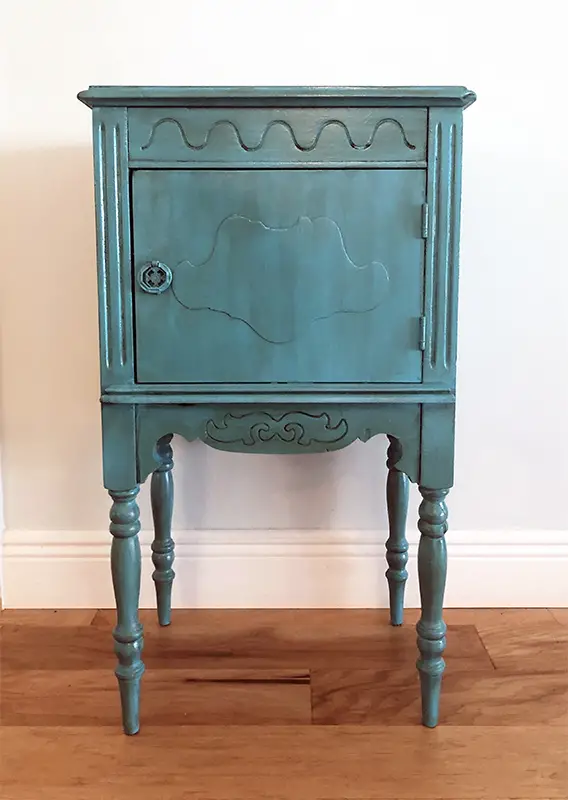
Here is the finished product. What do you think? Cute, right? I just listed this on Facebook Marketplace. I hope it sells.
PIN FOR LATER…
2 Comments
Are you using the polycrylic over the painted and waxed finish? I did not know you could put the polycrylic over wax?
I did apply polycrylic right over the wax and it seemed fine. 🙂