

Thrift Store Challenge – June 2019, Coffee Table Revamp
It is time for another Thrift Store Challenge! I have been participating in these monthly Thrift Store Challenges with a group of very creative bloggers for the last few months. It is so much fun. You can see my past projects here. This month the rules for the challenge have changed a bit. We could purchase something from a garage sale or thrift shop per usual, OR revamp/upcycle a piece(s) we already owned that no longer worked in our home. Since I didn’t have a whole lot of time to go Thrift Store shopping this month, I chose to revamp this old beat up coffee table that we already had. I’d been wanting to revamp this piece for so long and now was the perfect excuse.
Please check out all the other participants in the Thrift Store Challenge at the bottom of this post.
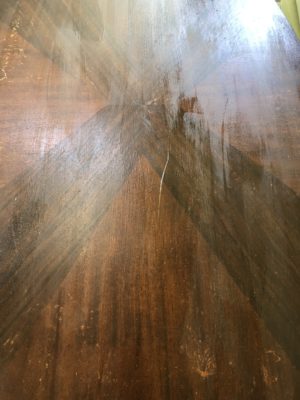
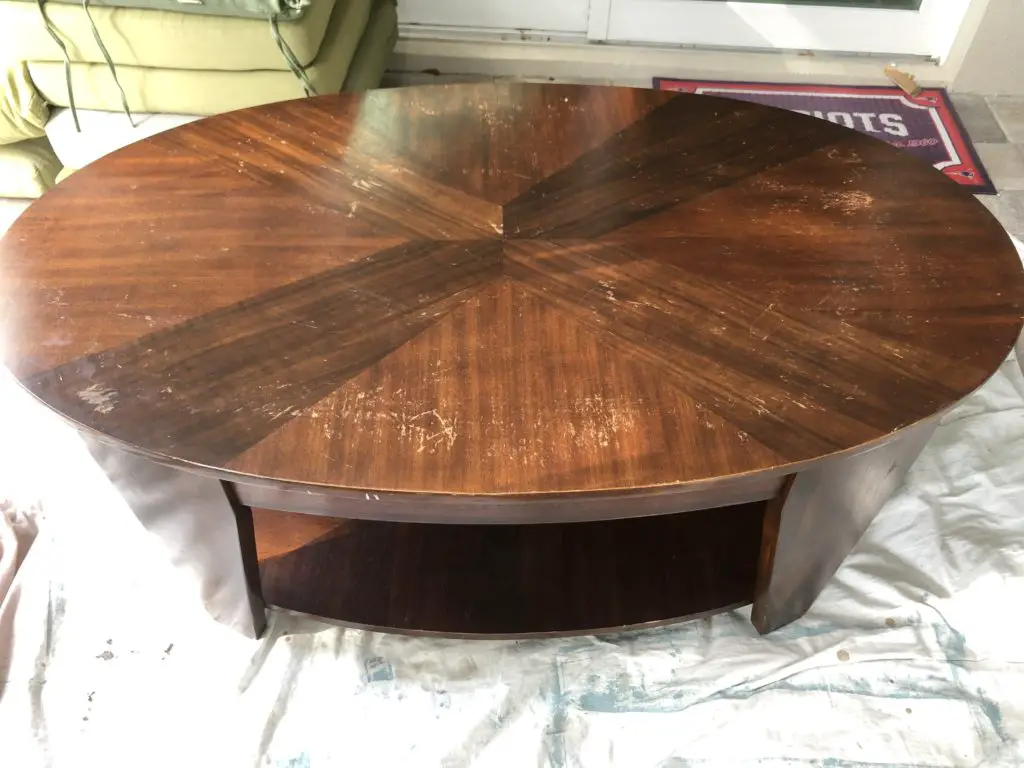
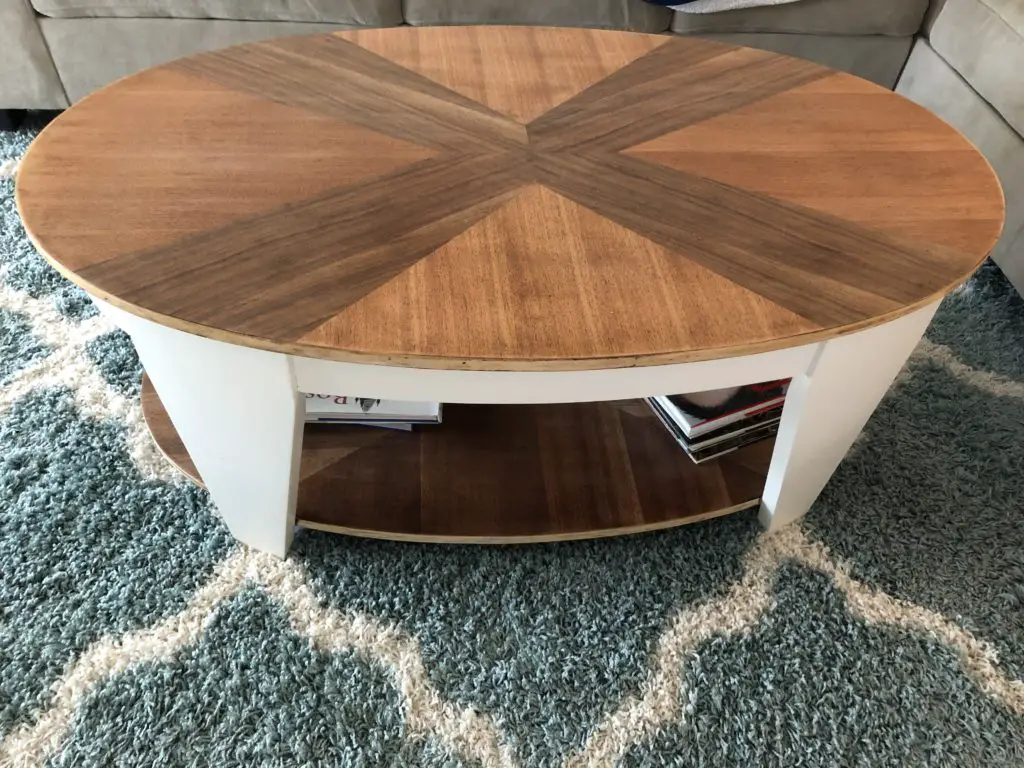
Here is the table. As you can see it had seen better days. This table lived in our den but I planned to move it to our living area once it was done.


Here are the Steps I took to Revamp this Sucker!
This post contains some affiliate links for your convenience (which means if you make a purchase after clicking a link I will earn a small commission which helps keep my blog up and running but it won’t cost you a penny more)!
Materials Used for this Project…paint stripper (I have heard this paint stripper is good and has no harsh fumes.) |
Step 1: Stripping the paint…
The first thing you need to do when refinishing a piece of furniture is strip off as much of the old paint/stain as possible using a paint stripper. The less paint on a piece, the easier it is to sand. I used Klean Strip because I had some in the garage from previous projects, but readers have suggested this Citristrip Product which is suppose to be less harsh smelling and a little safer to use. Anyway, to use any paint stripper you need to apply a thick coat of it with a paint brush, wait a few minutes, then scrape it off. Sometimes you need to repeat this step several times. Please discard the paint into a tin can and please be sure you wear safety googles and gloves.
I was working outside by my pool and it was extremely hot and humid and the stripper was drying way too quickly. Therefore, I ended up stripping as much stain off as I could and then moving on to Step 2. Normally I would try this step a few times but figured I could move on and then go back to using the stripper if sanding wasn’t going well.
Once you are done stripping the paint off, you need to apply some Paint Stripper After Wash. I used Klean-Strip After Wash. This product essentially removes any paint residue left from the stripping process. To use, follow the instructions on the back of the can and again make sure you wear gloves and safety googles. Basically the can will tell you to pour some onto a rag and wipe down the piece of furniture making sure to get rid of any residue.
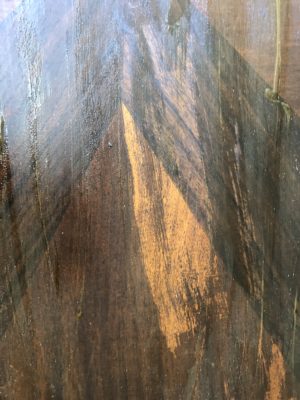
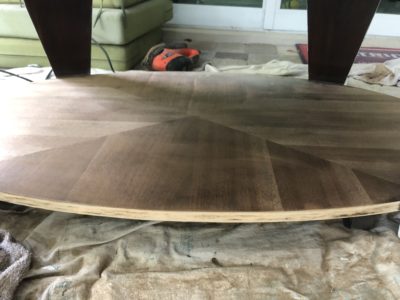
Step 2: Sanding…
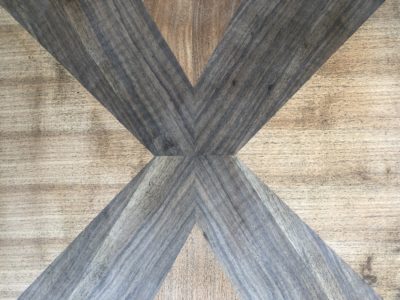
Since the paint stripper was drying to quickly I went ahead and started sanding. I could tell that it wouldn’t be to hard and wouldn’t take to long using my hand sander. (Again, please make sure you wear a mask and safety googles if you attempt a project like this. You don’t want dust going up your nose or in your eyes!!! Gross!) I only used one sand paper grit, 180, because that was all we had in the garage, but it worked like a charm. Look how cool it came out! I love the pattern on the top. This step only took about 20-30 minutes and what a difference!
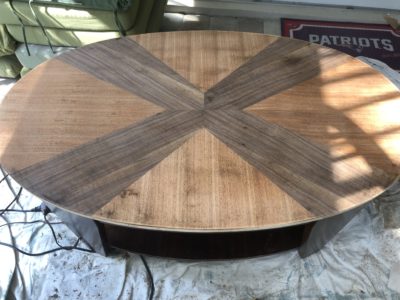
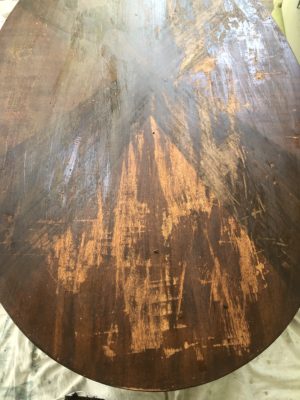
Step 3: To Stain or Not to Stain…
Once I was done sanding I had to decide if I wanted to stain this piece or not. I was really digging the color of the wood as is! Ultimately, I decided to skip right to step 4 and just polyurethane the already pretty wood. In the past I have chosen to stain the wood, like when I refinished this dining table. I didn’t think this piece needed any stain.
Step 4: Apply Polyurethane and Paint the Legs…
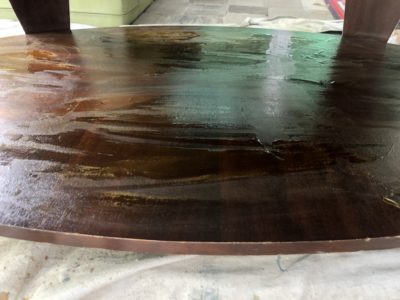
After doing many refinishing projects, I’ve discovered my favorite polyuerthane is this one by Minwax. It is water based so dries much quicker than oil based and it also doesn’t yellow. The back of the can said to apply at least 2 coats of poly, but I thought it needed at least 3. This is a coffee table after all, and I wanted to protect it from getting water damage, scratches, etc.
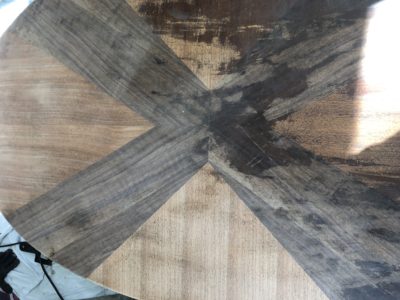
Originally I planned to paint the rest of the table white (including the lower shelf). However, once I started painting I realized I wanted to do the same treatment to the bottom shelf of the table as I did to the top, so I started with Step 1 again. I could tell that the pattern on the bottom shelf would compliment the top.
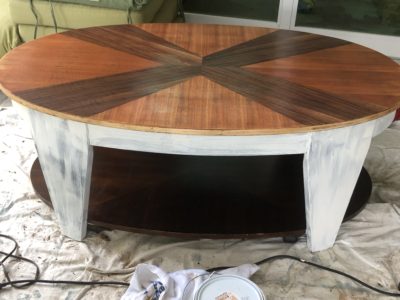
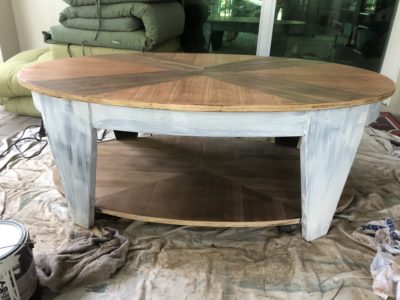
Once that was done I put 3 coats of poly on both the top and bottom shelf of the table. I also painted the legs white and put 2 coats of poly on those too. (I know the edges of the table are not perfect, but I sort of like it that way.)

And thats it!
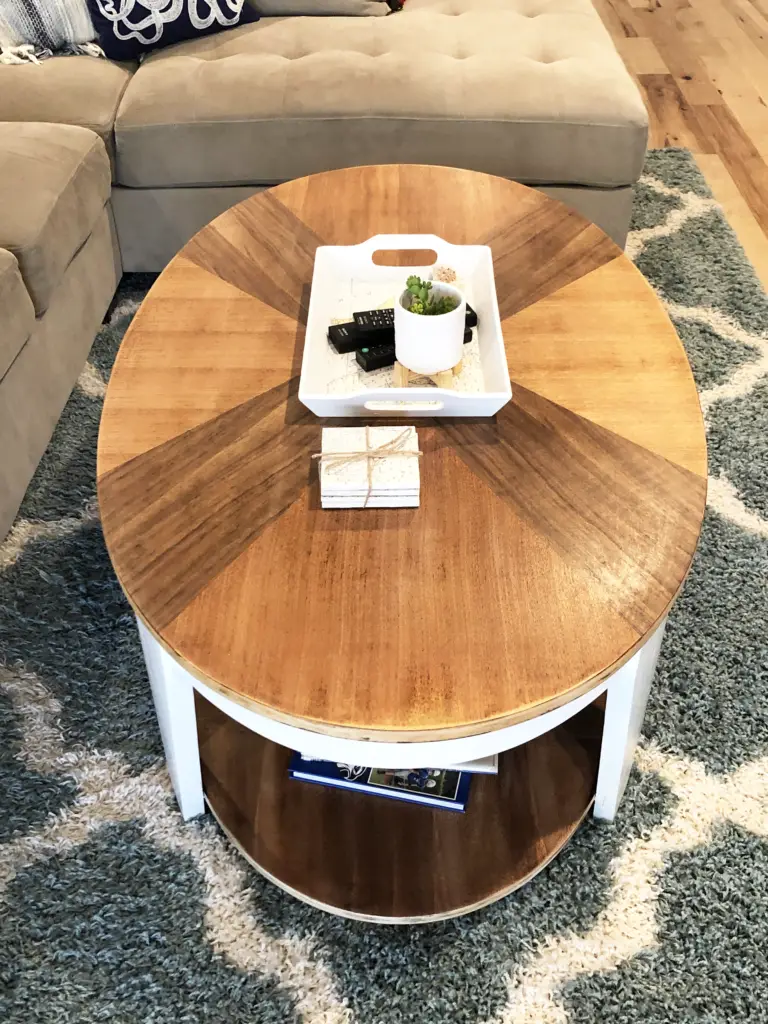
Once the piece was all done and dried, my husband and I brought it inside. Here is how it looks it my living room. I’m lovin’ it. What do you think?

AND ONE MORE BEFORE/AFTER…
Please check out the other Thrift Store Challenge Participants and their Projects below…
Terrie from Decorate and More with Tip

Lindsay from The Farmhouse Eclectic

Emily at Le Cultivateur

Cindy from Cloches & Lavender
Teresa from Through a Vintage Door

Shae at Sweet Southern Grace


10 Comments
Wow what a great project. You really gave this table a new life.
Bravo.
Cindy
Thank you!
Jodi, I am so glad you left the top unpainted and stained it. From the view it goes great with your kitchen table. Love your makeover!
Thank you! Yes, they match pretty well. I redid that dining table about 3 years ago. 🙂
Wow now that is one transformation!! I love the way it turned out and love the stain!! You sure gave this table a brand new life!!
Teresa
Thank you, Teresa! I’m so glad you like it.
I love how this table turned out! It looks perfect in your home! The detail on the top of the table is incredible!!! So cute!!!!
-Emily
Thank you so much! It looks so much better, and I agree, the pattern is pretty cool!
I love what you did to your table! It came out amazing!!
Thank you so much!