
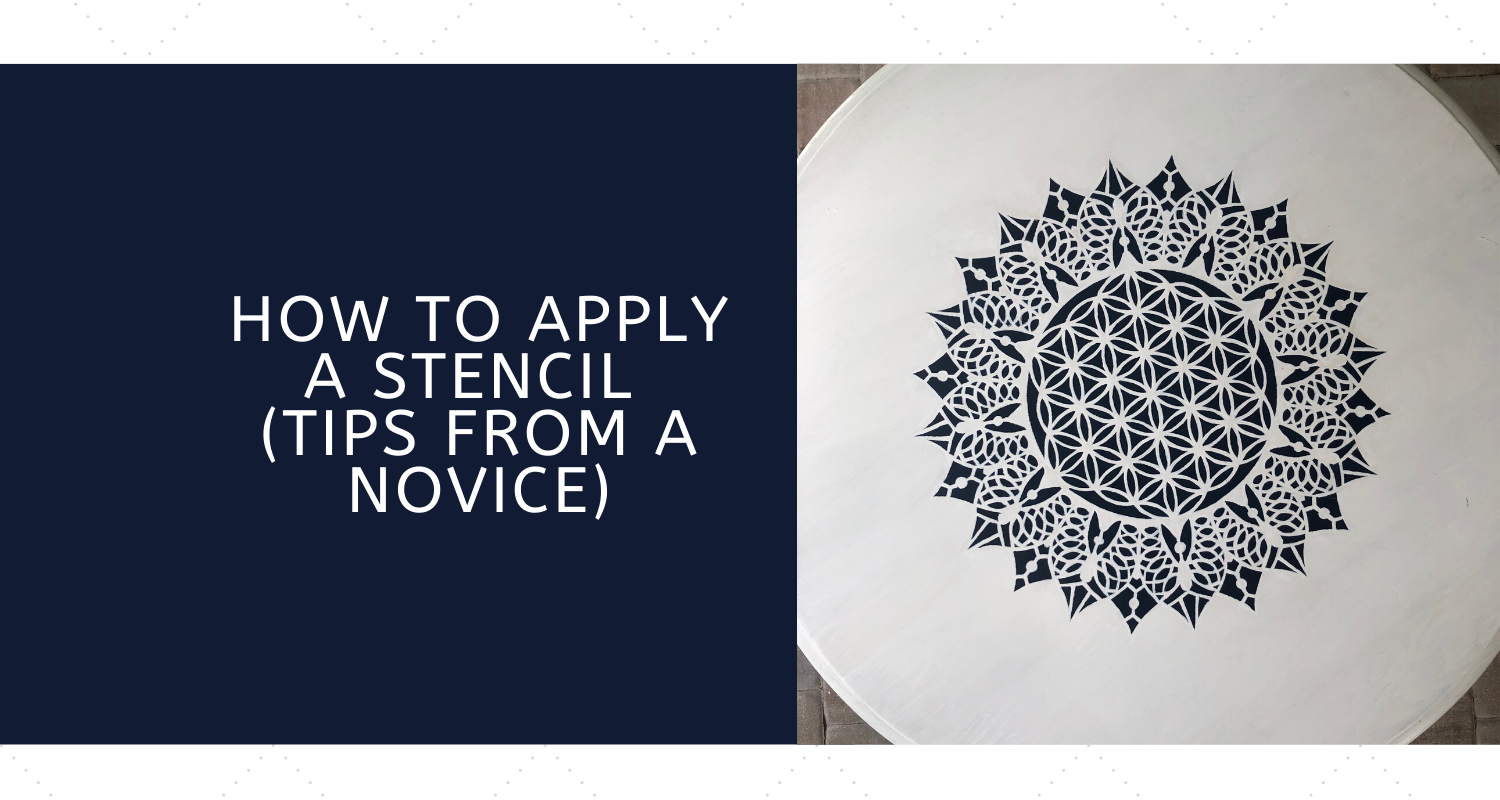
How to Apply a Stencil (Tips from a Novice)
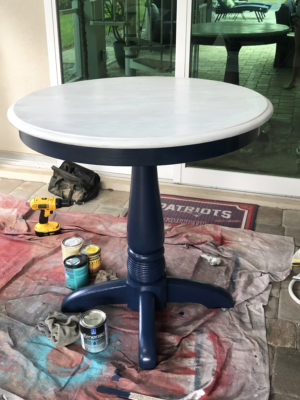
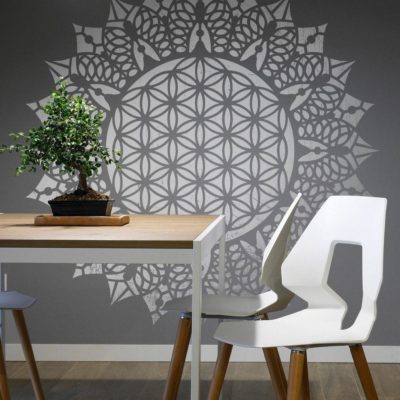
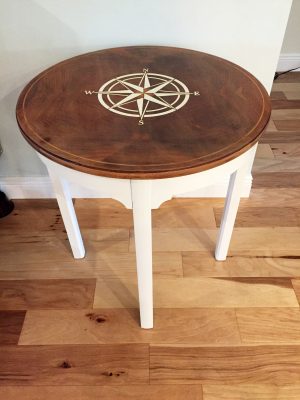
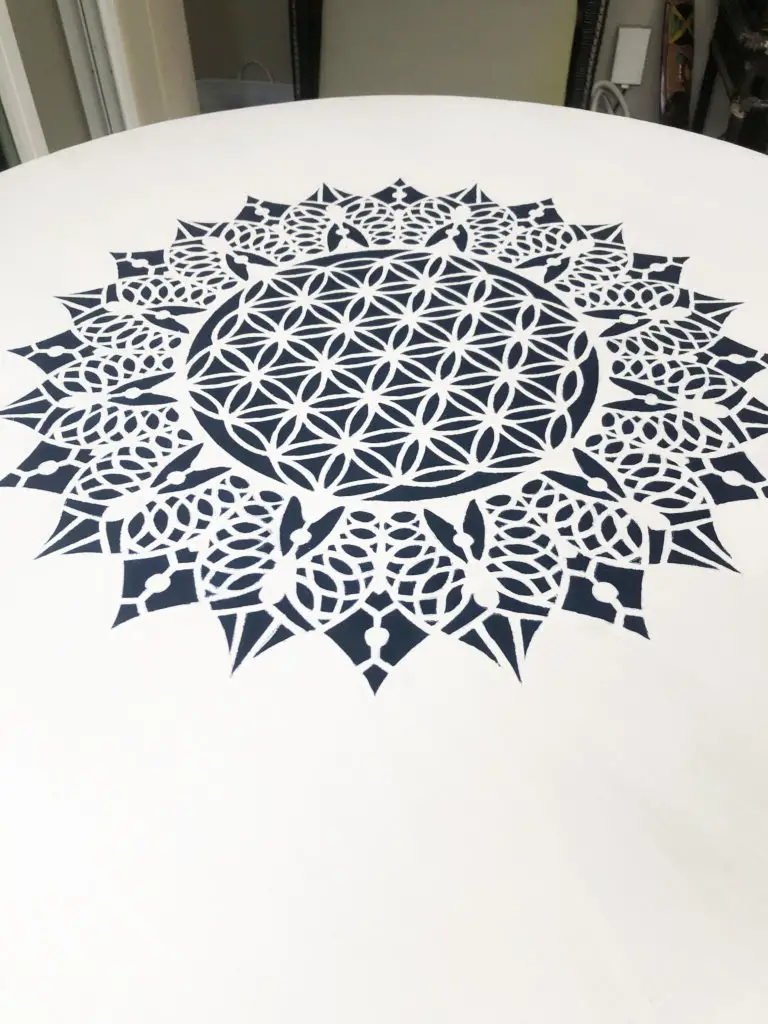
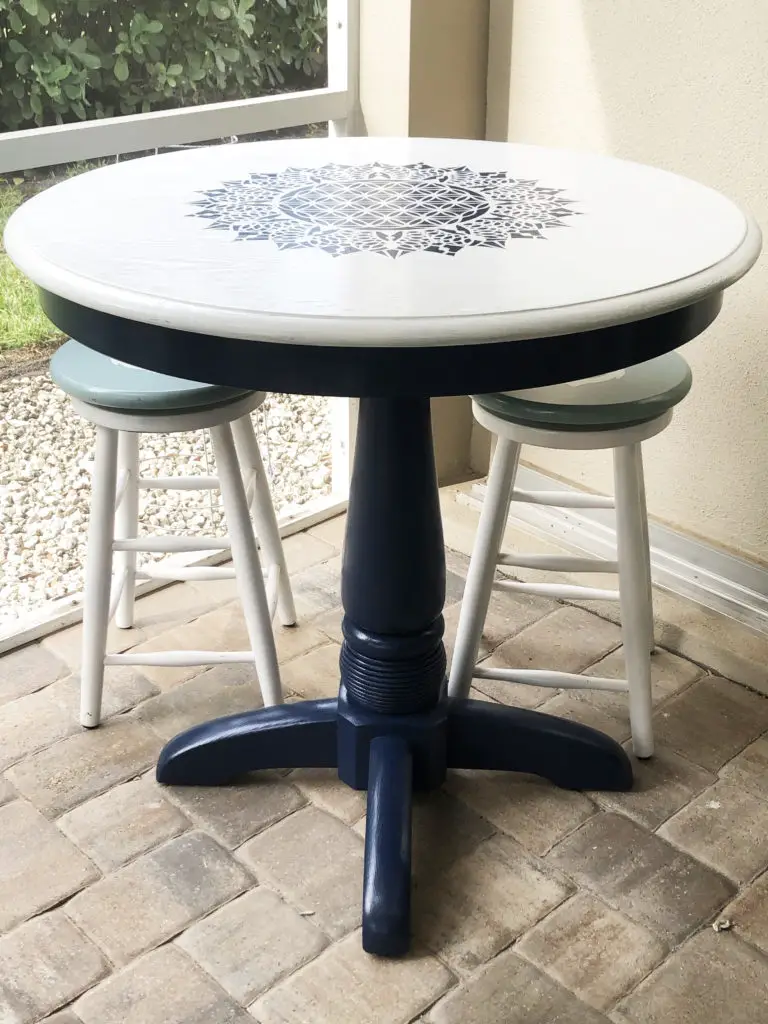
Last week I revealed my thrift store challenge pub table make over. It looks nice the way it is, but I thought I would kick it up a notch and add a stencil to the top. Stencilslab.com agreed to work with me on this project and sent me this amazing Mandala stencil! Isn’t it gorgeous? My table is 36 inches so I ordered the 20×20 inch size. Most of their stencils come as large as 88 inches! (They have an amazing and extensive selection of stencils! They can also work with you to create a custom stencil if you don’t see one that fits your needs). BONUS – You can get a 10% off discount by using code thehousehouse (excludes custom orders).
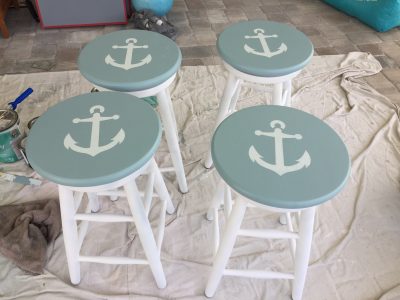
I don’t have a ton of experience with stencils, especially ones as intricate as this. However, I did apply stencils to these bar stools and this side table, but as mentioned they were not as intricate and large as the one I planned to apply to the table.
Sooooo, what to do when you are not sure what to do? Google of course. I researched a lot, and watched a few youtube videos on how to properly apply a stencil, before I attempted this project. All the experts had the same advice…
1. make sure your surface is clean and smooth
2. make sure you use the correct materials
3. don’t overload your brush or roller with to much paint, take your time
4. use a small amount of stencil adhesive to adhere the stencil to the surface leaving less gaps to prevent bleeding
5. and most said you will get some bleeding, it is just the nature of the beast
Here are the materials that I used…
This post contains some affiliate links for your convenience which means if you make a purchase after clicking a link I will earn a small commission which helps keep my blog up and running but it won’t cost you a penny more!
sherwin williams paint in the color Naval (same color I painted the legs)
paper plate

I followed most of the advice above (except for using some adhesive), and still got a fair amount of bleeding. I am sure it is because of the surface of the table being very porous. It is wood after all. Anyway, it wasn’t hard to make touch ups, but it was time consuming.
Here is what I did…
I used painters tap and carefully pressed the stencil down and smoothed it out as best I could as I was taping. Next, I put a small amount of paint on the paper plate and rolled the foam roller in it until it the foam was saturated. Then I began to paint slowly and tried not to press to hard. I waited at least 10 minutes between coats and made sure to use a small amount of paint each time.
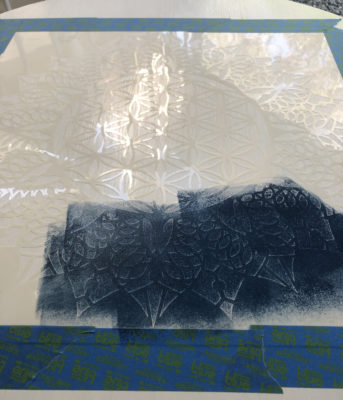
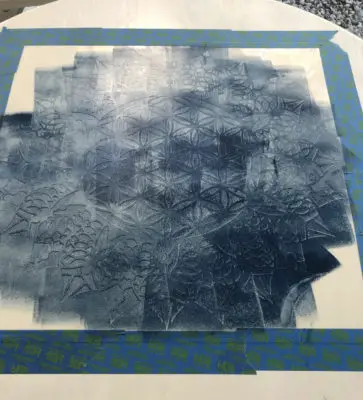
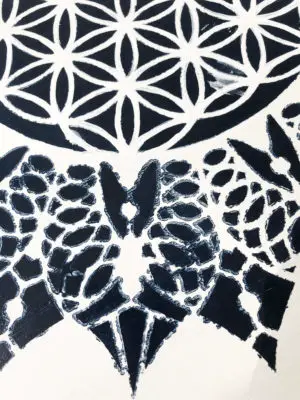
Here is how it looked when I took the stencil off. A good amount of bleeding in a few spots, but I knew I could fix that.
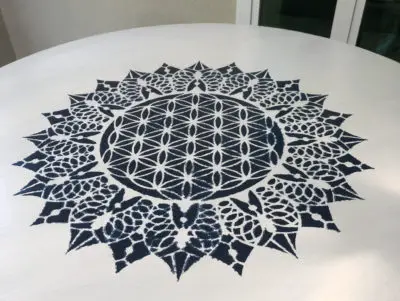
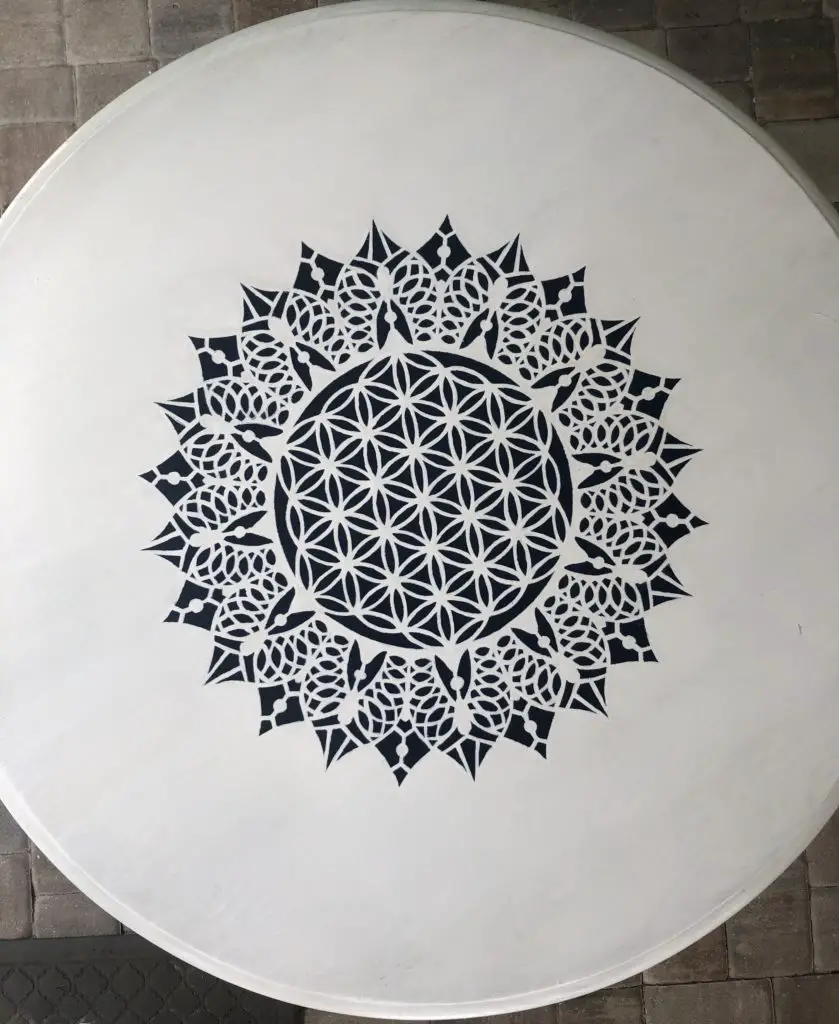
I used a small paint brush and the white pickling stain that I used on he top to begin with, t0 fix any mistakes. Admittedly this took a bit of time. Approximately two hours. But, I am a perfectionist!
So, here are my tips, after doing this for the first time…
TIP #1 from a Novice (that’s me, by the way) – Definitely follow the advice about not using to much paint. Use a paper plate and only about a tablespoon of paint at a time. It won’t seem like a lot but it will be enough. Don’t overload your brush/roller, and don’t press to hard.
TIP #2- use some stencil adhesive. I did not and got a fair amount of bleeding. Maybe I wouldn’t have if I had adhered the stencil to the surface better, allowing less gaps. I was afraid using adhesive would take the paint off the top when I took it off.
TIP #3 – take your time. I set a timer for 10 minutes in between each coat of paint. This helped keep me on track.
TIP #4 – once finished, peel the stencil off slowly.
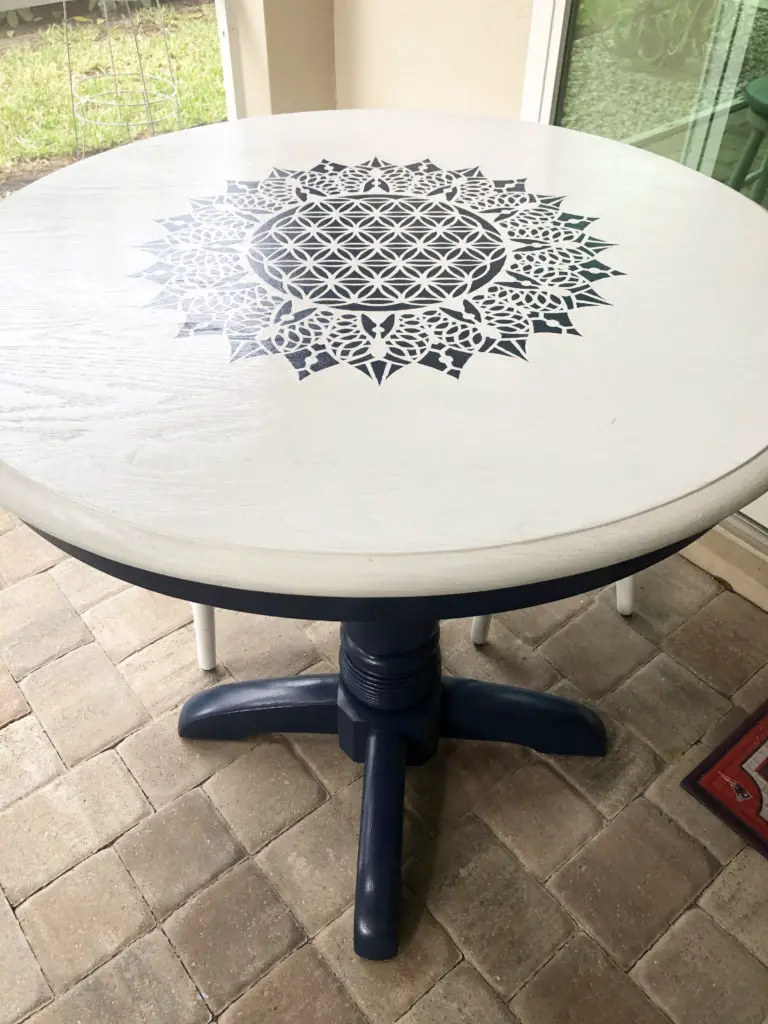
AND…..VIOLA! Here is the finished product. I am really loving it. (To seal it all, I used 3 coats of Minwax Polycrylic Satin Water-based Polyurethane.)


No Comments