
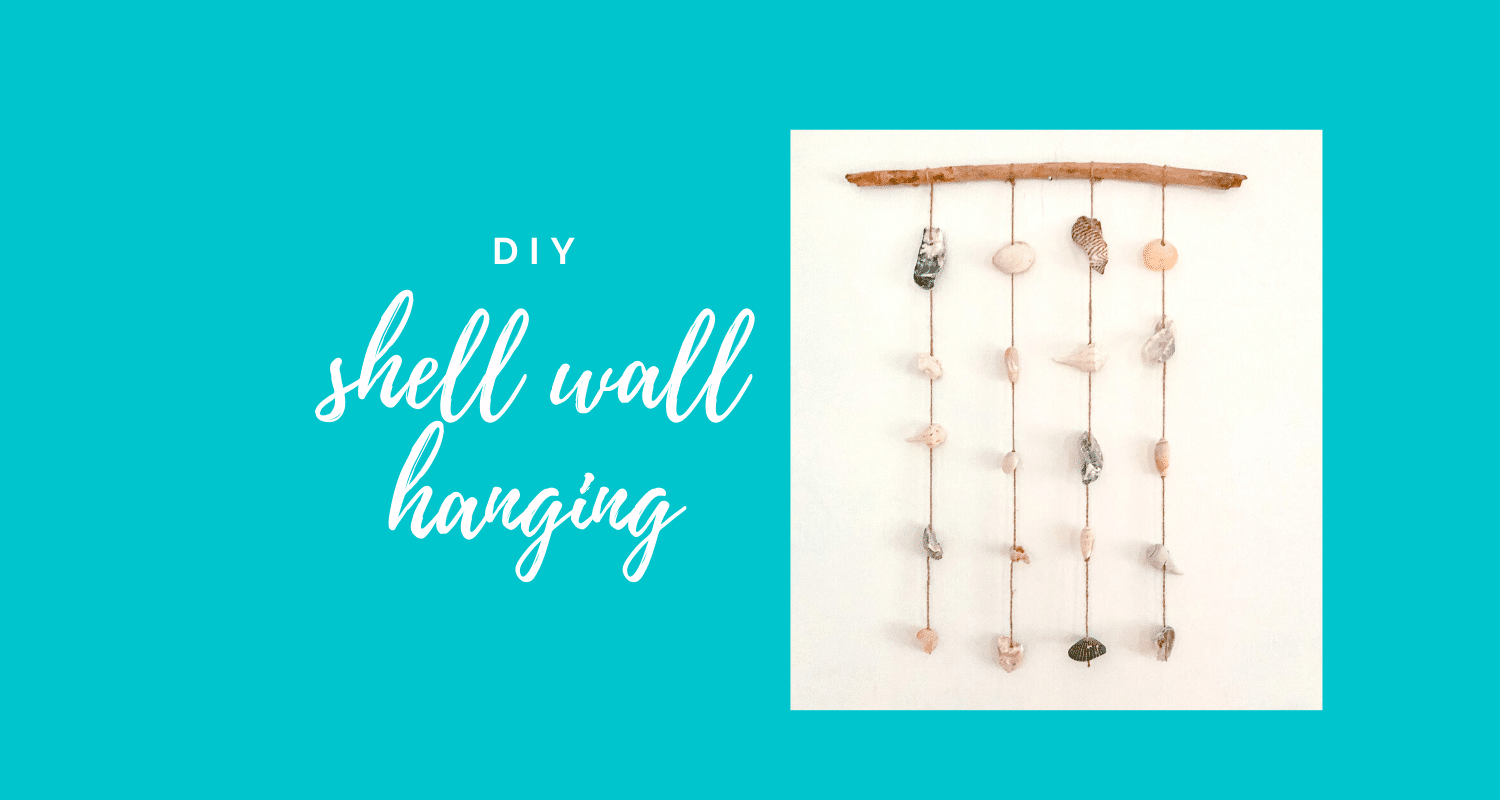
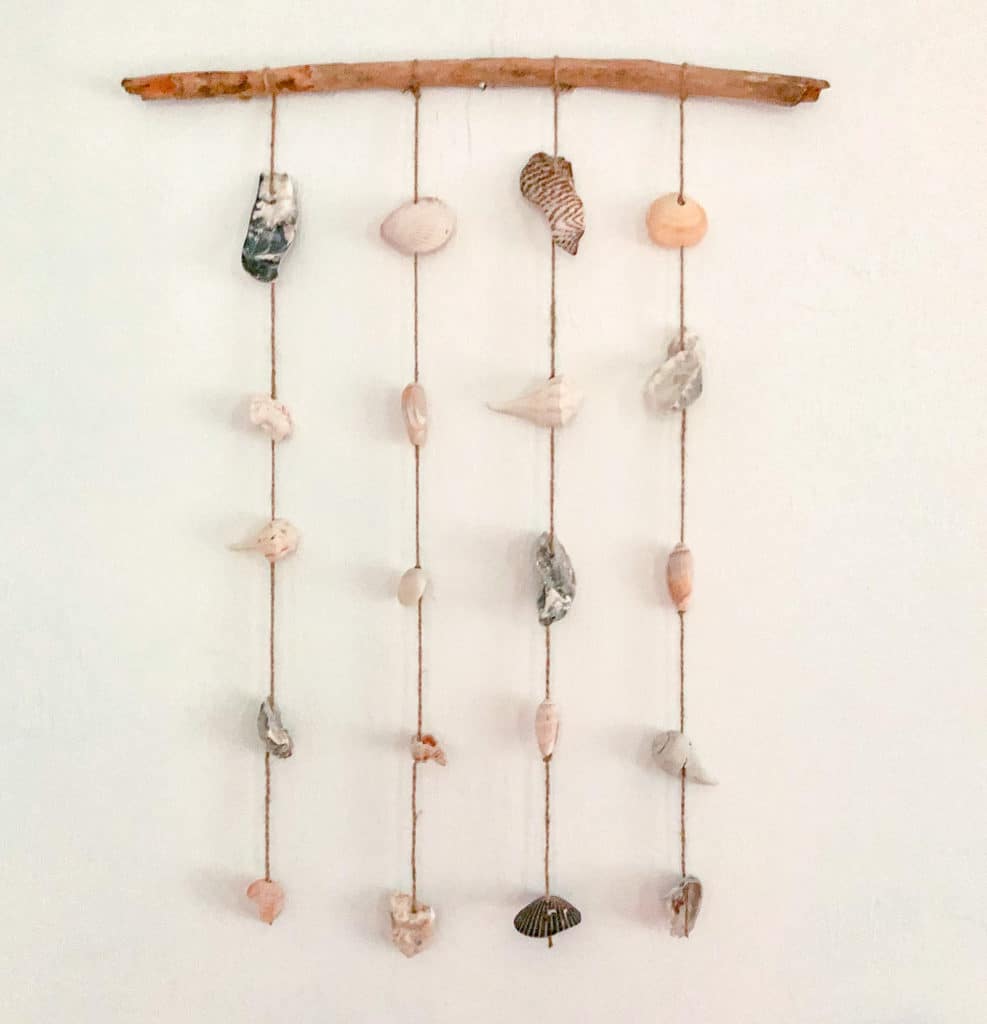
DIY Shell Wall Hanging
If you’ve been following me for a while, you may know that I have a slight shell obsession. Recently I opened an Etsy shop to sell my shell creations, so it may come as no surprise to know that I have A LOT of shells in my house. The last few times I have gone shell hunting, I have looked for shells that already had holes in them so I could make a shell wall hanging. (I know you can make holes using a small drill , but I wanted to find some that already had holes, and there are plenty to be found). So this weekend I pulled all those shells out and decided to finally make this fun DIY Shell Wall Hanging. Here is how…
You can see some of my other shell projects, here.
*This post contains some affiliate links for your convenience (which means if you make a purchase after clicking a link I will earn a small commission which helps keep my blog up and running but it won’t cost you a penny more)!
Materials Used – DIY Shell Wall Hanging…Shells |
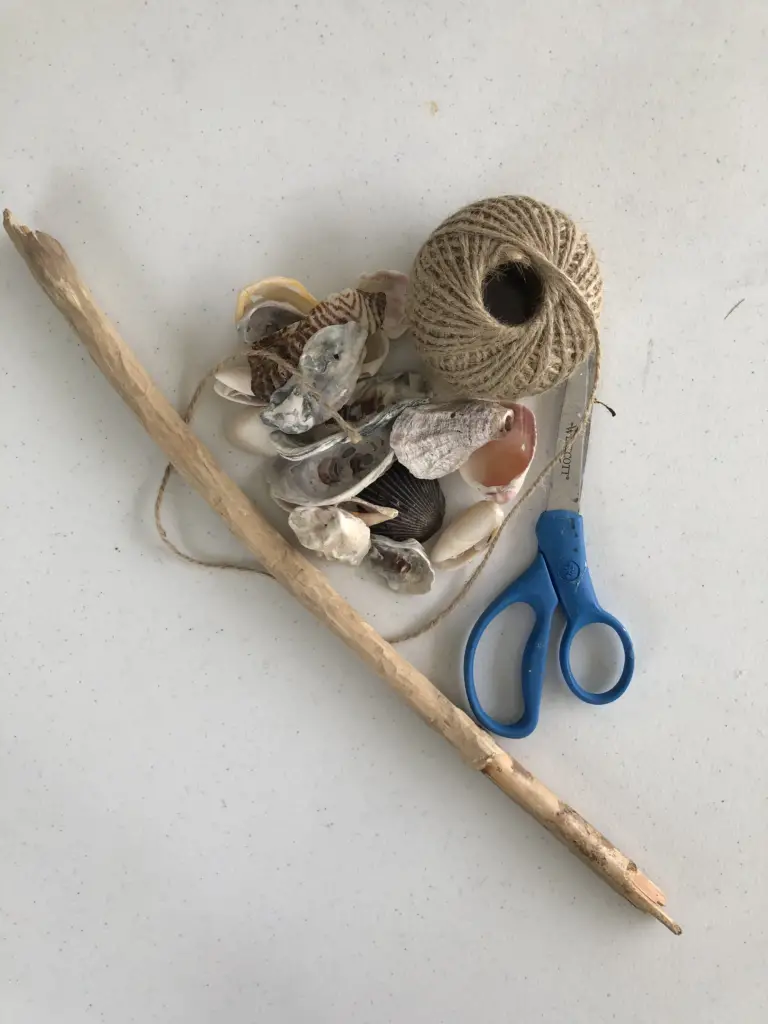
Step 1, Find Some Good Shells…
As stated above, I have a ton of shells in my home. We live near the beach and every time we go I collect some. My husband has even nicknamed me ‘Shelly’. Anyway, I went through a bunch from my collection and found the ones that already had holes in them.
Step 2, Find a good Piece of Driftwood…
I used a piece of driftwood to attach the twine and shells, but you could use a dowel, or any piece of nice wood or stick from your yard.
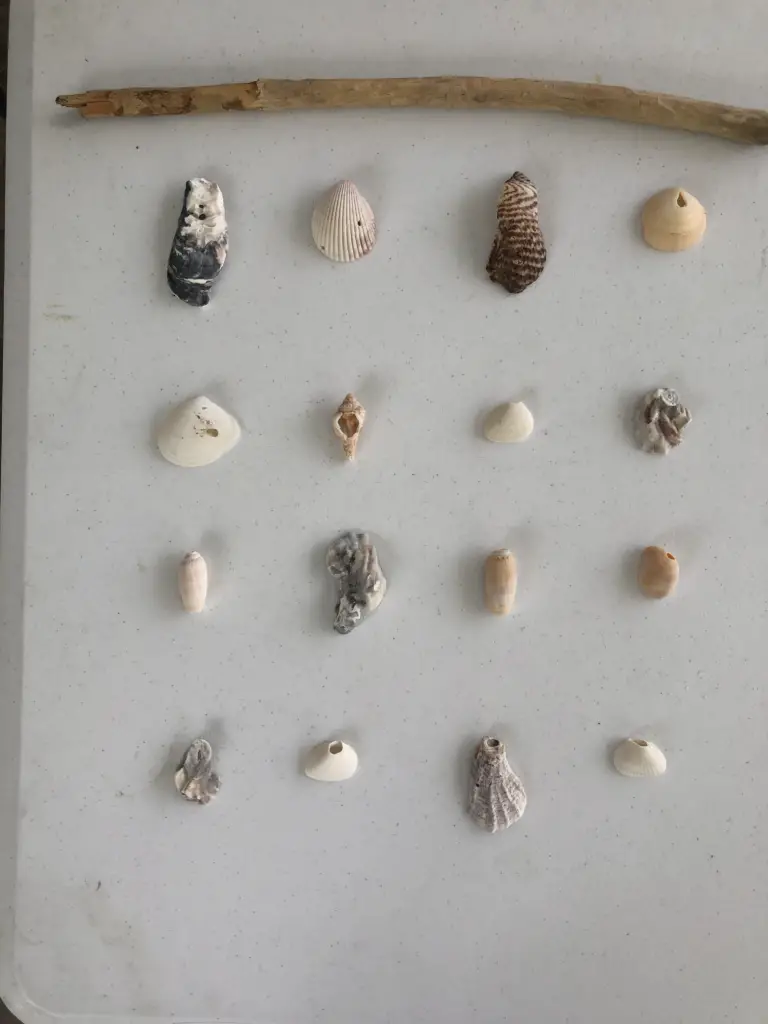
Step 3, Arrange Your Shells…
Arrange your shells in a pattern you like. I did end up moving some around a bit, but doing this gave me a good idea where to space them out.
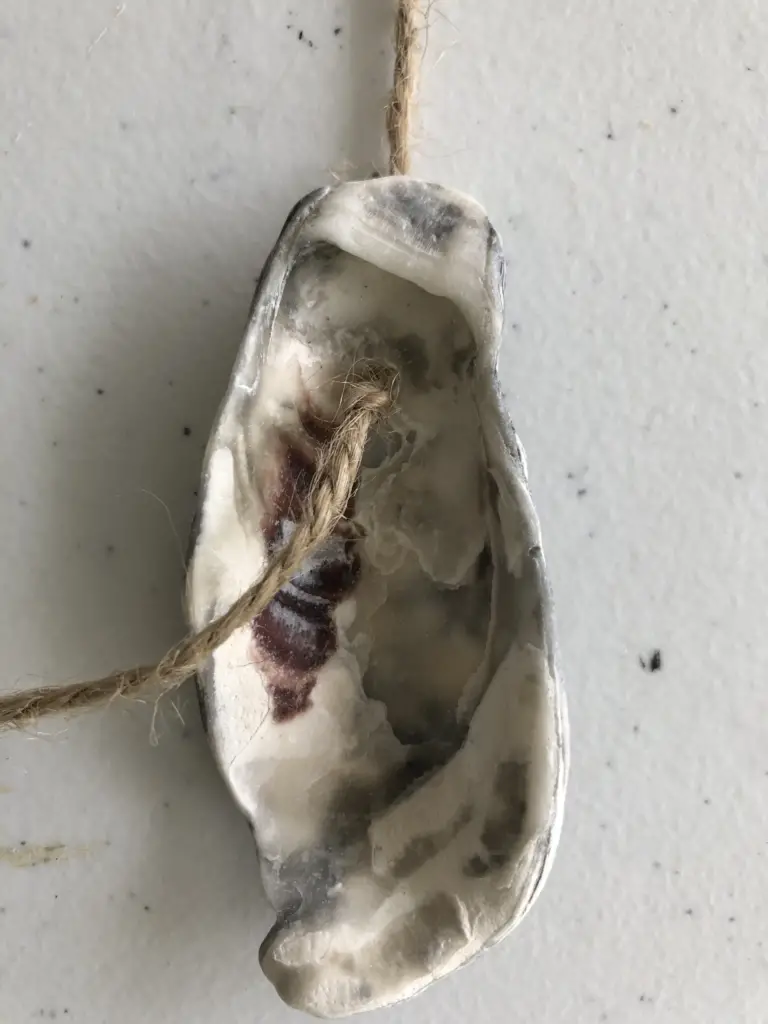
Step 4, Start Tying the Shells with the Twine…
First, I tied a piece of twine to the driftwood, then I put the twine through the hole in the shell. Then I flipped the shell over and tied a knot to hold the shell in place. I continued that process until I was happy with the results. I did end up moving some around a bit in this process.

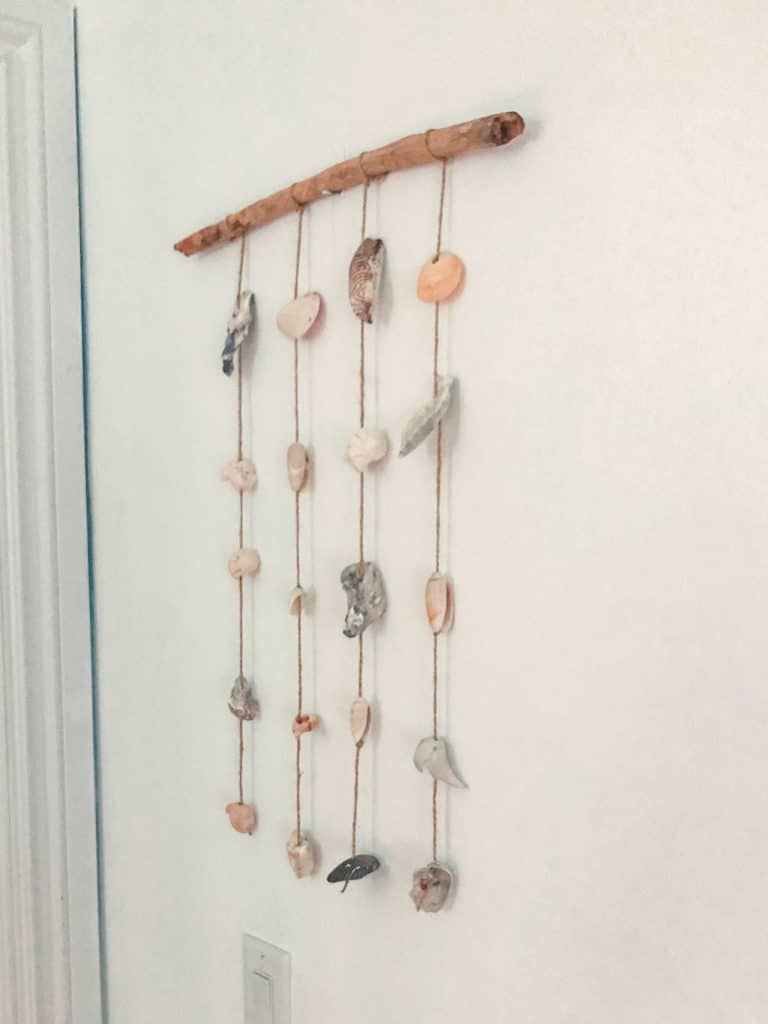
Lastly, I trimmed the string at the bottom and around the driftwood and hung it up! You could add some rope to the driftwood piece to hang it up, but I just rested it right on a nail and liked the way it looked.
PIN FOR LATER…

2 Comments
Jodi your creation is so pretty and spot on with a coastal theme. The tutorial is very clear to follow. Thanks for sharing! Have a great weekend.
Thank you so much, Terrie! I hope you have a great weekend too.